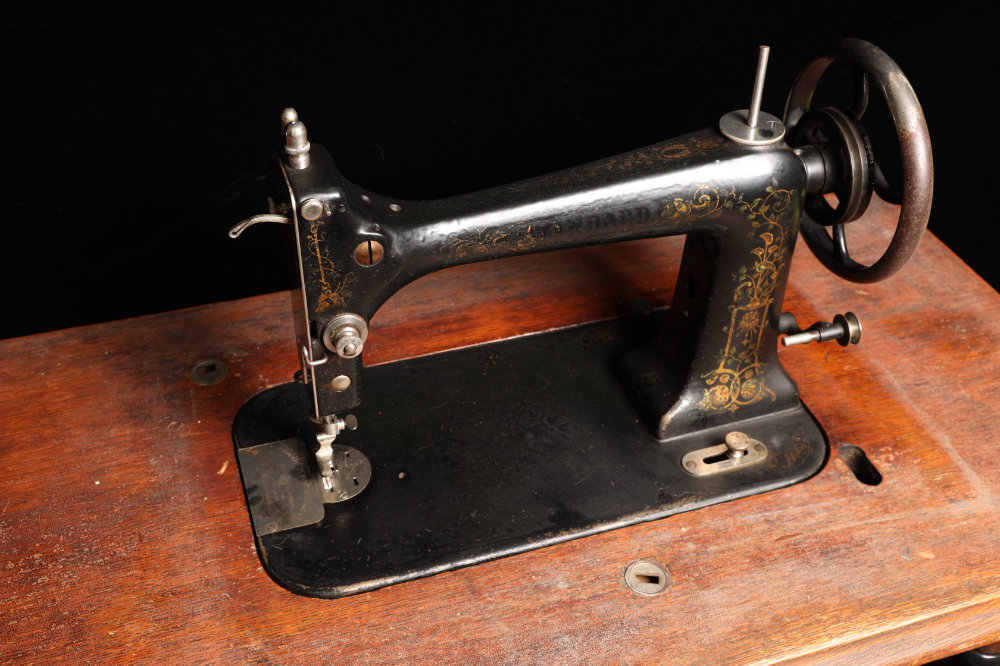
A sewing machine can be a pretty intimidating piece of machinery if you have never used one or are still really unfamiliar with them.
Fortunately, most sewing machines are similar to each other at least in the basic features and functionality.
To illustrate this similarity, I'm going to walk through the basic parts of a sewing machine. And, I'm going to do it on three different machines from different eras so you can learn all about the sewing machine.
Keep in mind that I'm really trying to point out the basic parts and pieces of the machine. It's very likely your machine will be different in more than one way from any of the three I'm showing you. I'm hoping you'll find enough similarity to at least feel more familiar with your machine.
I'll do my best to point out areas where I know there are differences that I can't illustrate. Because despite my almost embarrassing plethora of machines in my house, I know there are some things I just don't have.
Also, keep in mind this article is ONLY addressing sewing machines. I'll tackle sergers and coverstitch machines in a different article.
And, lastly. Some of bits and pieces on the machine I am going to make up names for them. I'm sure there are proper names for them. Your machine should have a manual (either that came with it, or is available online) and would likely have the proper names. But proper names aren't super important till you break something or are getting instruction for something. So, feel free to refer to your machine manual for all the proper names.
Let's get started.
Top Thread
In order to use your machine, you'll need to thread it. And since it makes sense to start from the top cause most of us will start looking down on our machines (Physically, not metaphorically).
First, there is (or should be) at least one thread spool holder. Some machines will have two, or a place to put a second. But, I'd consider it defective if there isn't someplace to put a spool of thread.
From there the thread needs to go through a series of doohickies and tension plates. Every machine I've threaded usually has the thread go over a non-adjustable tension plate, under an adjustable tension plate, through the eye of a take-up lever that's attached to the assembly that holds the needle, and then at least one but sometimes 2 thread guides before the needle.
That greatly simplifies it. Most machines the thread goes over something, under something, over something, and then down to the needle.
Some go over, under, over under then through the take-up lever (usually "over") and then down to the needle. Your machine will have specific threading instructions.
I cannot emphasize how important it is to thread your machine correctly. It will jam, and do weird things when trying to sew every time you use it if it's not threaded correctly.
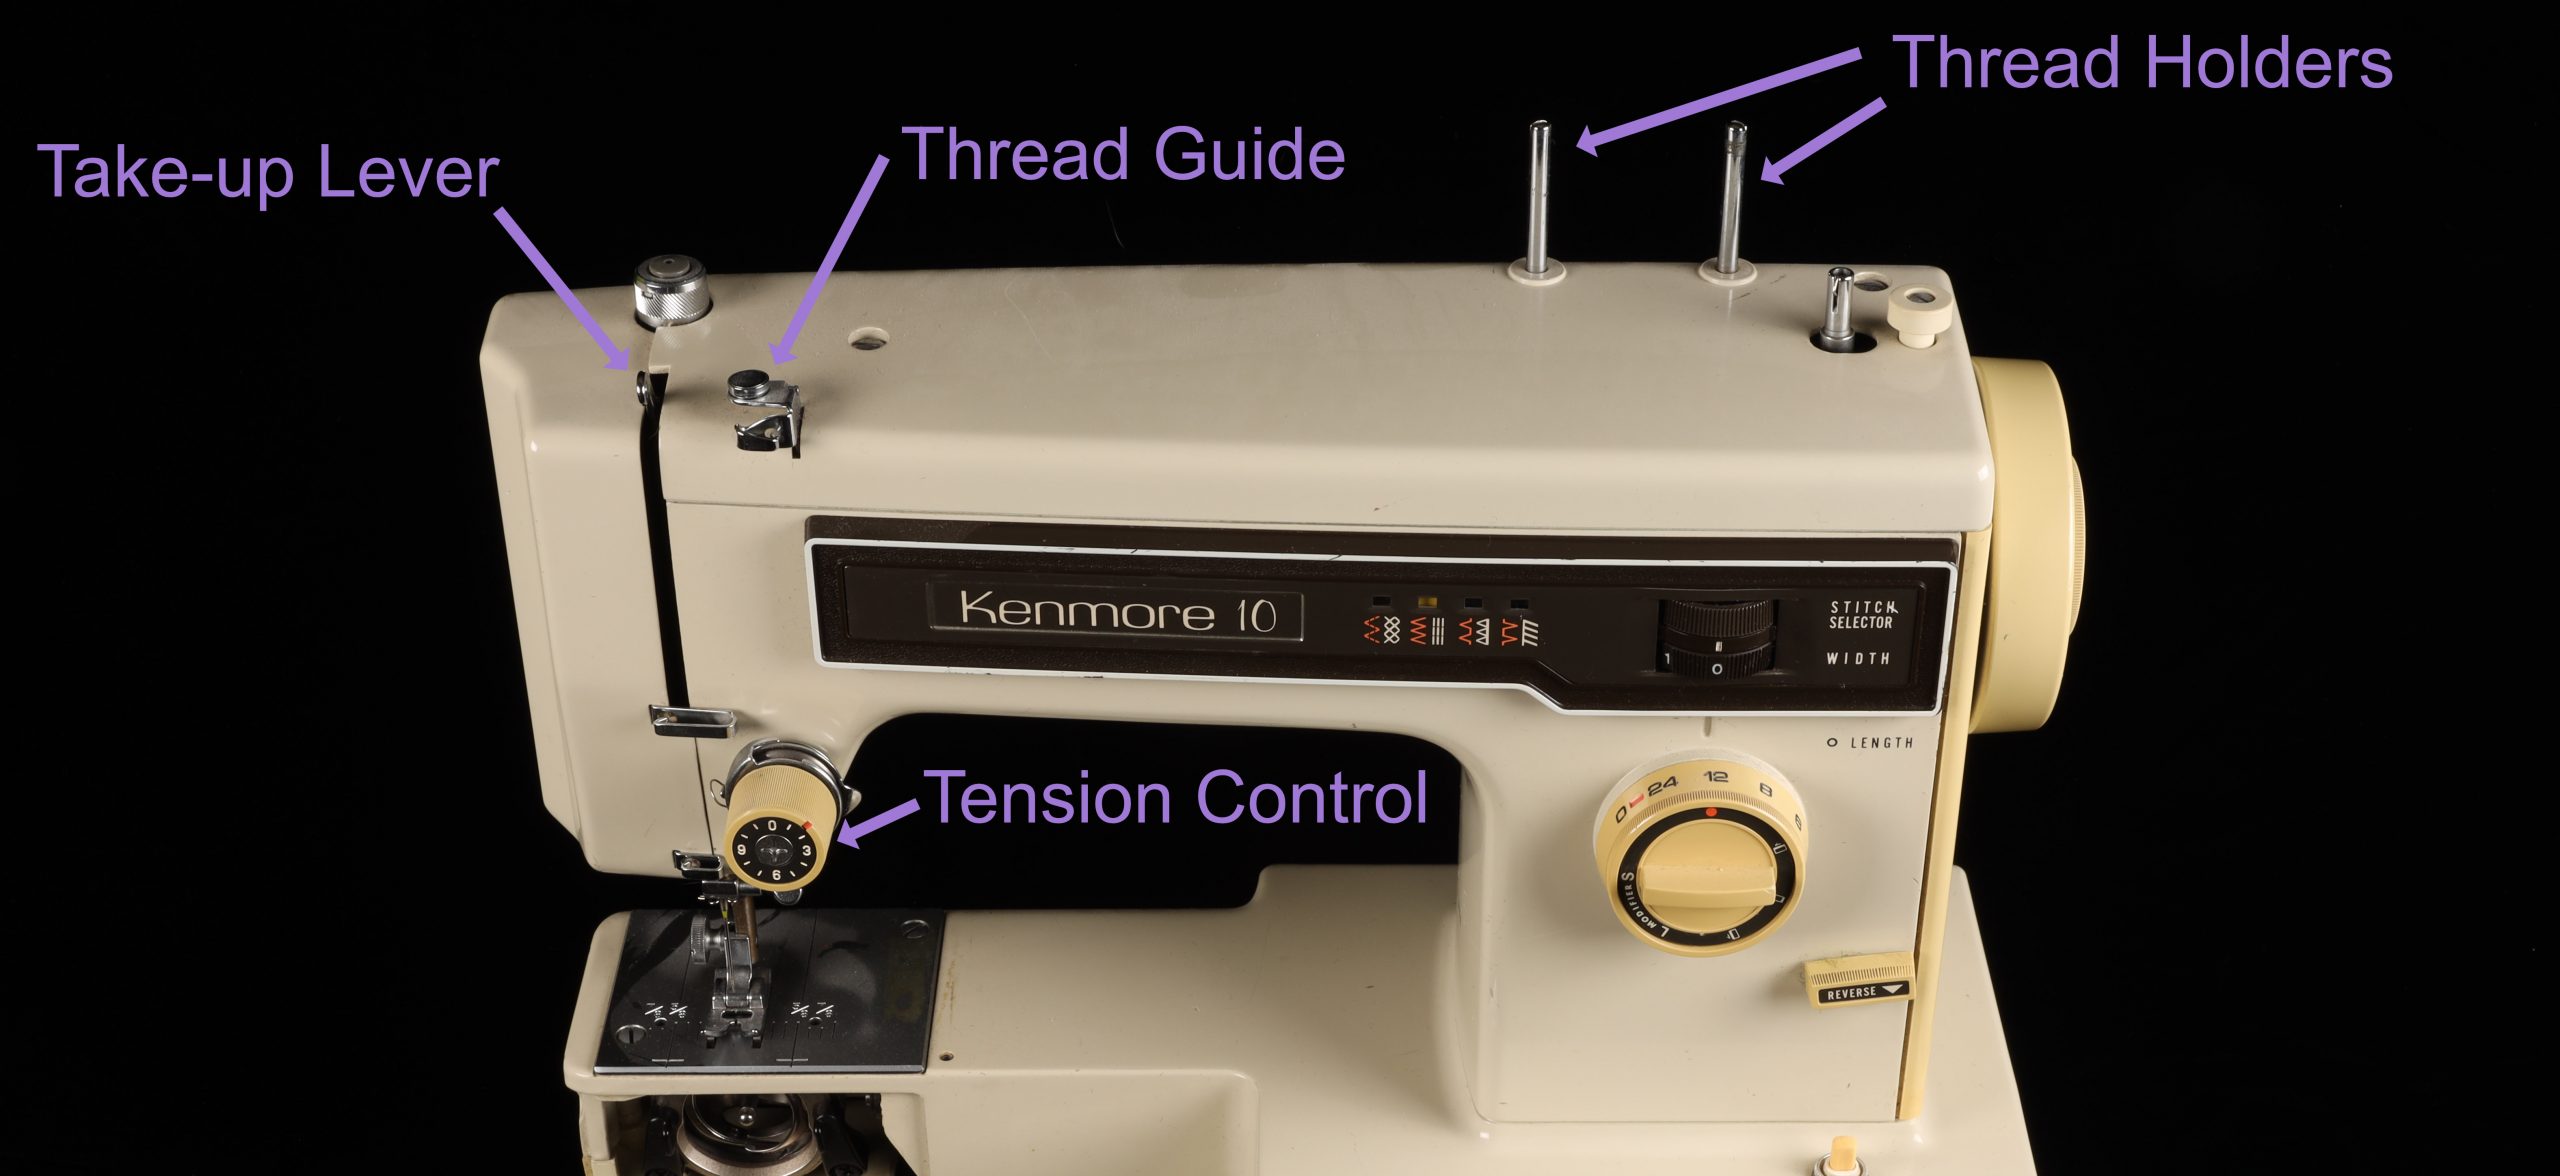
Kenmore Machine
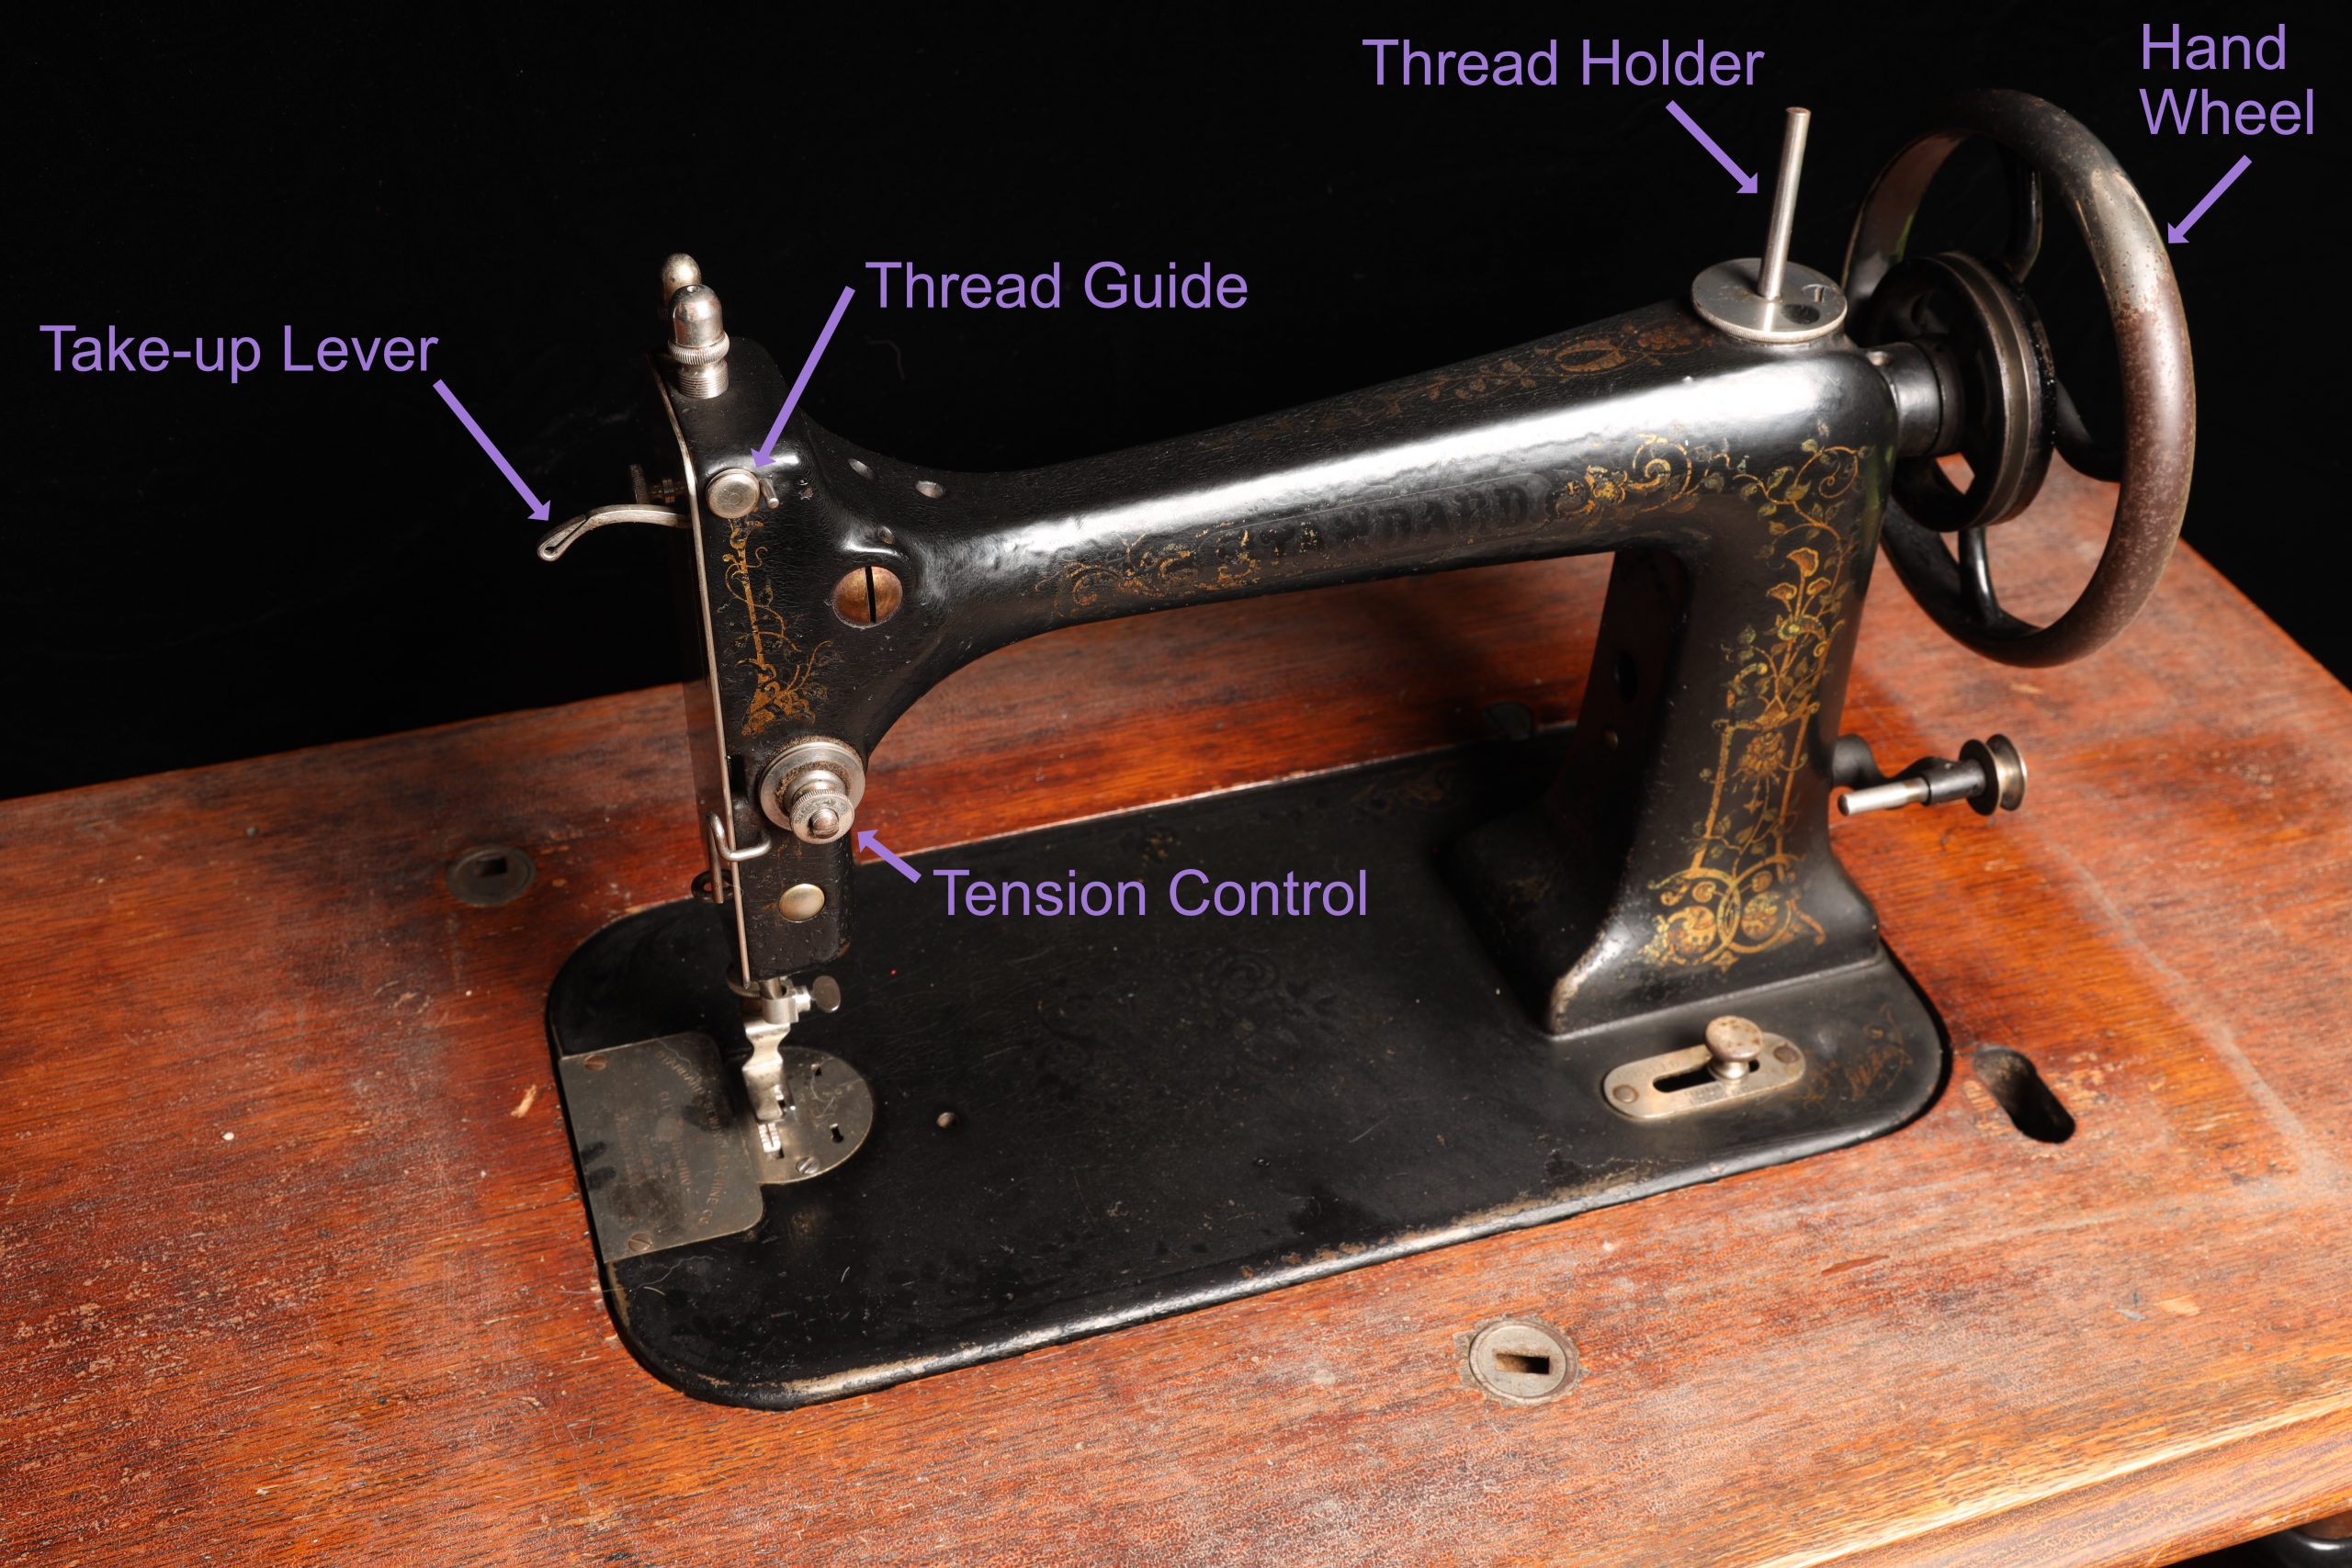
Standard Machine
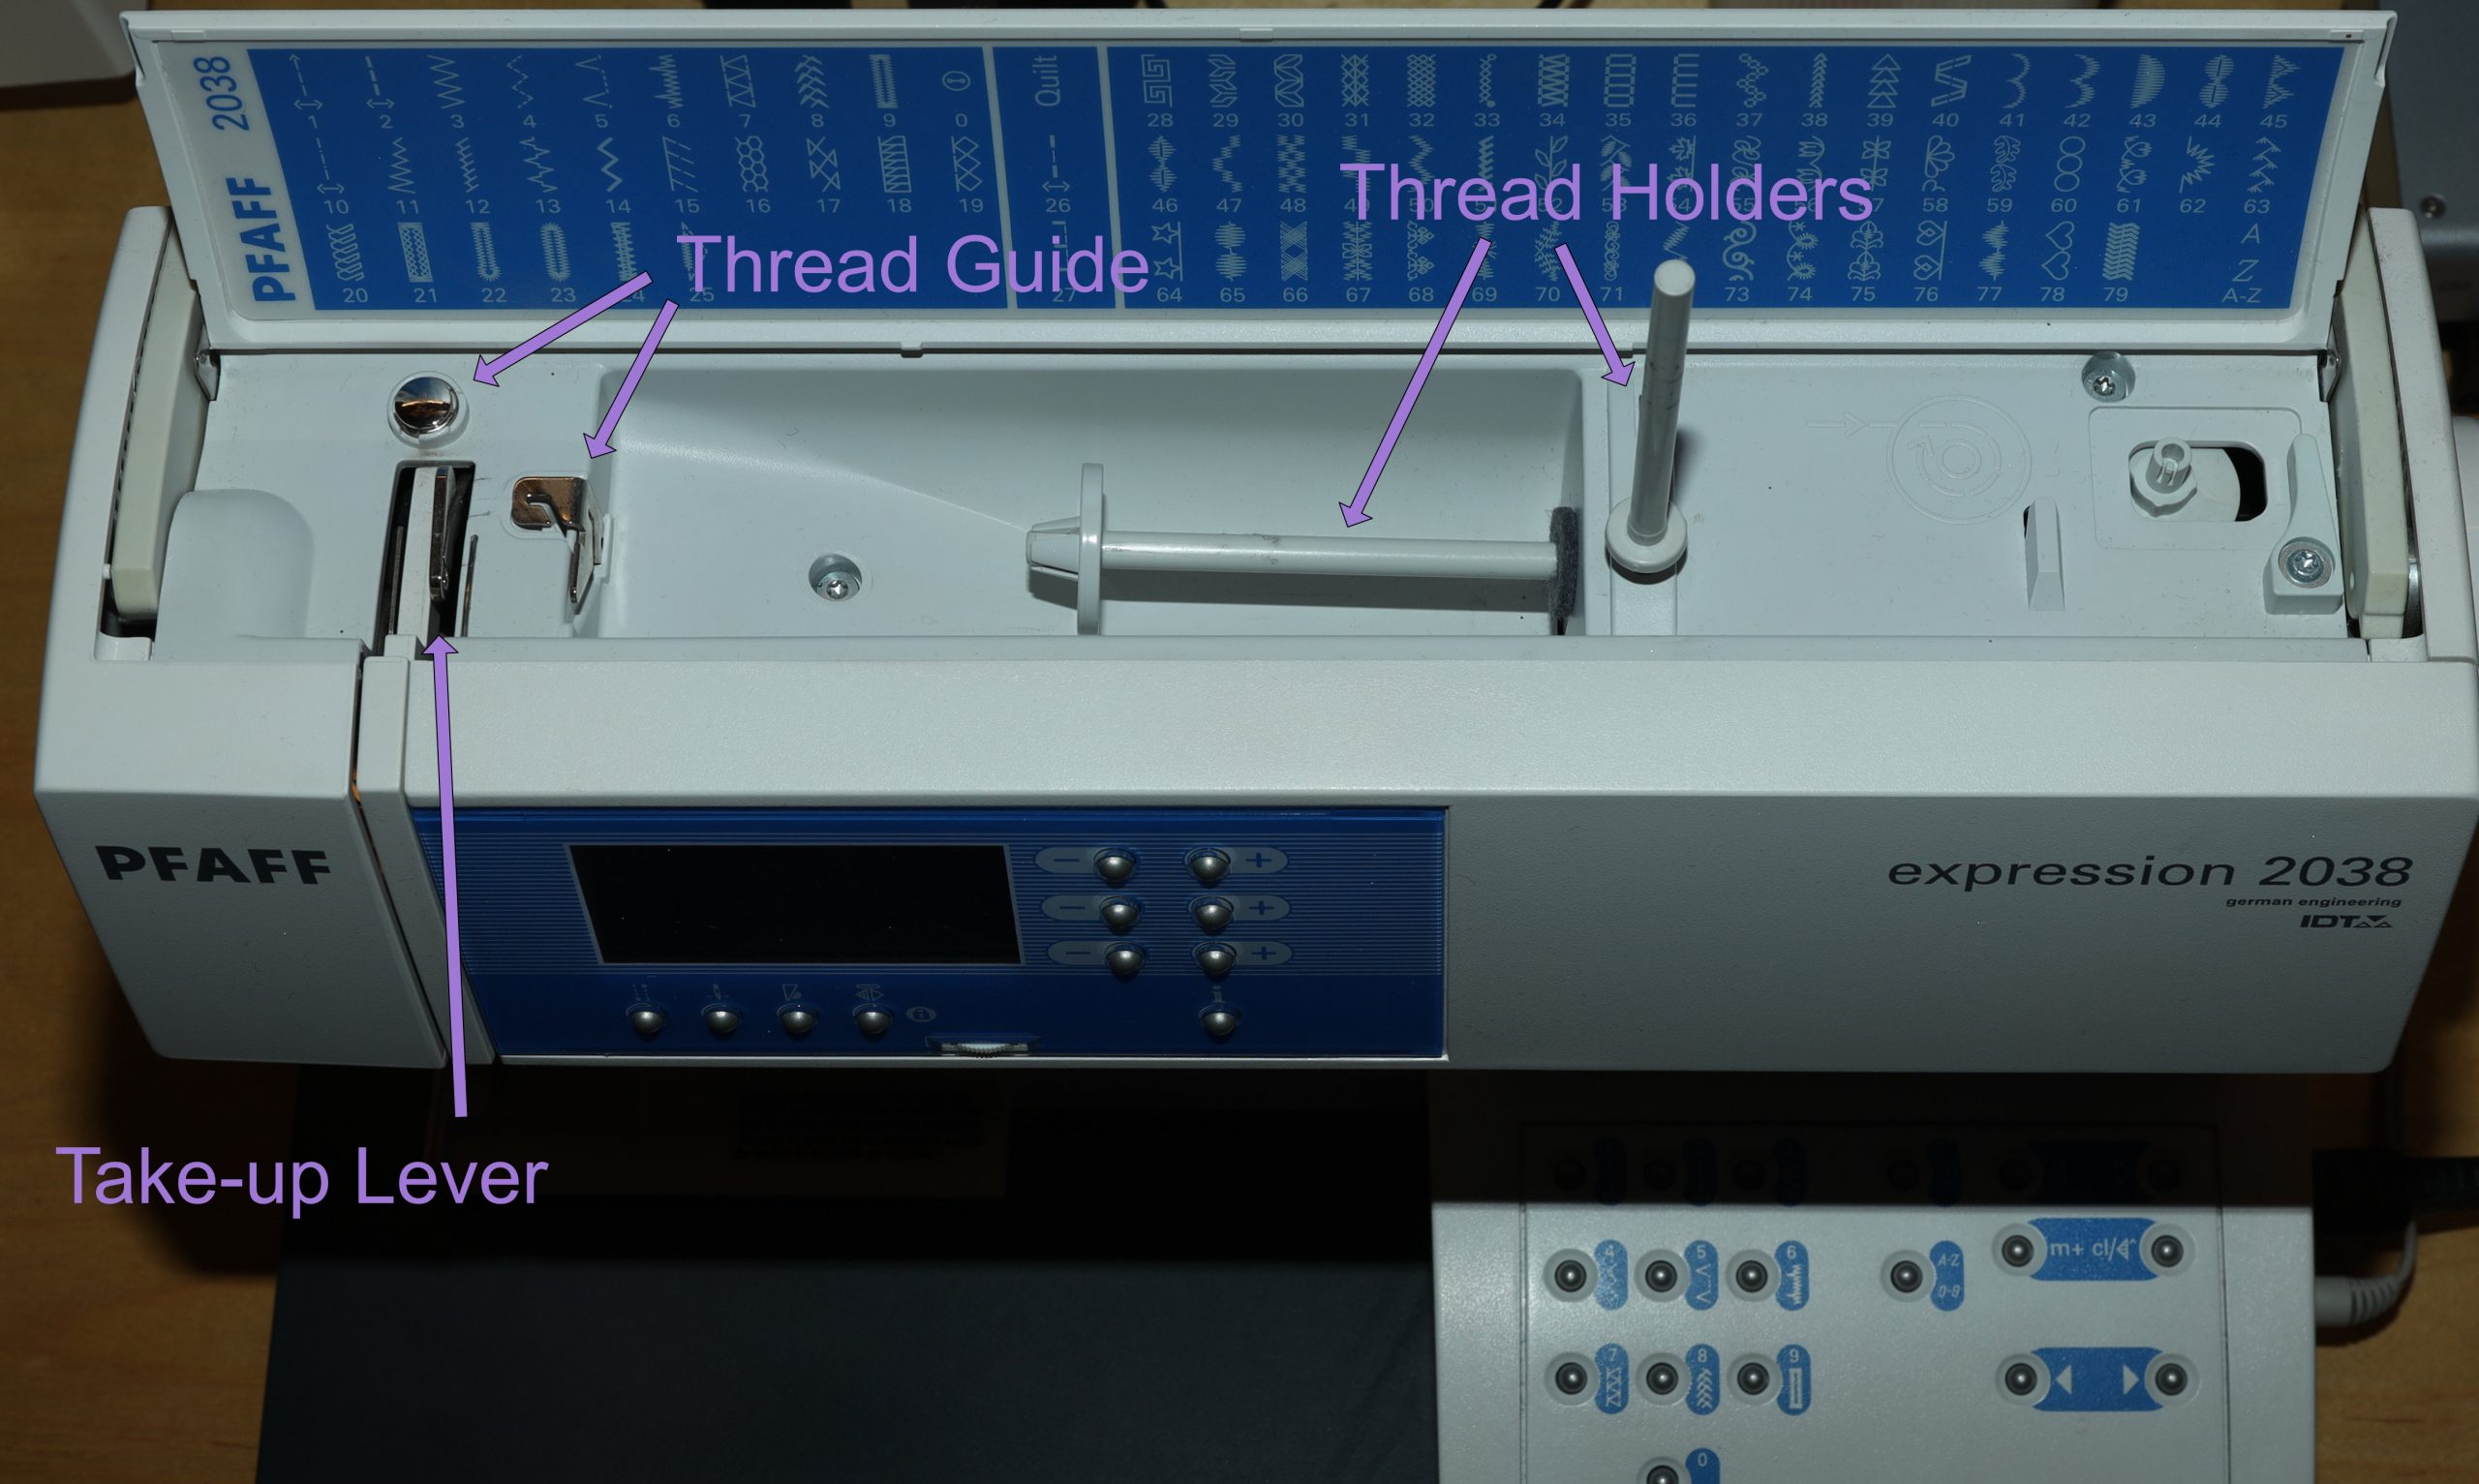
Pfaff Machine
Here are 2 examples of the adjustable tensioner, and one example of the tensioner that isn't seen but the dial is on the side of the machine. You may not have a manual dial if your machine is completely computer-controlled.
Most machines have you thread the needle from front to back (home machines use a needle that is keyed. It has one flat side so you can only put the needle into the machine one way). However, I have two machines in my house that the needle is threaded from left to right, rather than front to back which means the needle sits in there facing to the left if you will. And when you peer into the bobbin case, you can see that the bobbin sits facing the left, rather than the front.
More on bobbins to come.
In all machines I've threaded, the thread passes through the adjustable tension dial before heading through the take-up lever thing that goes up and down with the needle.
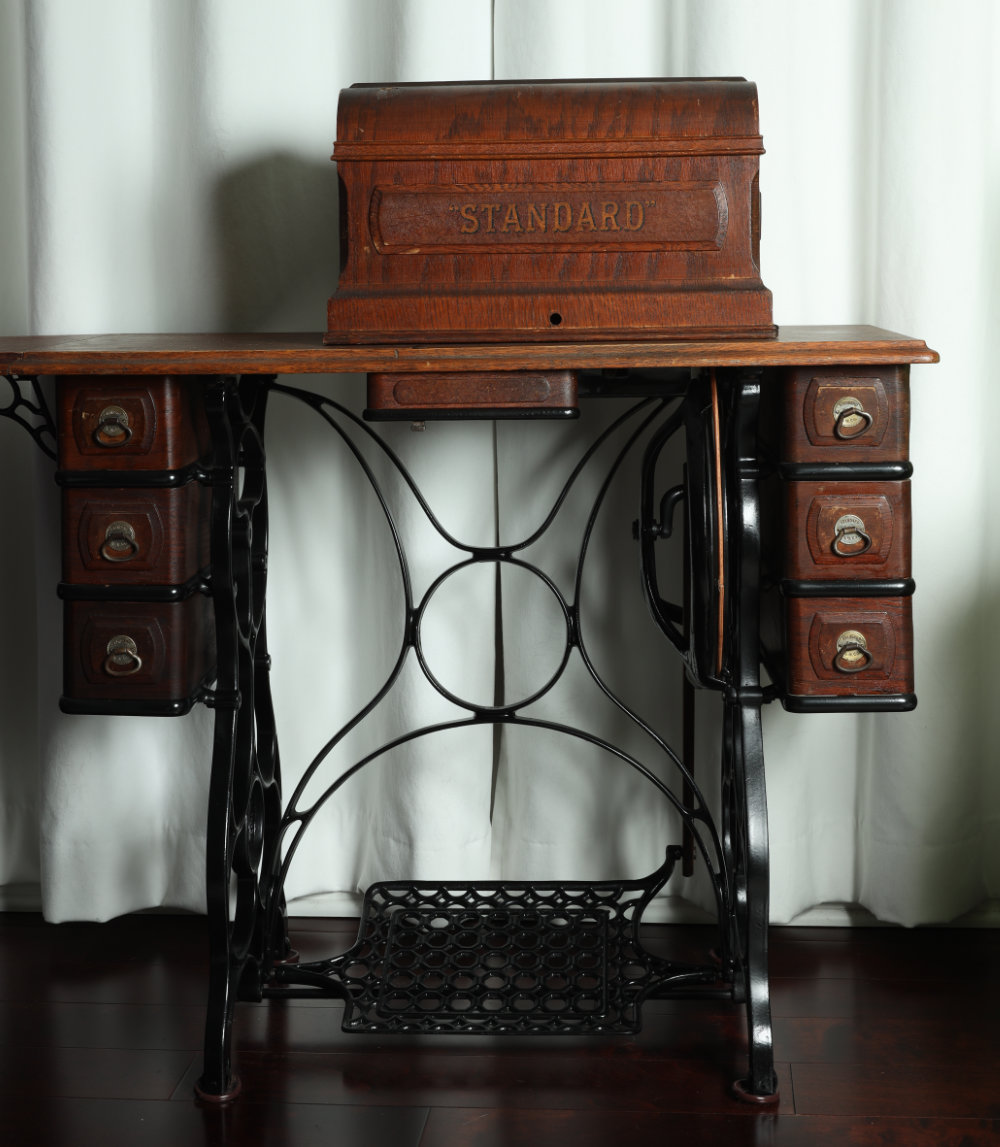
On this old Standard machine, I actually don't know how to thread it. And I haven't looked it up, because, in all honesty, I don't plan on ever sewing with it. It only goes forward and backward (it doesn't do zig zag). And if I actually do want to go backwards, I have to stop the machine and manually start it to go backwards.
This is treadle operated and has no motor. And while my lower legs sure could use the extra workout, I don't think I have the patience to use this machine. But it's pretty, in an old and antique sort of way. Plus you can see most of the workings of the machine whereas on my newer machines, a lot of the parts are hidden.
Bobbin Thread
So, when you sew a seam, the top thread is seen on the top side, and the bobbin thread is seen on the bottom side. The top thread comes from a spool that sits on the top. The bobbin thread needs to be wound on to a bobbin and then in a lot of machines, will need to be inserted into a bobbin case and then the case is inserted into the underside of the machine.
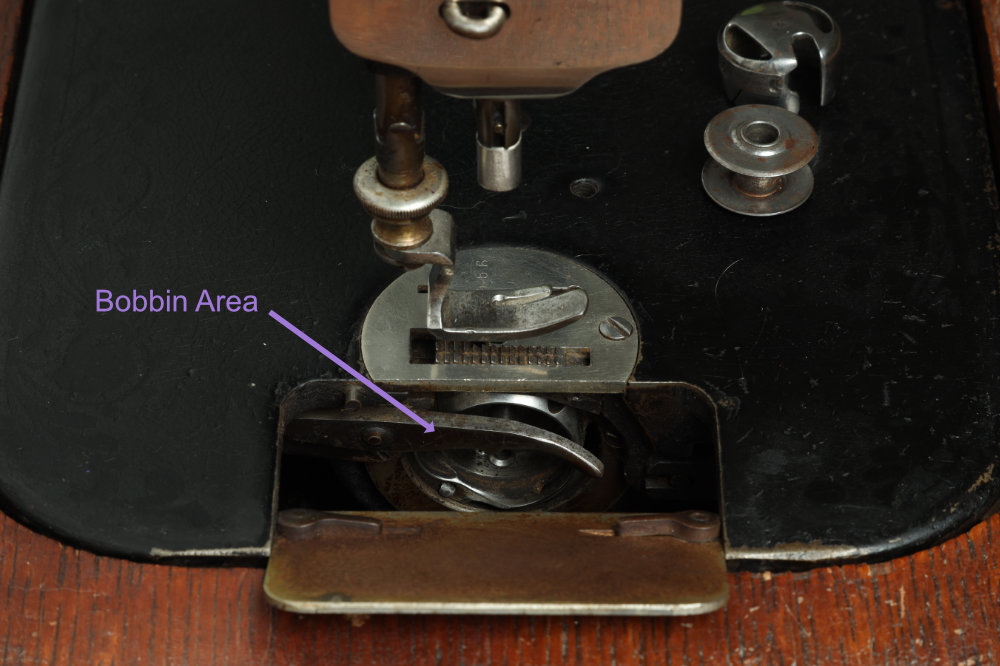
In this Standard machine, the bobbin sits sideways, meaning it faces to the left. And thus, the needle faces to the left.
Standard Machine
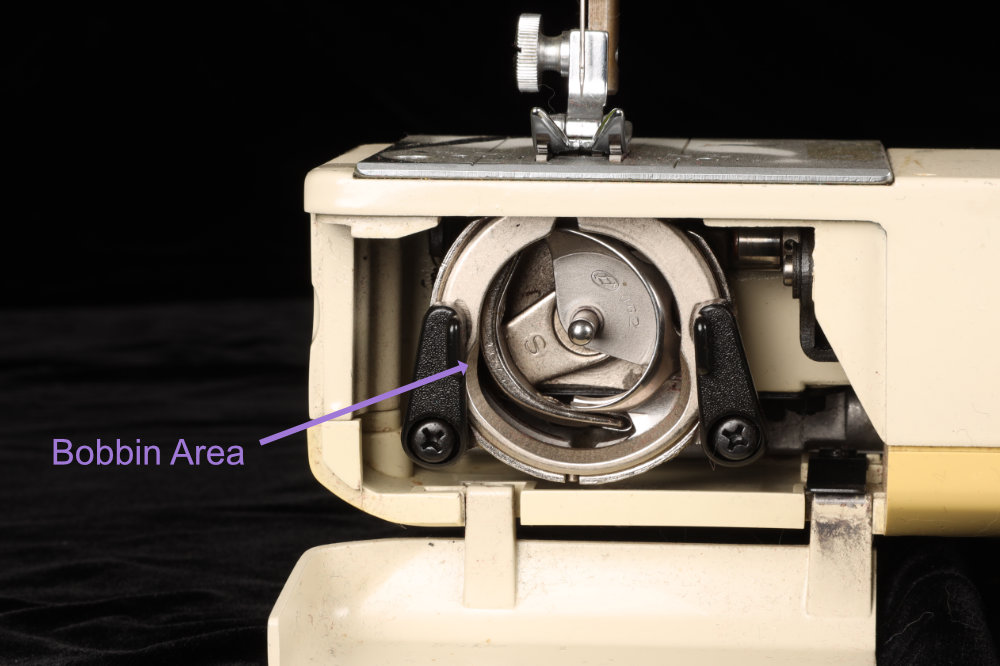
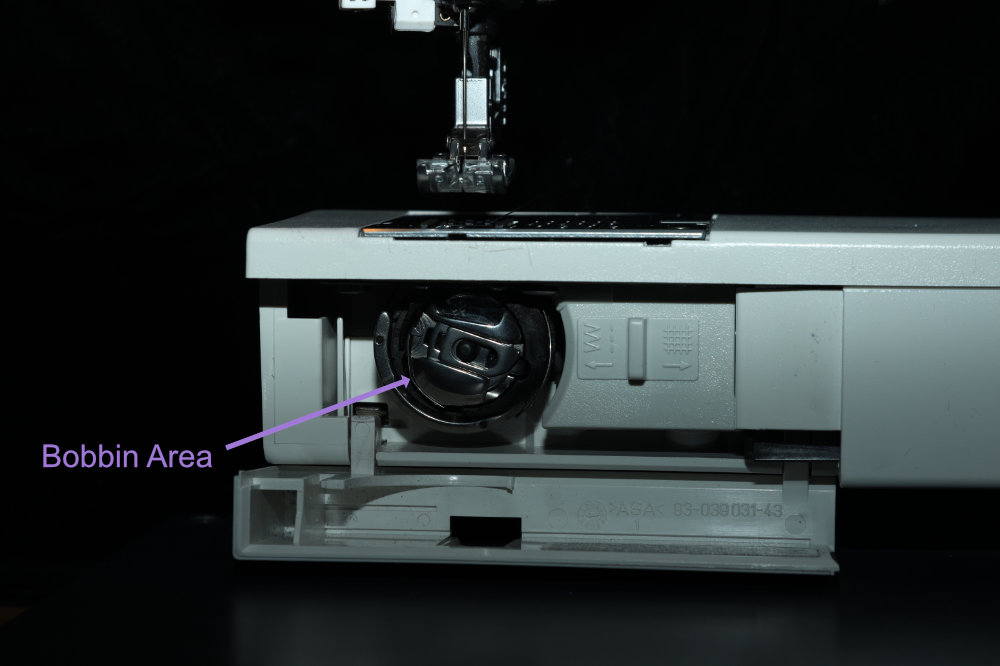
In my Kenmore and Pfaff, it sits facing front. And the needle faces front as well. My folks used to have a Singer that had a bobbin that sat horizontal, rather than vertical. And I am pretty sure there are a fair number of machines out there that use that kind of bobbin configuration.
Kenmore Machine
Pfaff Machine
The bobbin case (If the vertical kind), will have some way for you to lock the thread in place. And as far as I'm aware, there is a preferred direction of thread unwinding. I think of it as a P. But, check your manual. The Kenmore manual doesn't show a preferred direction, but the Pfaff requires a specific direction the thread is wound in the bobbin case.
Bobbin Winder
Every machine I have has the ability to wind the bobbin "automatically". Now I put "automatically" in quotes because my mother's old Singer was a horizontal bobbin and I could fill the bobbin without ever having to remove it.
However, the 4 machines I have currently have the vertical bobbin and it must be removed on all 4 to be wound.
In the case of the Standard (and my industrial), the bobbin winder is a contraption that is powered by the same belt that runs the machine. The bobbin is wound on a little bobbin spool that gets turned when you move the bobbin winder to come in contact with the drive belt.
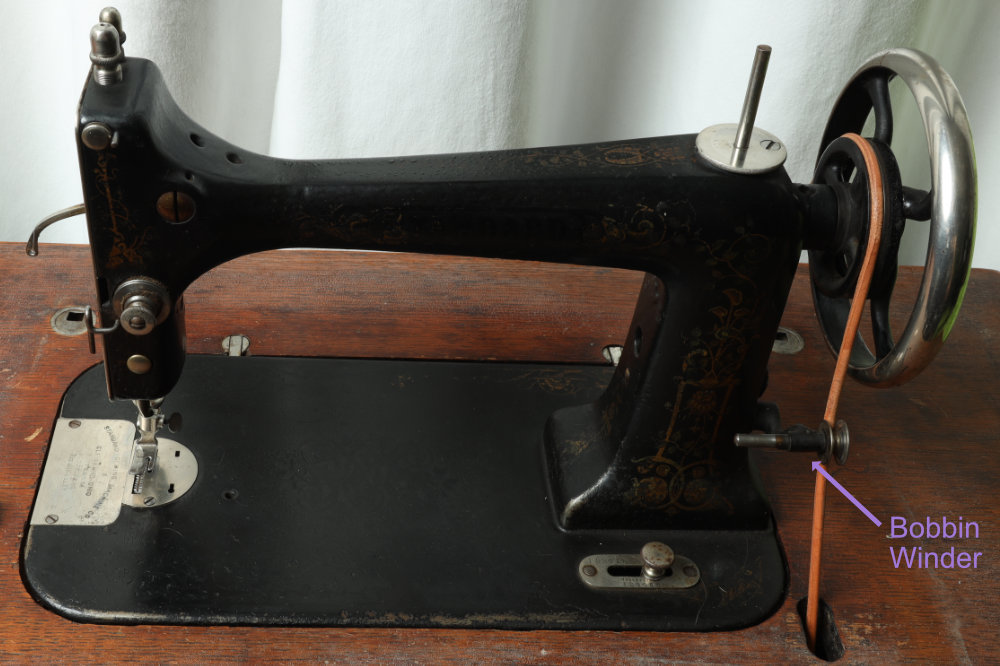
Standard Machine
On both the Kenmore and the Pfaff, there is a little bobbin winder on the top of the machine. It's a little short spool holder looking thing. It typically has some way to be engaged (like sliding to the right) so that it turns when you depress your foot pedal. Check your manual for any additional instructions when filling the bobbin
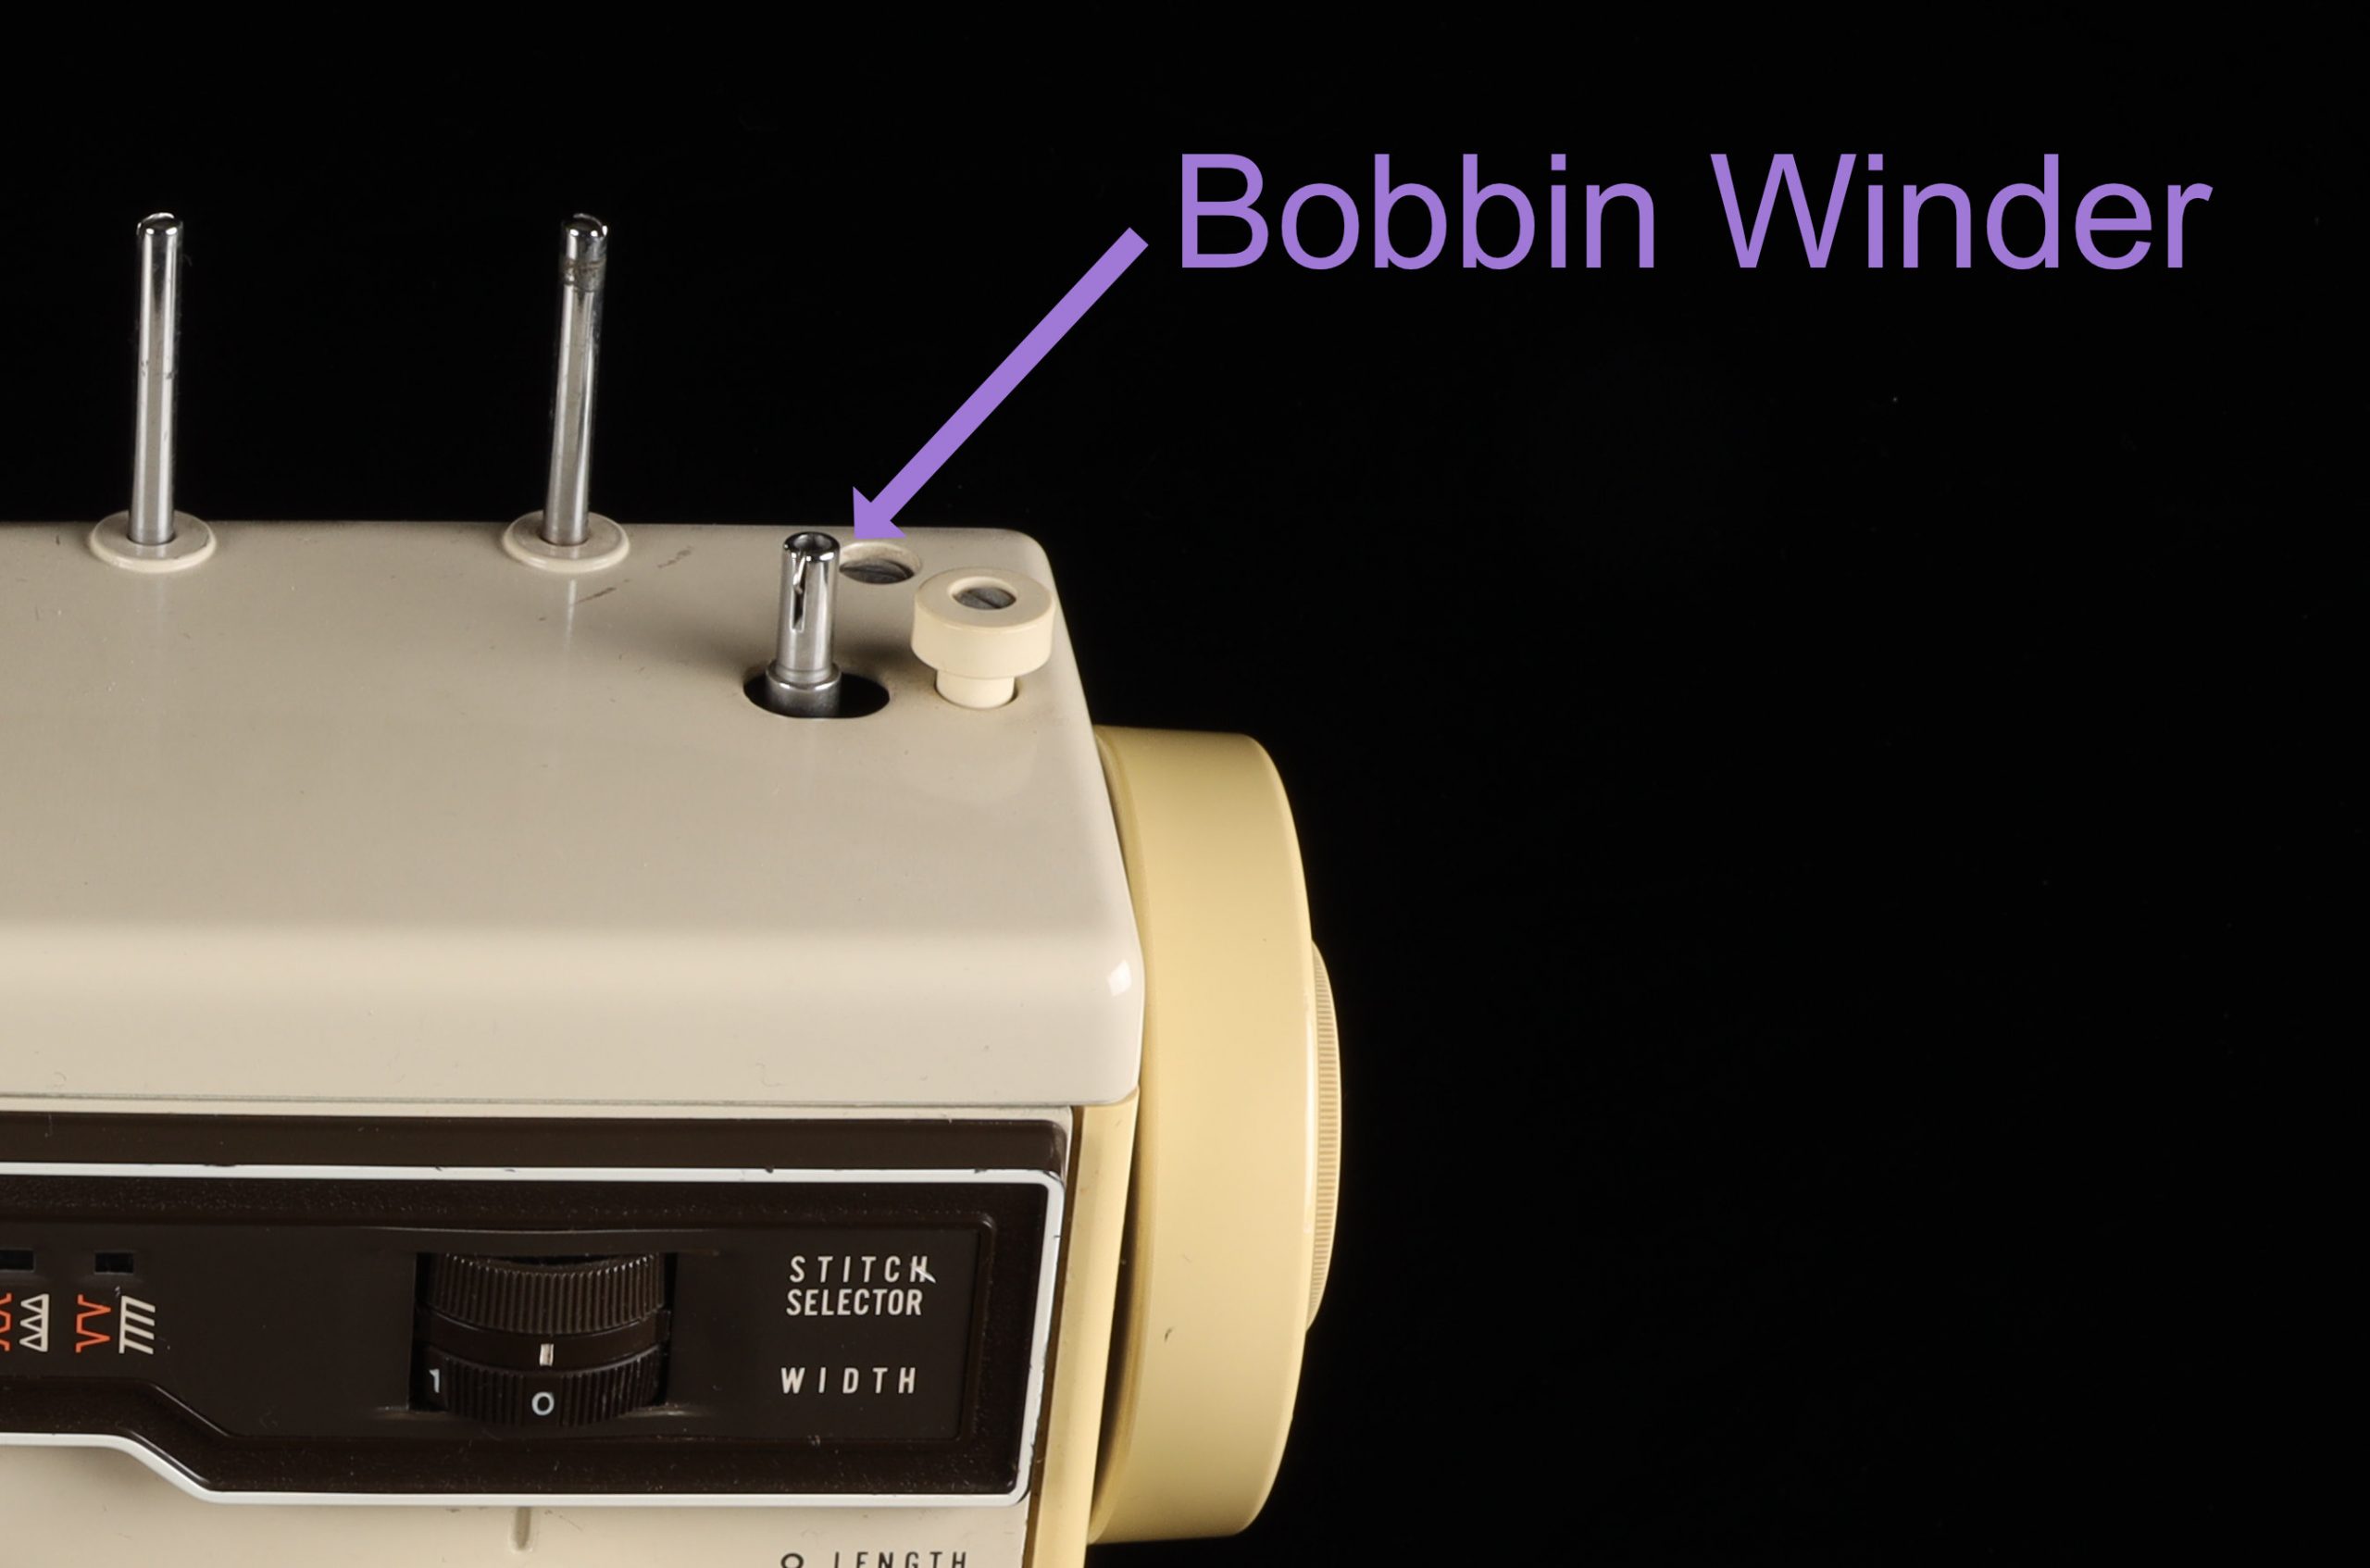
Kenmore Machine
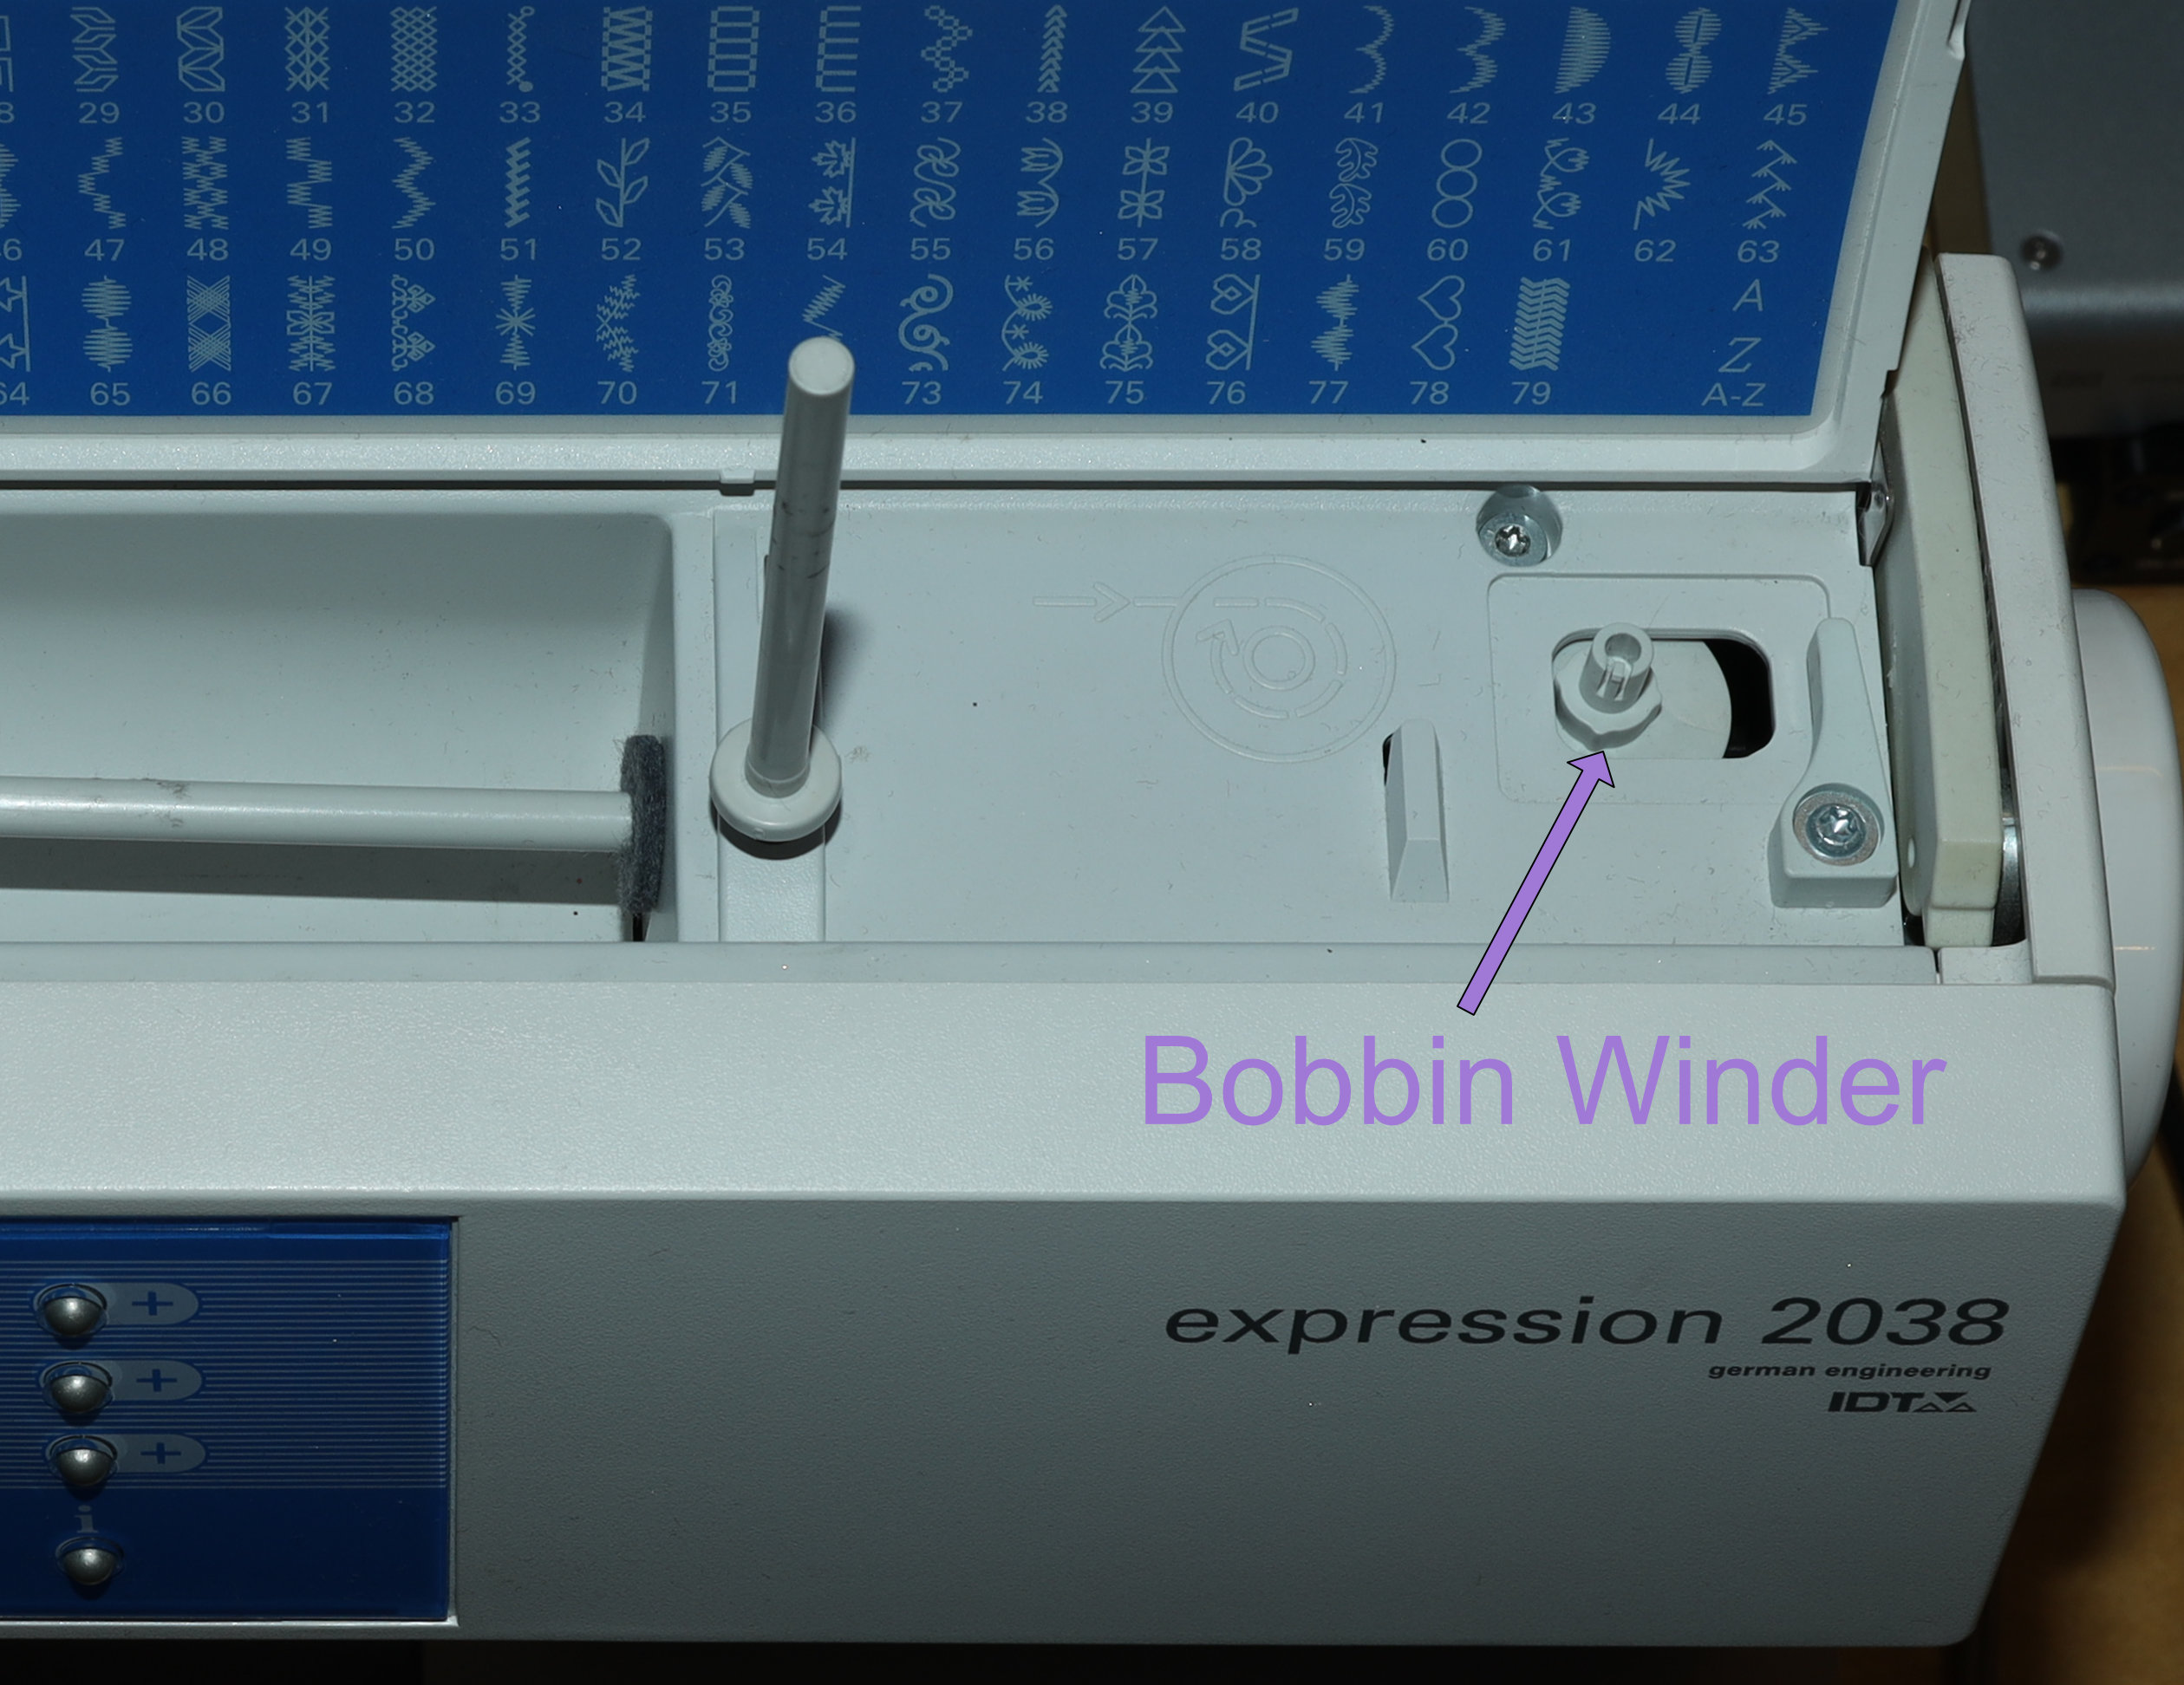
Pfaff Machine
Settings and Controls
There are a few other main controls and components that are common on most machines.
The needle passes through a presser foot and needle plate before entering the bobbin zone.
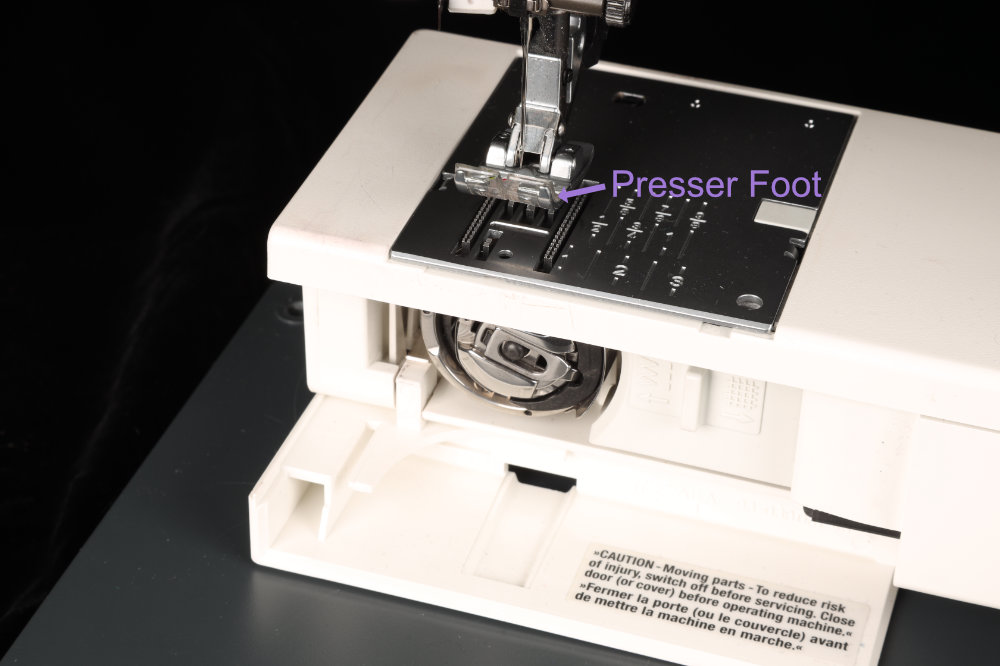
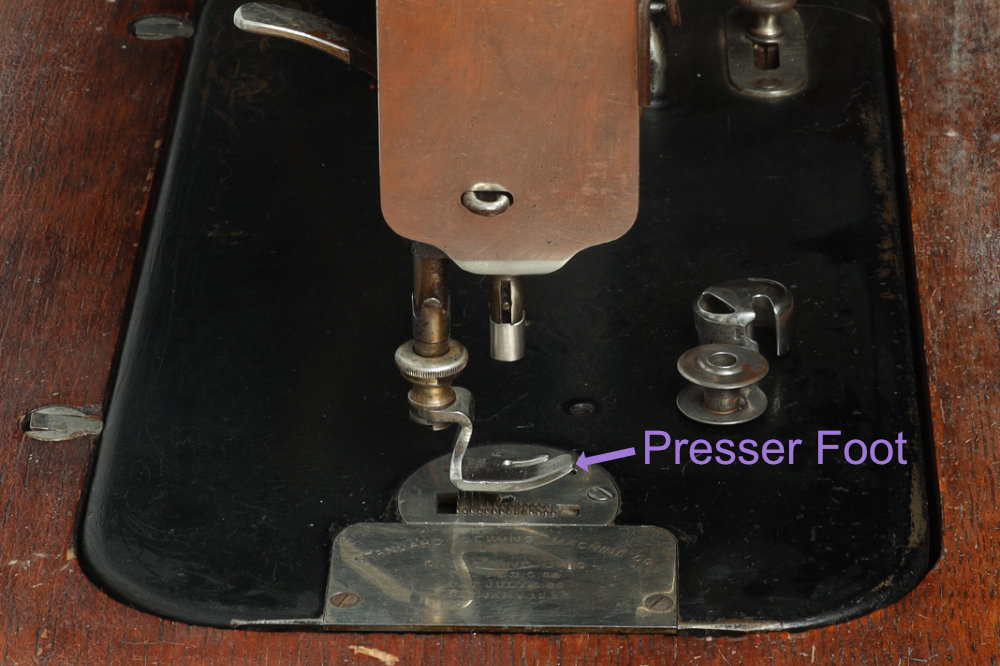
The presser foot is usually interchangeable and is what holds the fabric to the feed dogs. The feed dogs are ridged metal bits that stick up through the needle plate and pull the fabric through the machine. (You should NEVER have to pull or push your fabric through your machine, the feed dogs do all the work for you. You just need to steer.)
Presser Foot
The presser foot is what holds your fabric down so that the needle can pass through it with less resistance.
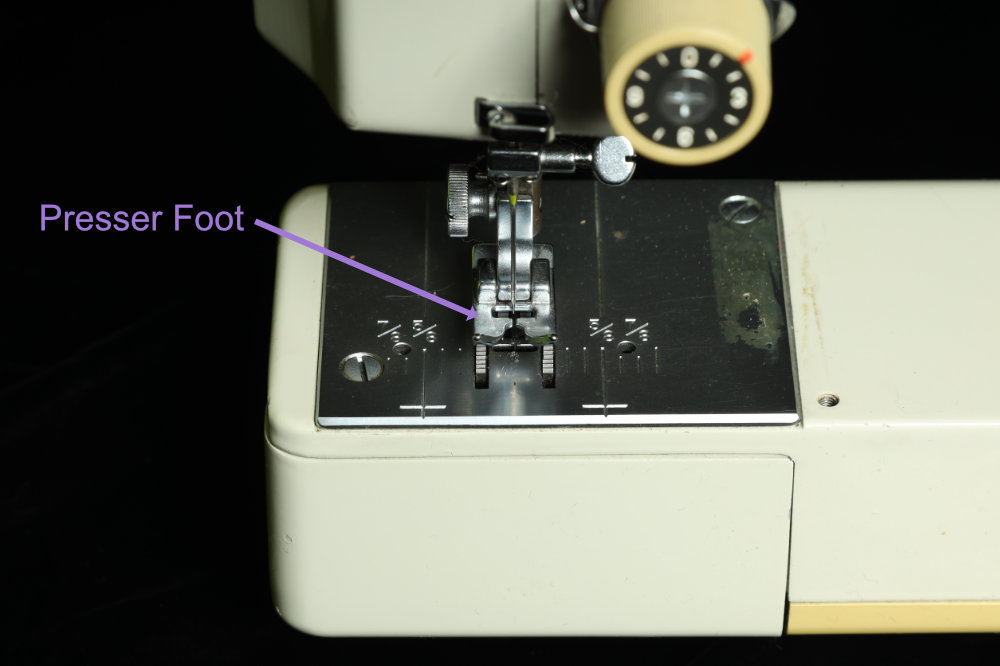
Kenmore Machine
Pfaff Machine
Standard Machine
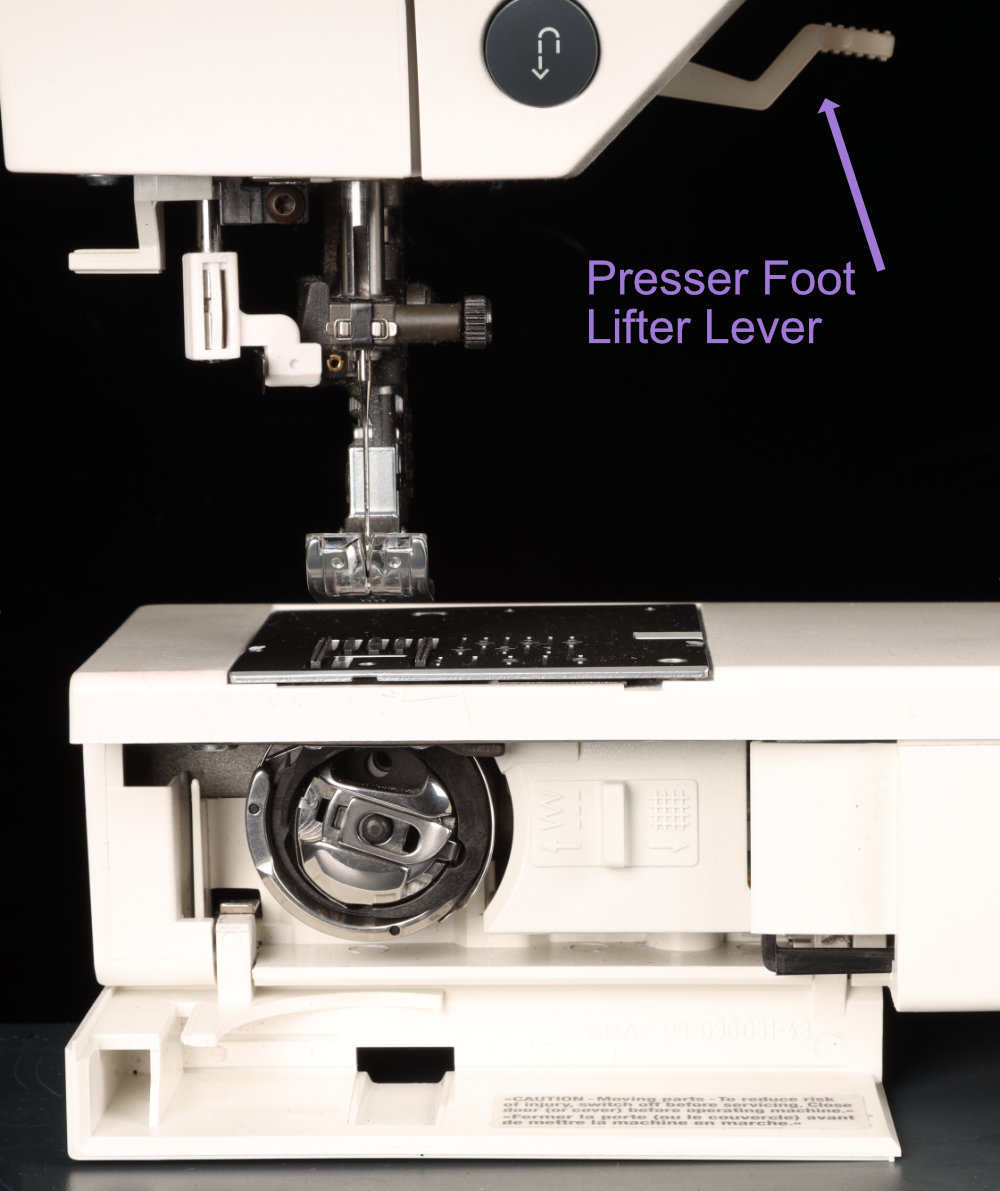
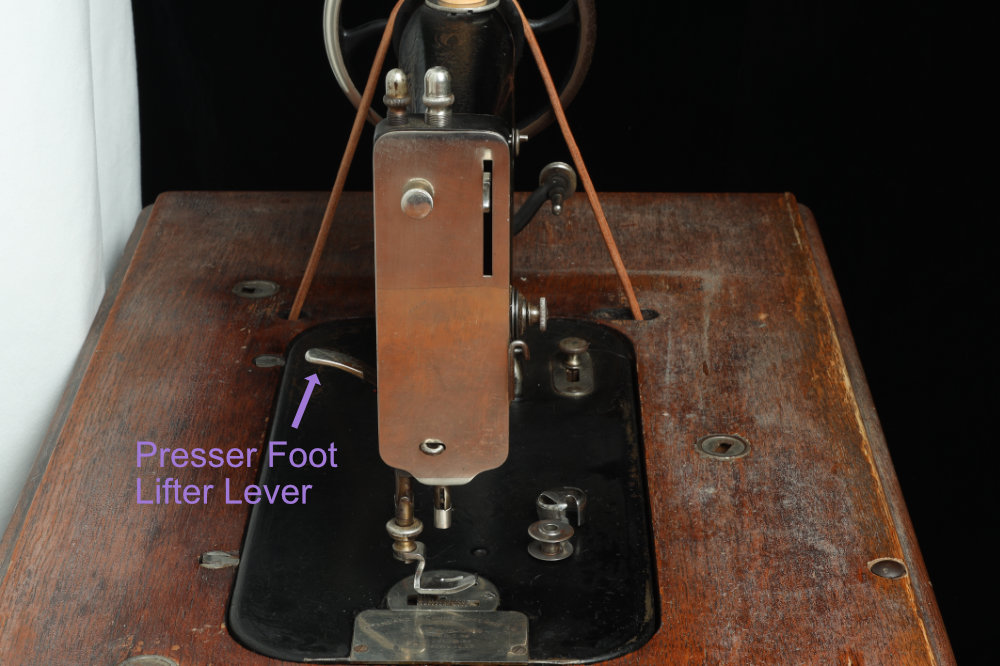
Your presser foot needs to be lowered in order for you to sew well. The presser foot is lowered using a lever that usually sits in the back of the machine. Some machines have the ability to have a knee lever added to lift and lower the presser foot. This is a good feature if you have it so you can keep your hands on the fabric when you lift and lower the presser foot. However, it's not critical to have. Only my industrial machine has it.
Pfaff Machine
Standard Machine
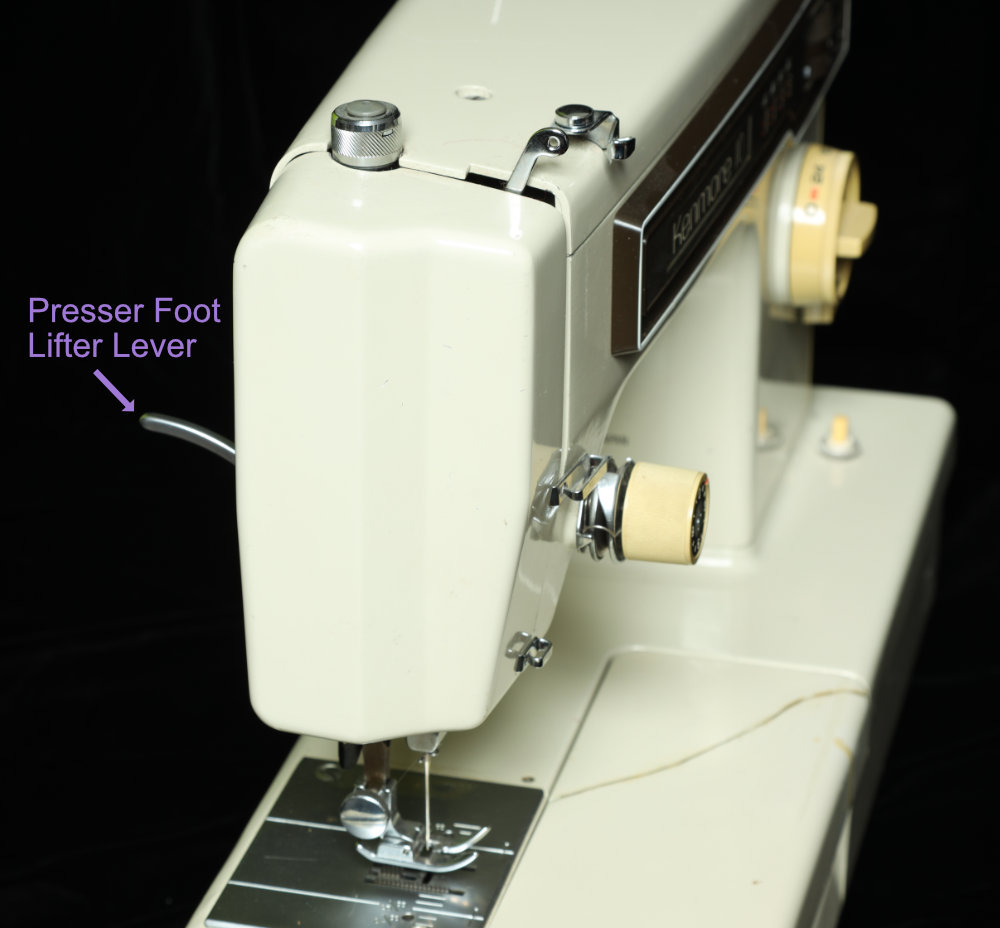
Kenmore Machine
Some machines have a manual presser foot pressure adjustment. Some do it "automatically" whatever that means. Computerized, I'm guessing. My Pfaff doesn't have a manual adjustment.
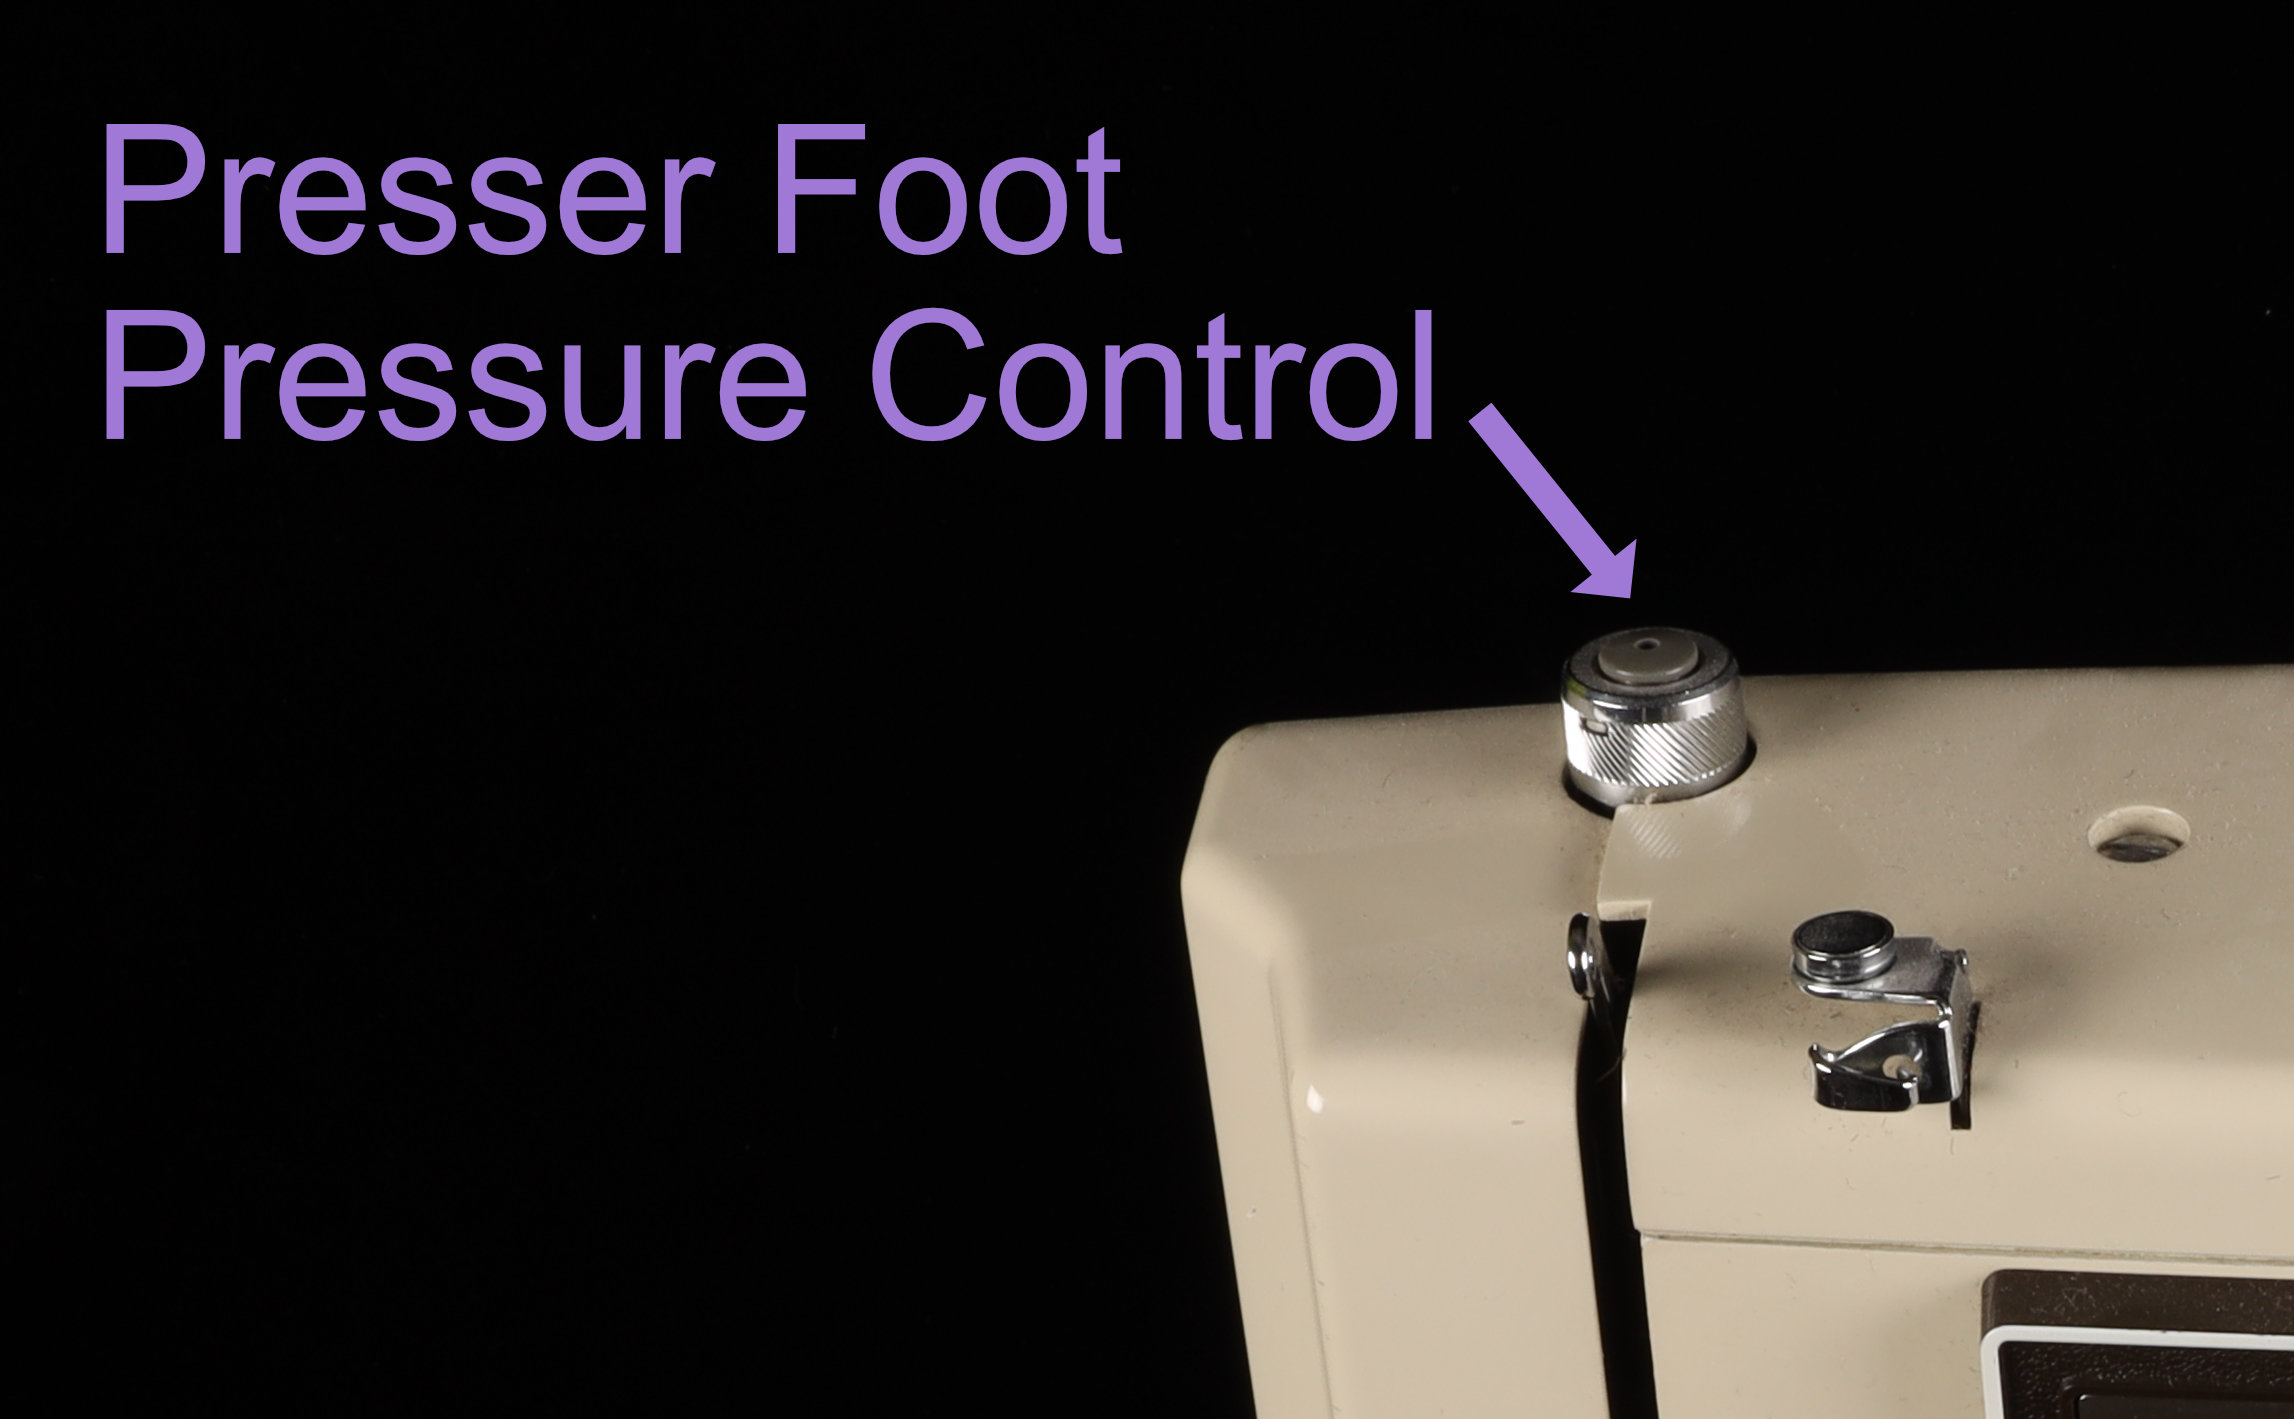
Kenmore Machine
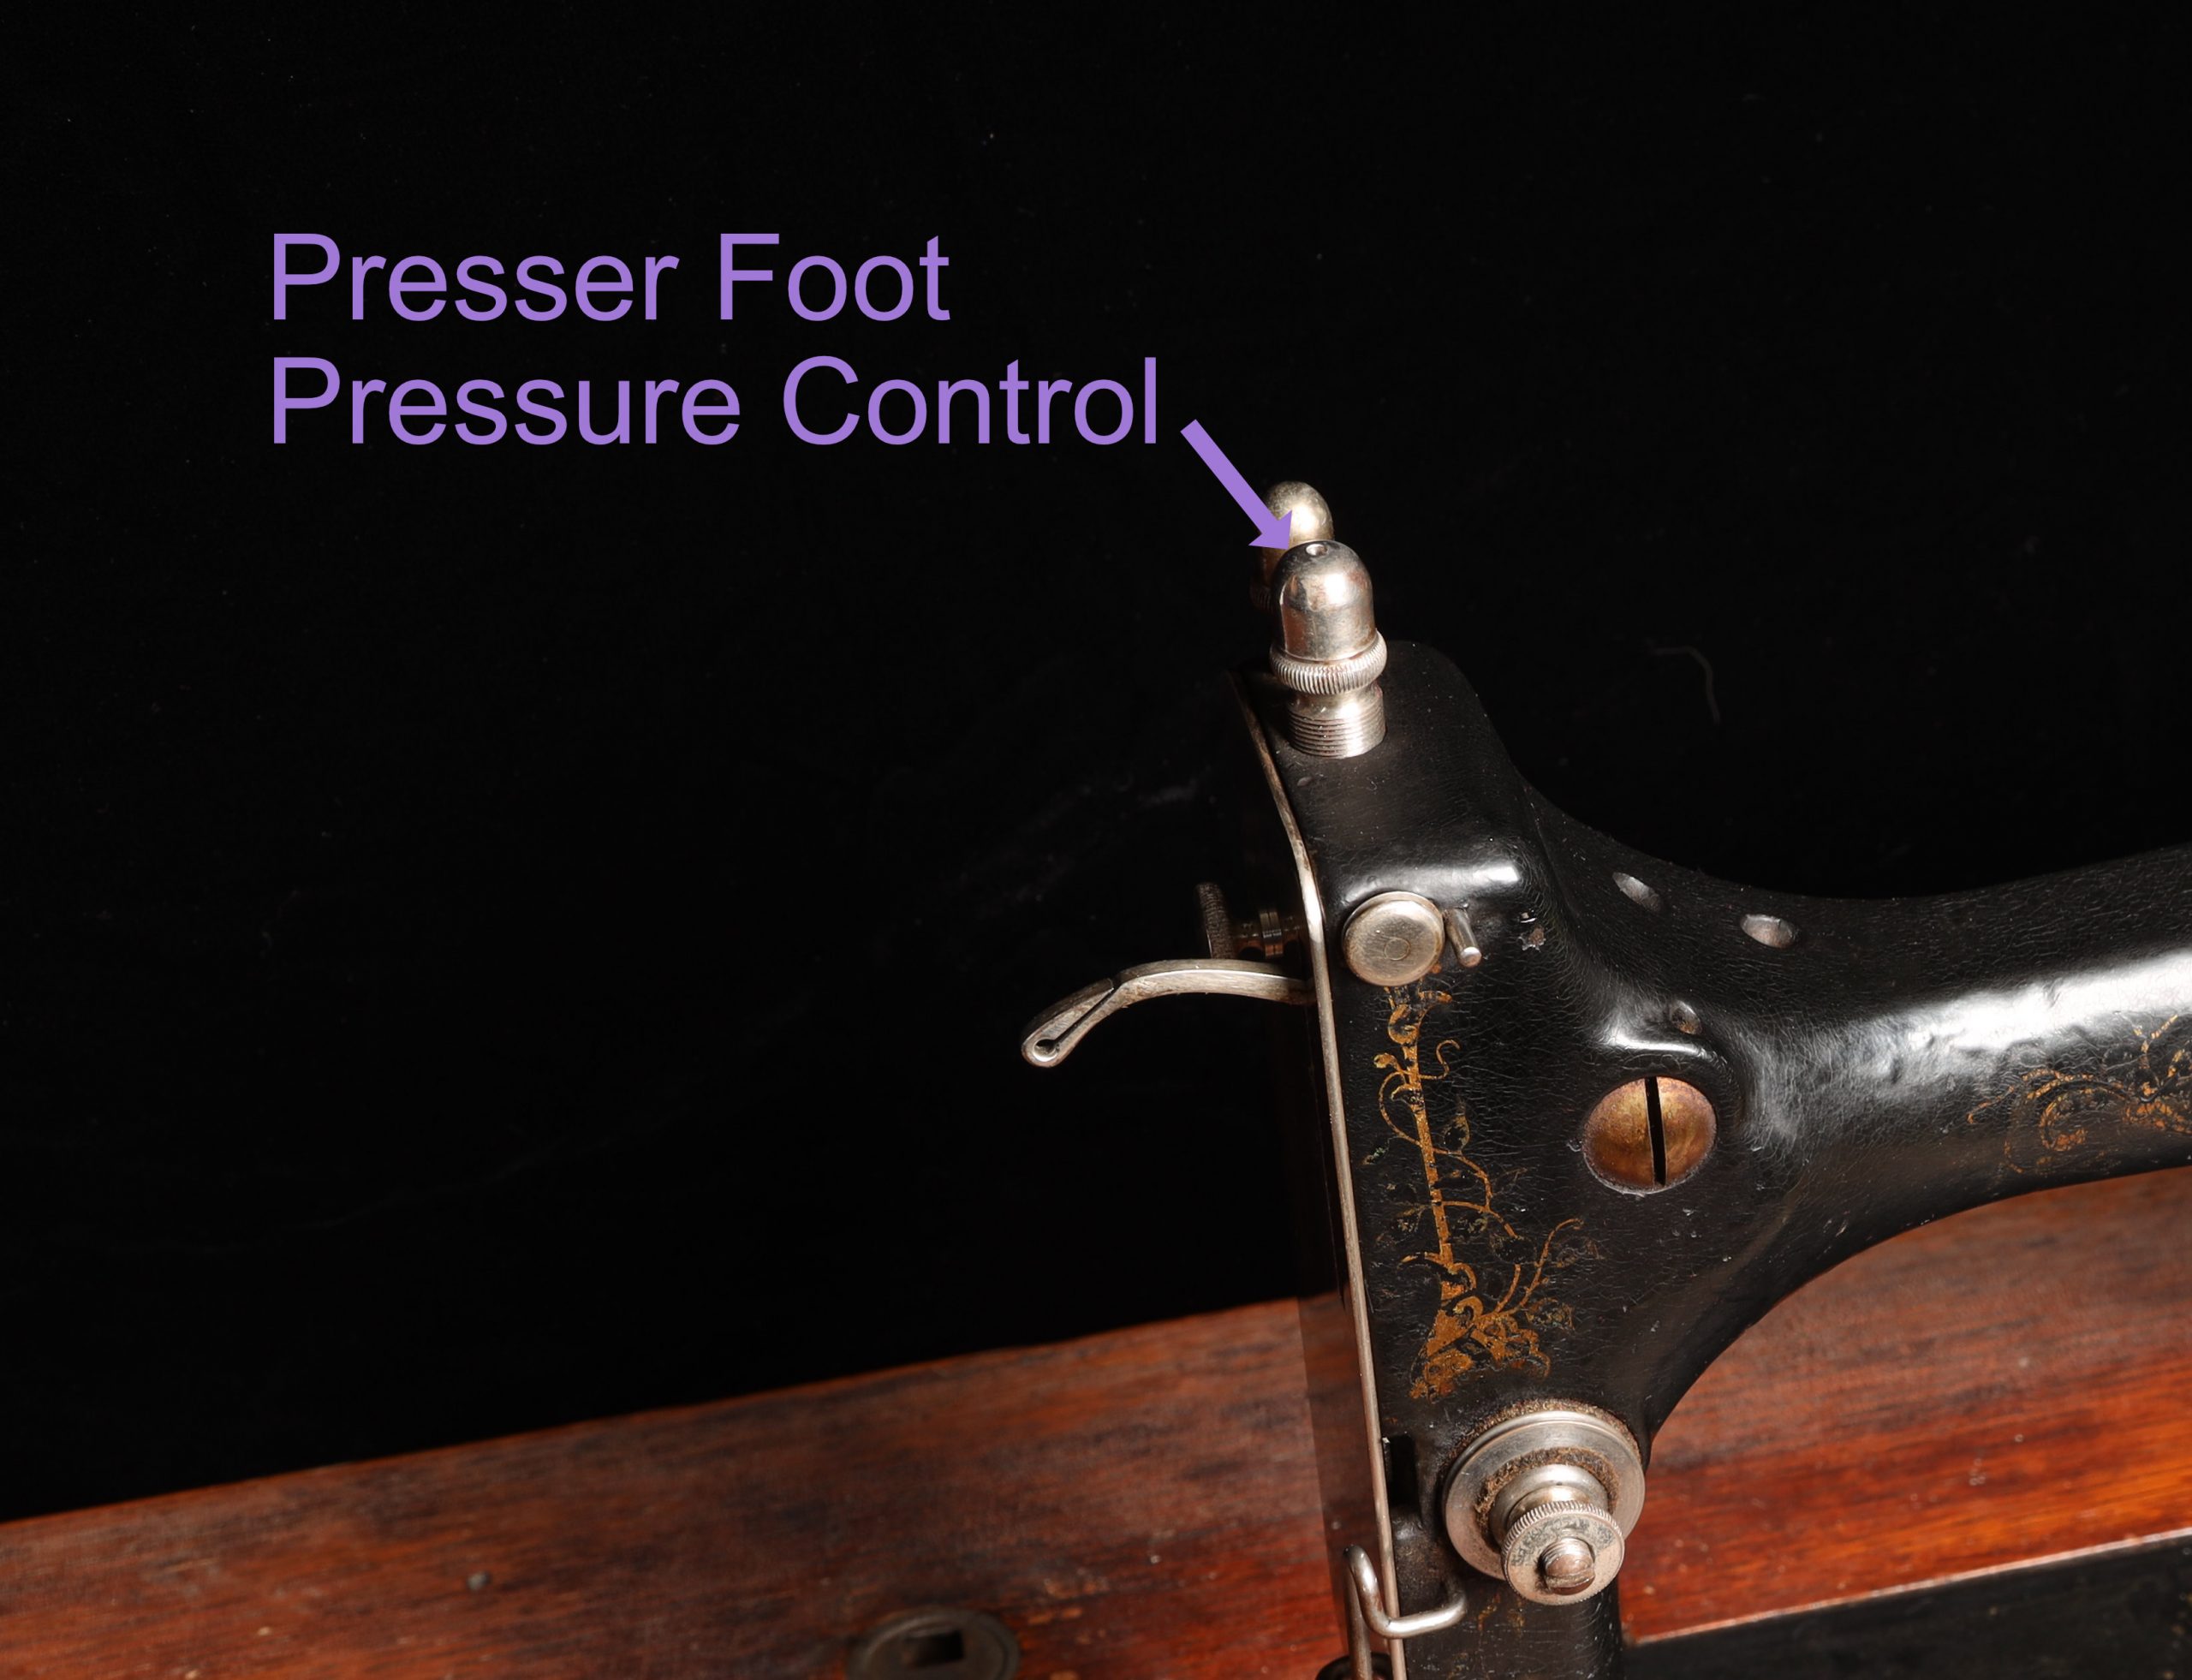
Standard Machine
Also, if you are going to store your machine unused for a long period of time, it's good to store it in the down position to keep the spring less compressed.
There are many types of presser feet available and your machine likely came with a few. I will leave a discussion of presser feet to another post.
Needle Plate
The needle plate is a metal plate that has a hole for the needle to pass through, and slots for the feed dogs to come up through.
It must be said that if you are sewing and your needle gets "crooked" it will not pass through the metal of the needle plate and can snap off. This often happens if you choose to try to pull your fabric through the machine rather than letting the feed dogs do their job. (So don't do it).
Some machines have interchangeable needle plates. This can be helpful if you are going to be sewing tricky fabric and need a presser foot and needle plate combo that has a smaller hole that only allows the machine to sew a straight stitch. If your machine has this feature, make sure you don't try to sew a zig-zag with the straight stitch needle plate (or foot). Again, the needle will not pass through the metal.
For pretty much everything you sew, you'll just need the regular needle plate that accommodates a variety of stitch widths.
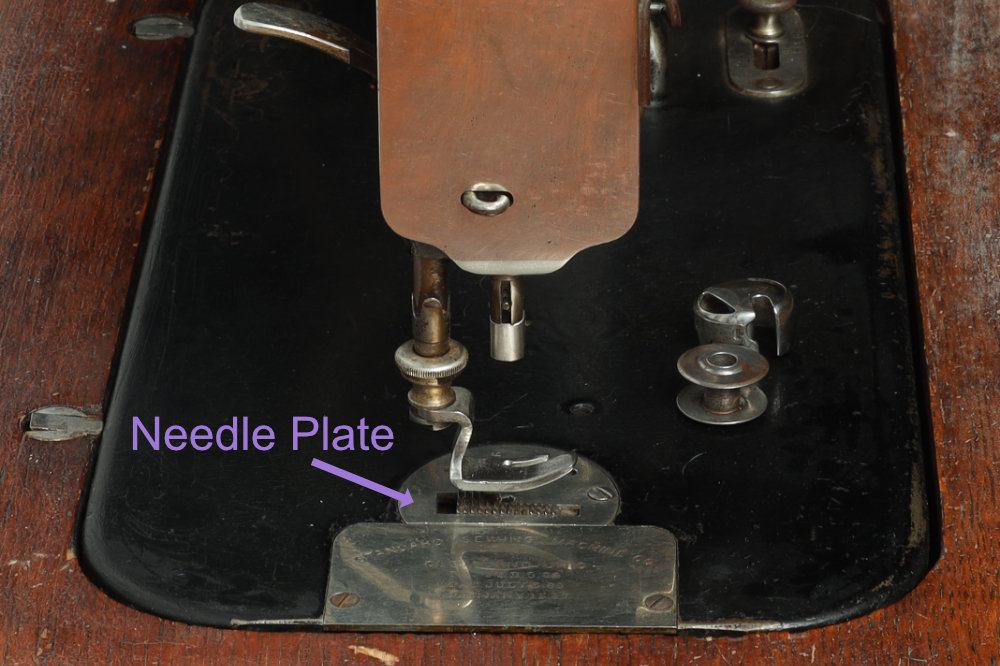
Standard Machine
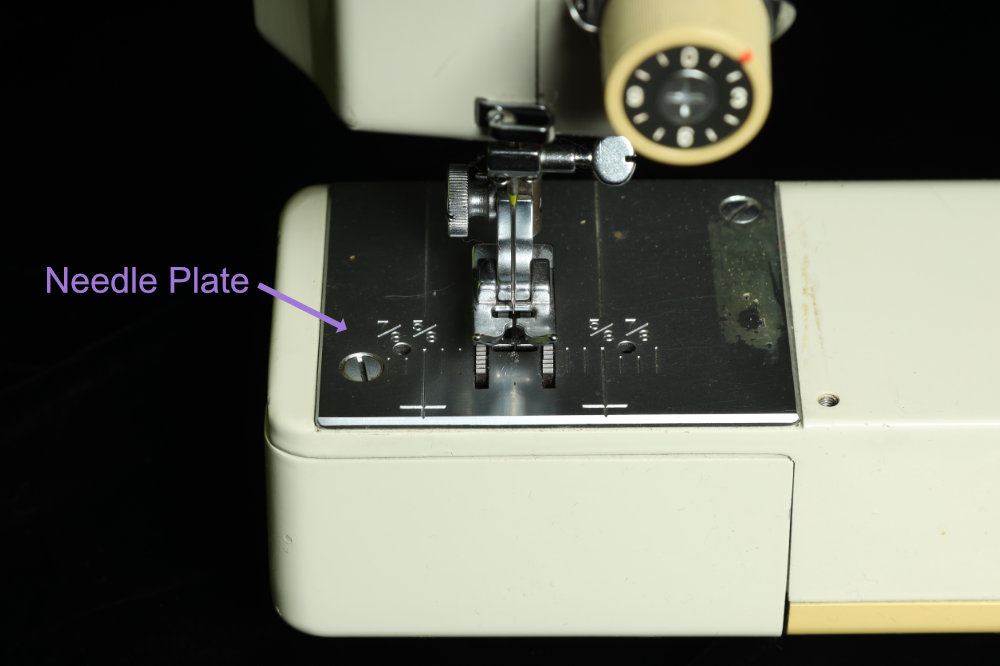
Kenmore Machine
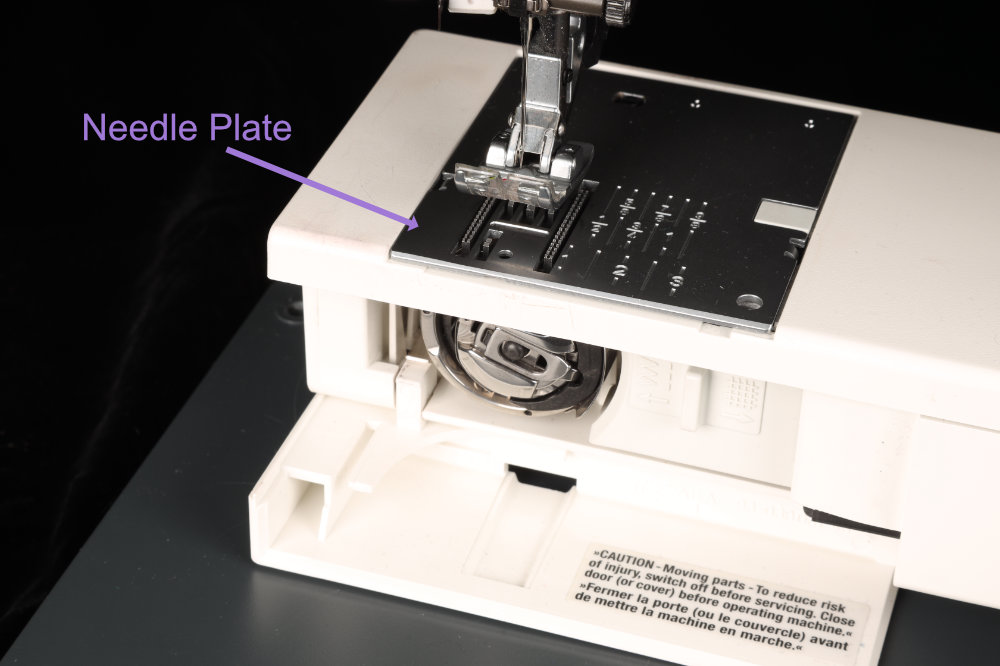
Pfaff Machine
Feed Dogs
The feed dogs are what pull the fabric through the machine for you.
On some machines, you can drop them to do "freeform stitching".
On my Pfaff, there's a tiny little extra feed dog that sits just in front of the presser foot on the left side that will help pull the fabric through for very narrow strips of fabric.
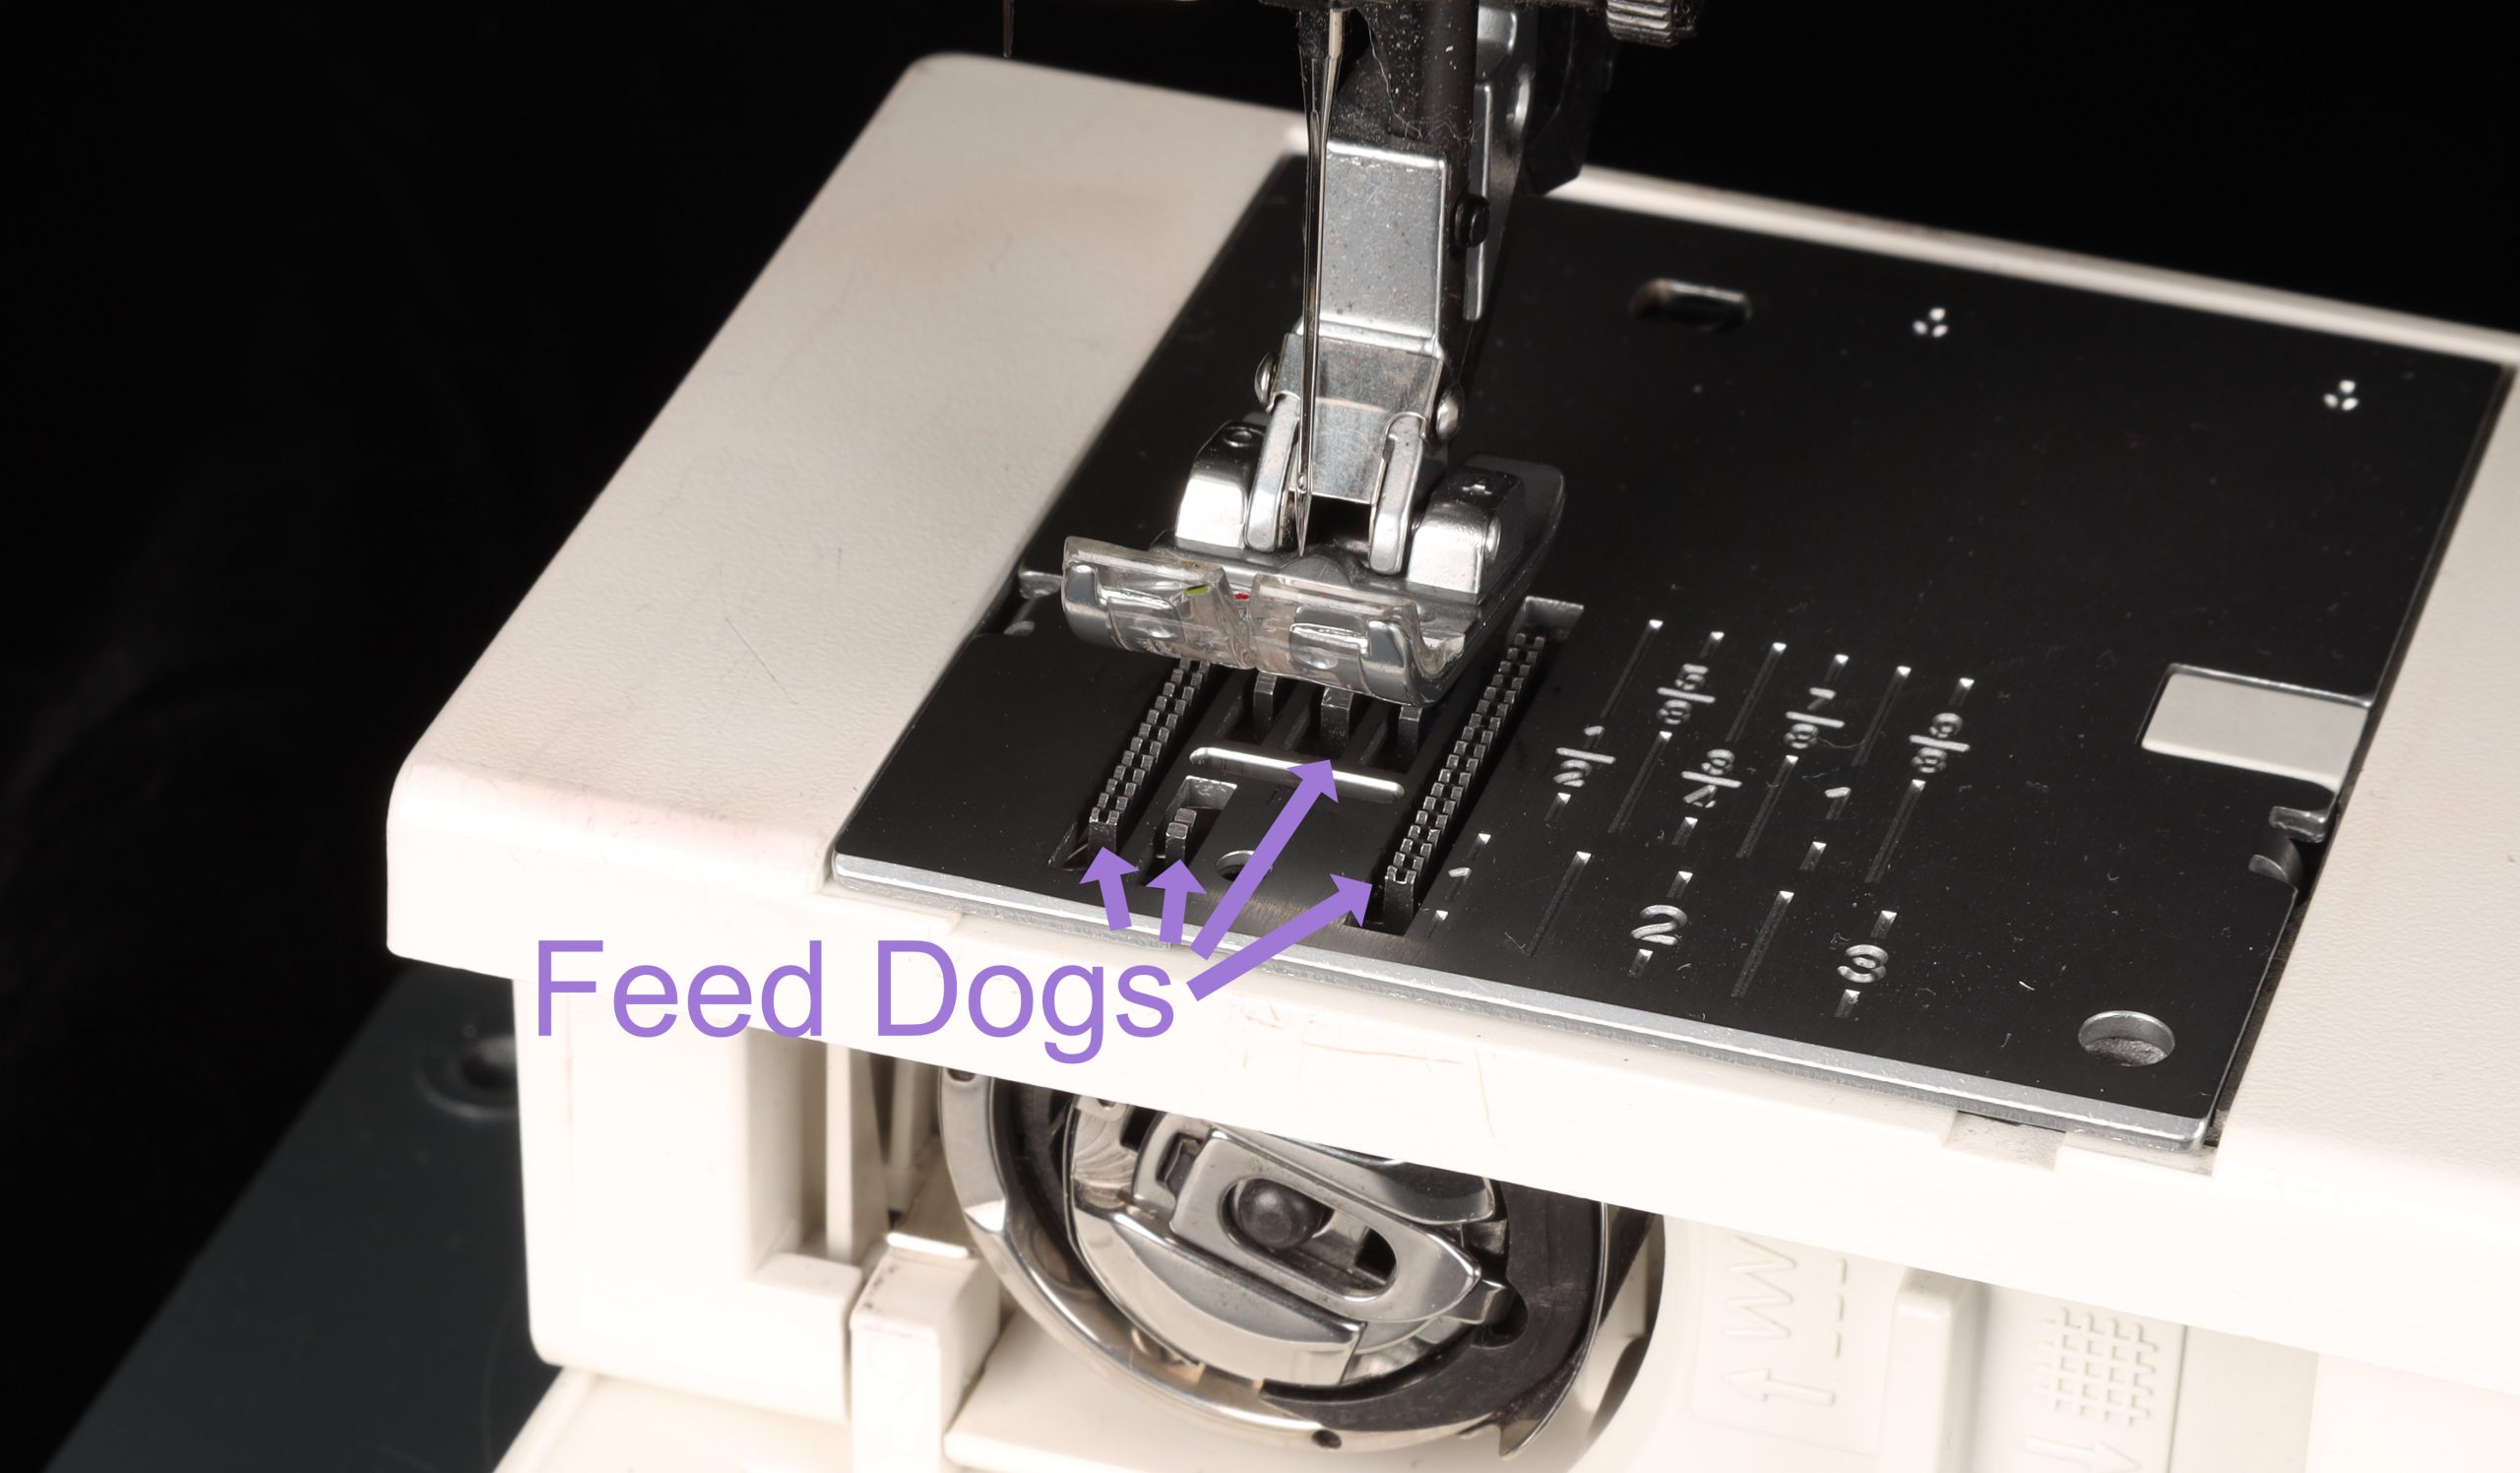
Pfaff Machine
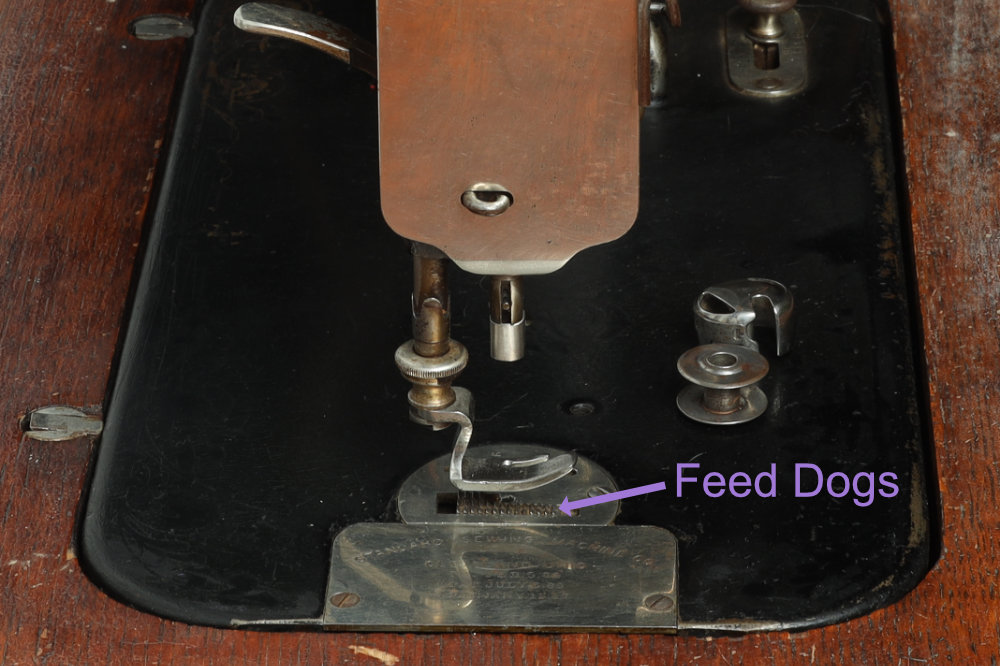
Standard Machine
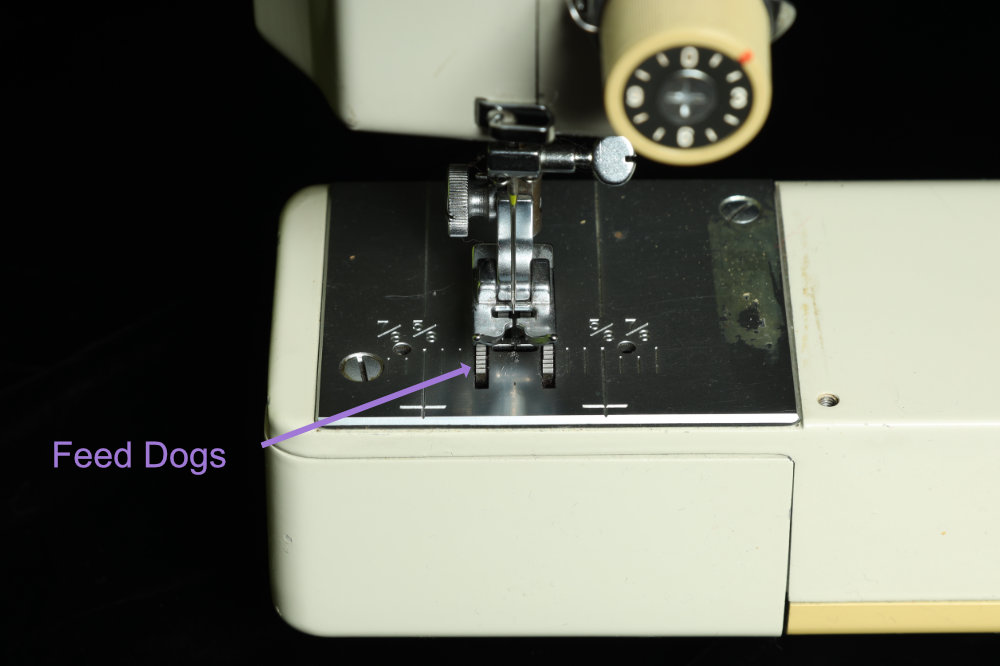
Kenmore Machine
Hand Wheel
Every machine has a hand wheel. This allows you to manually turn the machine and make the needle go up and down. This is great for starting stitches when you don't want to go really fast.
Also, if your machine doesn't have the ability to always end with the needle up or down, you will need to use the hand wheel to turn it so when you stop stitching the needle is in the position you want it in.
I also use it when threading the machine. I like to hang onto the top thread and turn the hand wheel once so that the needle goes in and the thread gets looped with the bobbin thread so I can pull the bobbin thread to the top side. I've had issues when leaving it down there.
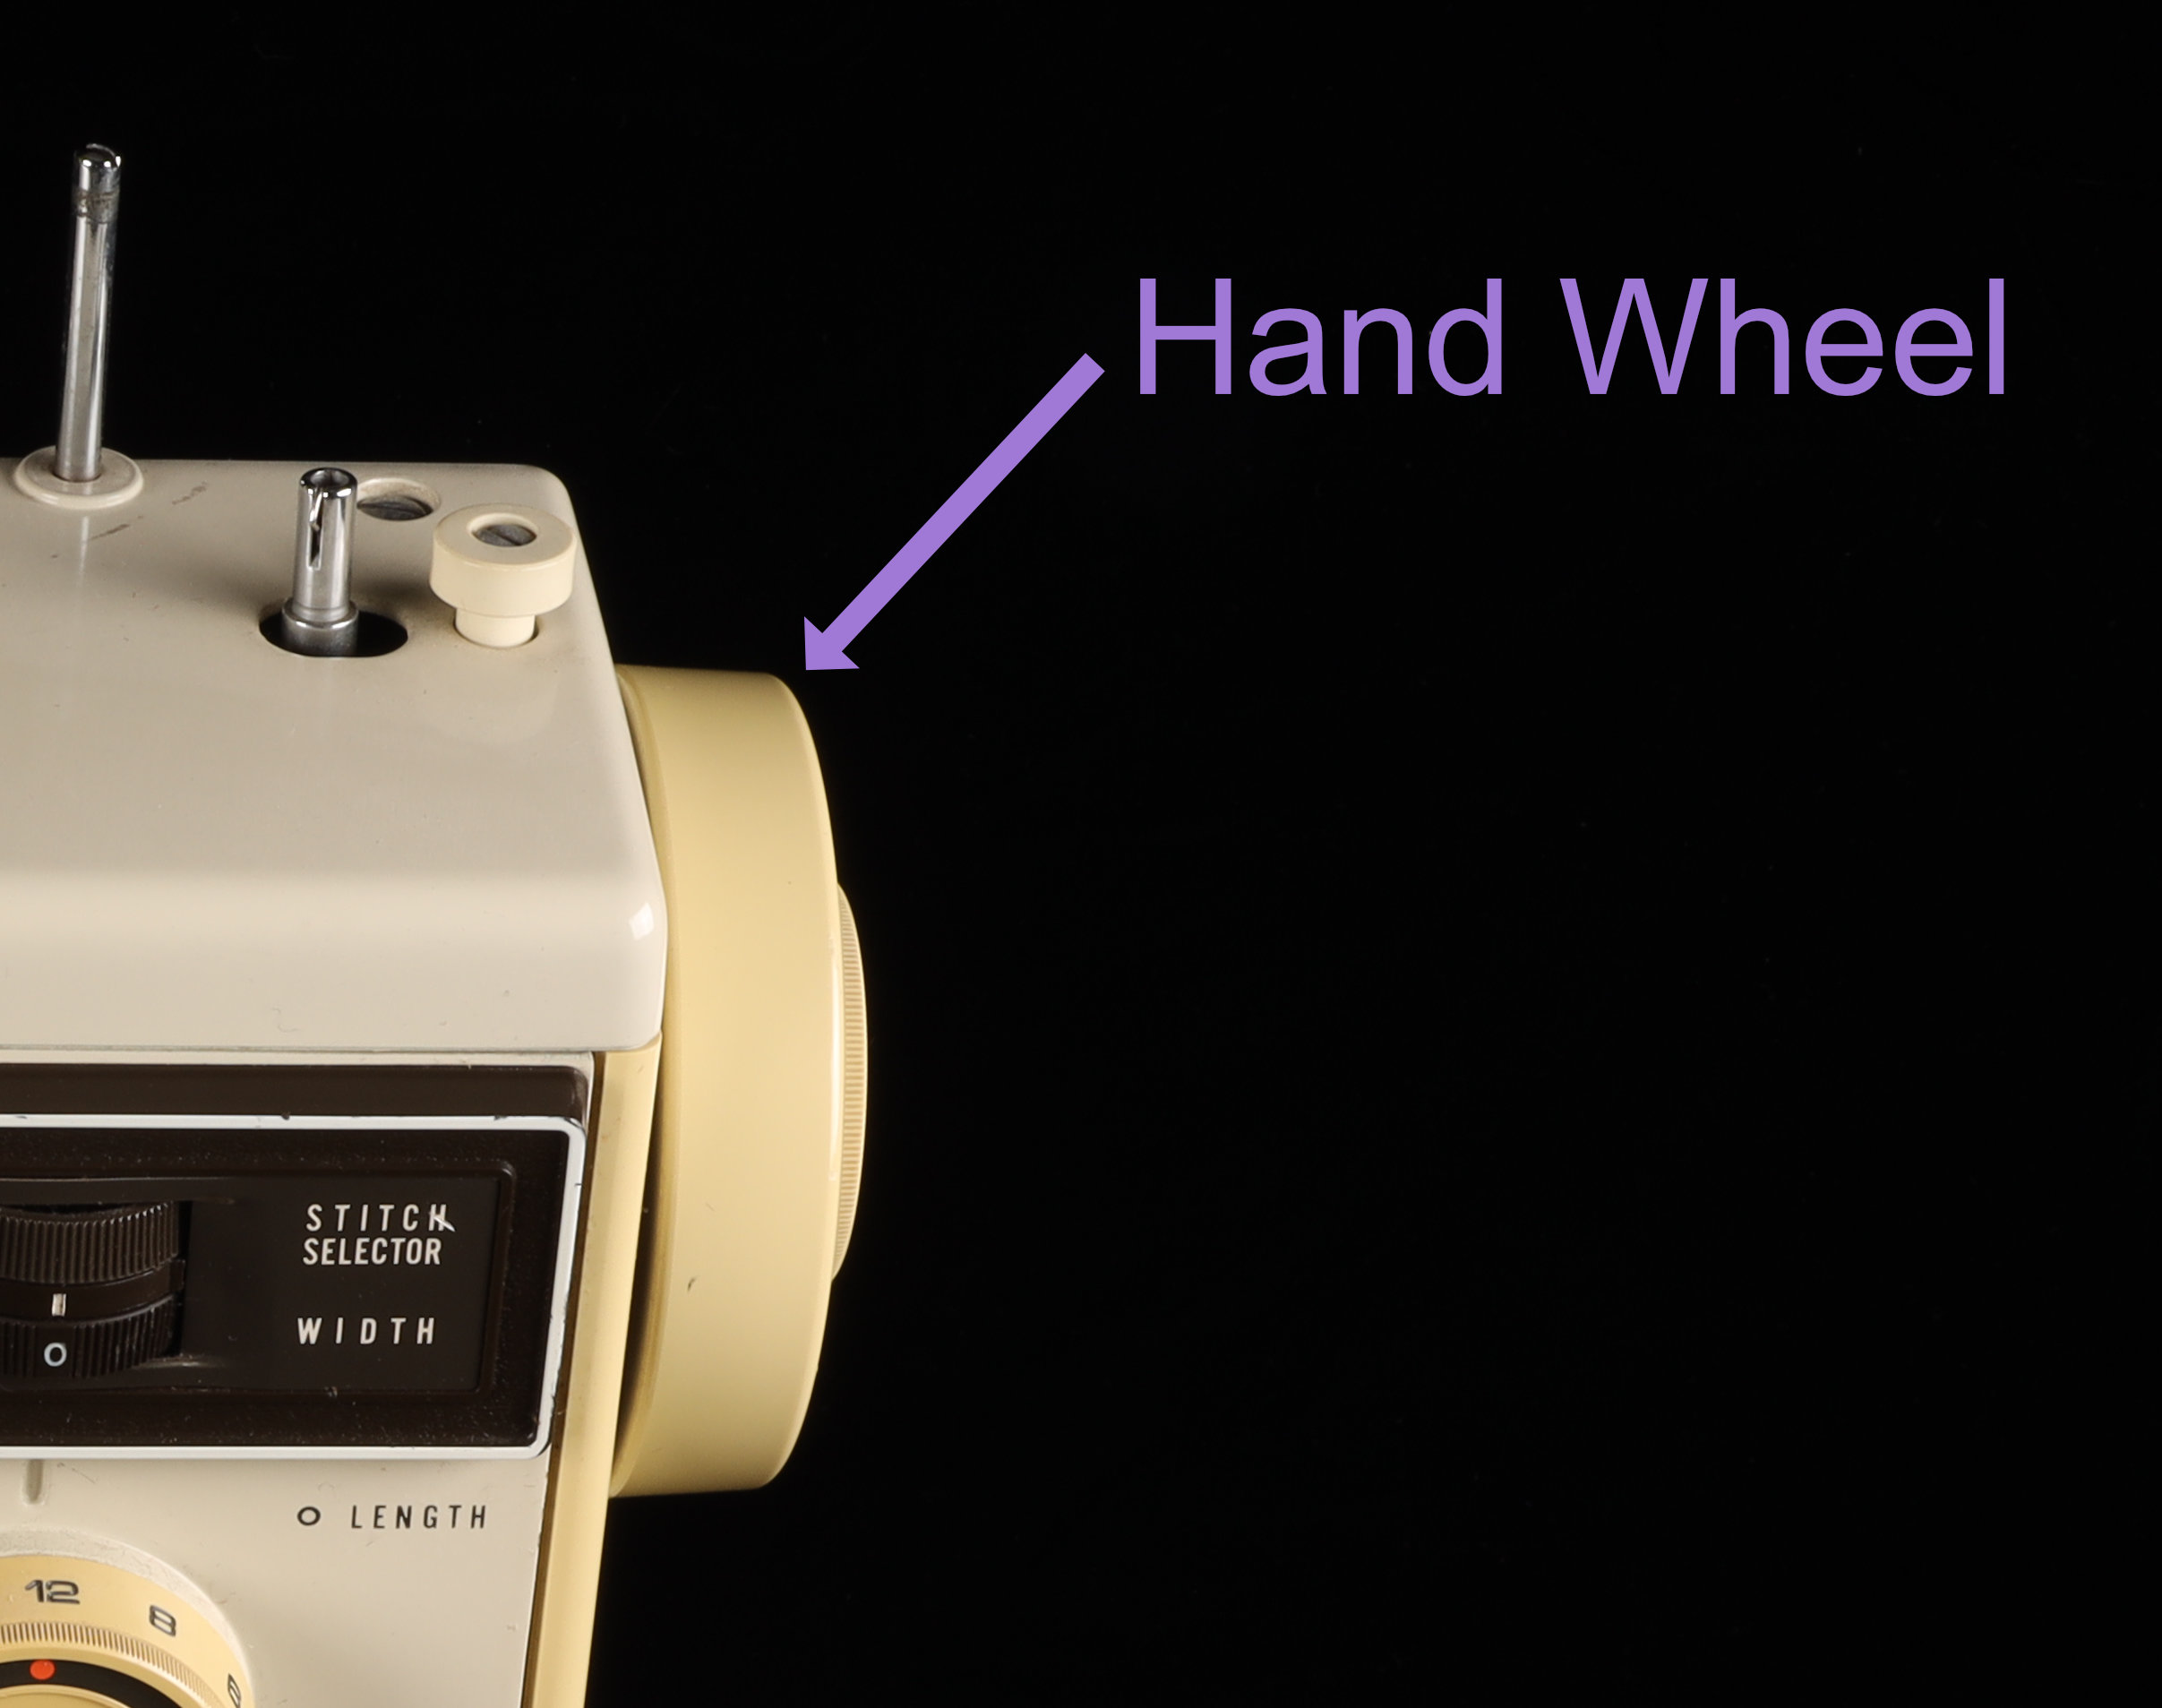
Kenmore Machine
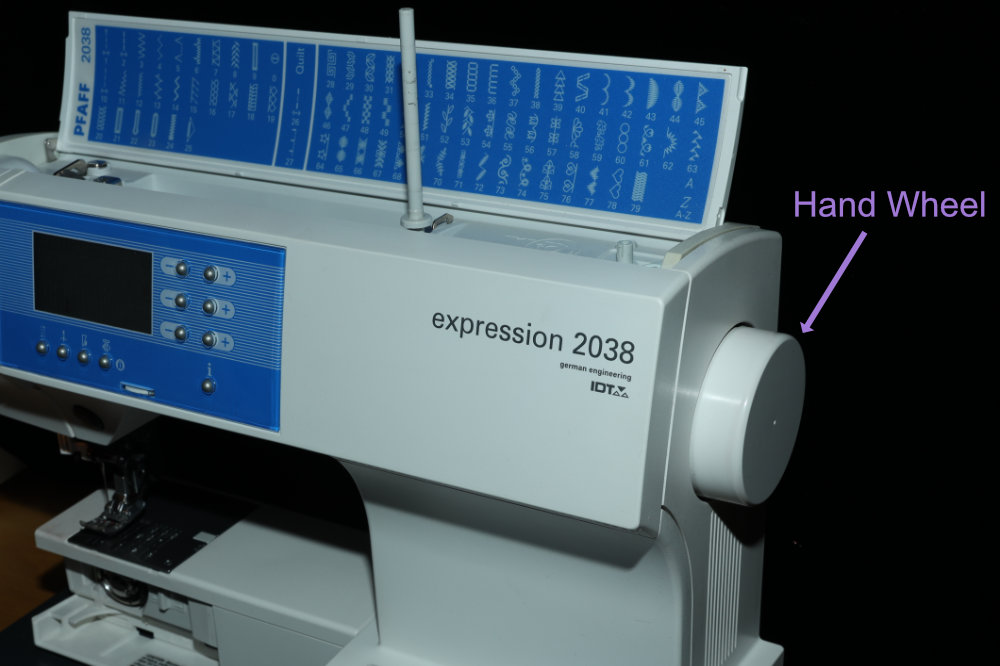
Pfaff Machine
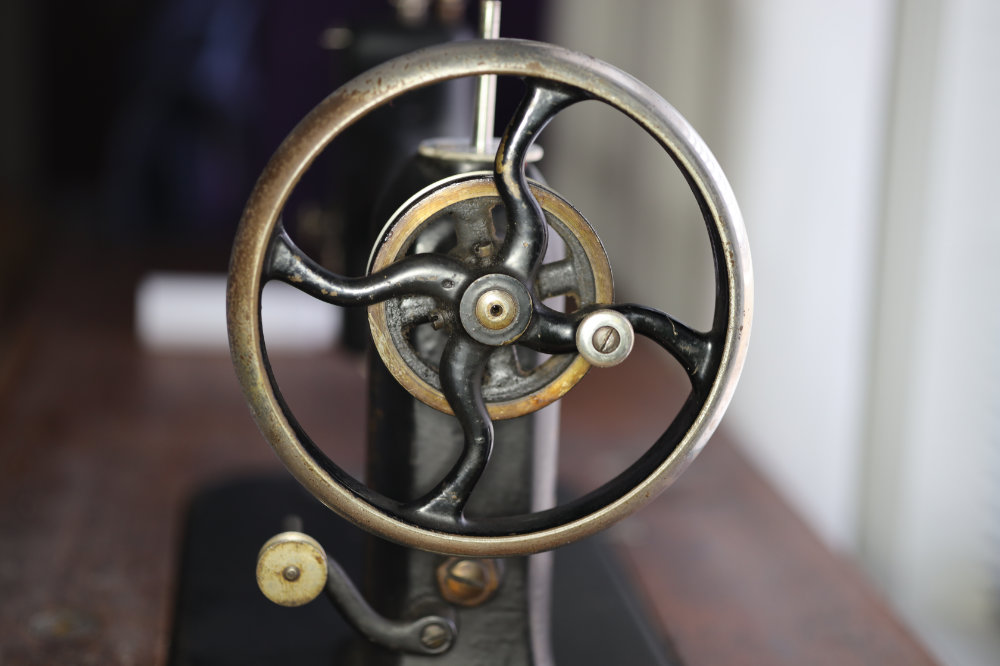
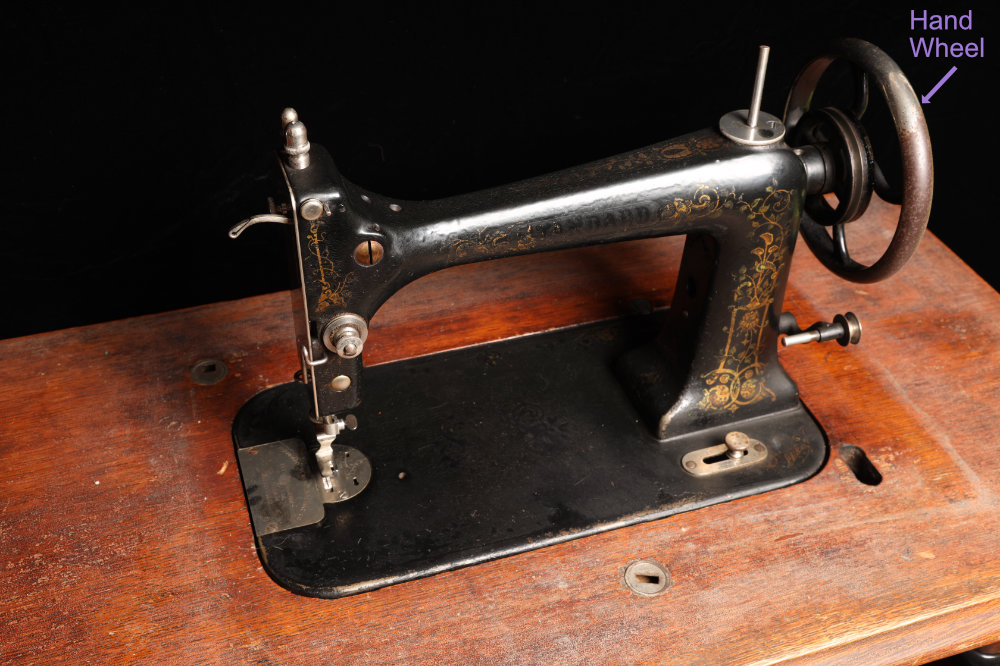
Standard Machine
Foot Pedal
Modern machines are controlled by a foot pedal. Think of it like the gas pedal on your car, but there's no brake pedal.
You can control the speed at which you sew by varying the pressure you put on the foot pedal (I think some computerized machines also have a slow-sew setting so it limits how fast the machine will go even when you stand on the pedal).
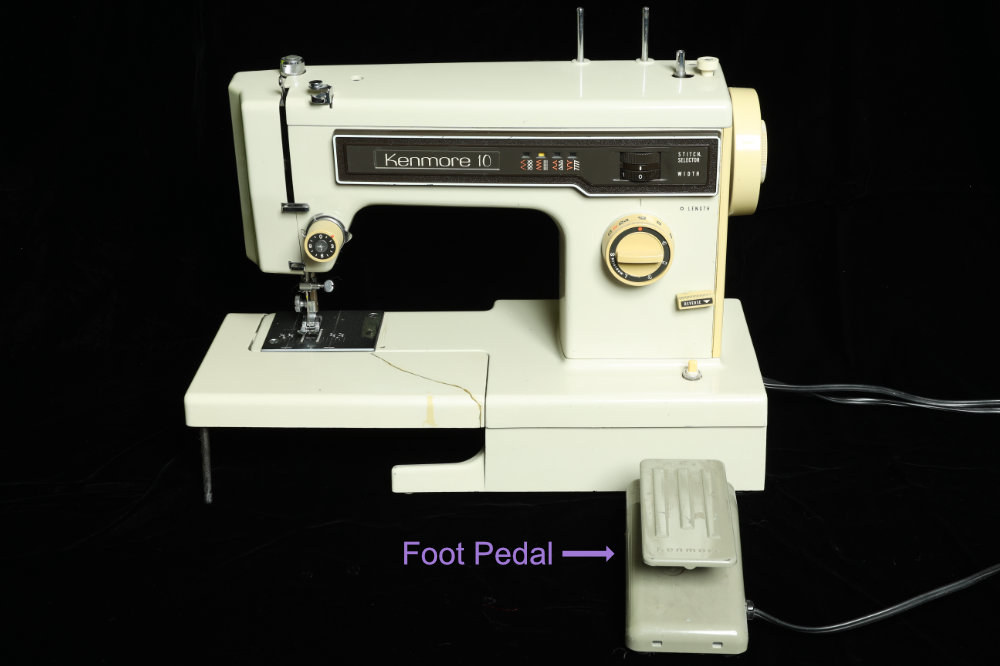
The Standard is a treadle controlled machine which means it's run by a belt that is powered by a foot treadle. You get exercise using this machine.
One thing to keep in mind. If you are doing anything with your needle, like threading it, or changing the bobbin, it's best to not ever touch the foot pedal. Most machine manuals will tell you to power off when doing things like this to prevent accidents.
Common Controls for Adjustments
On older machines, the following adjustments are typically made with dials or sliders. On more modern machines, they may be part of the stitch selection settings and done on a screen in the computer. Some machines (like my Pfaff) have a mixture of control types.
Thread Tension
The top thread tension is often controlled by a dial if it's not electronic. The Kenmore and Standard have theirs on the front. Whereas my Pfaff has tucked it's on the side. Both the Kenmore and Pfaff have numbers indicating the setting. I don't know if there is any standardized tension settings. But I do know that I adjust my tension according to the thread I'm using, and the stitches I want to make. If I want to make a stitch I can easily rip out, I lower the tension.
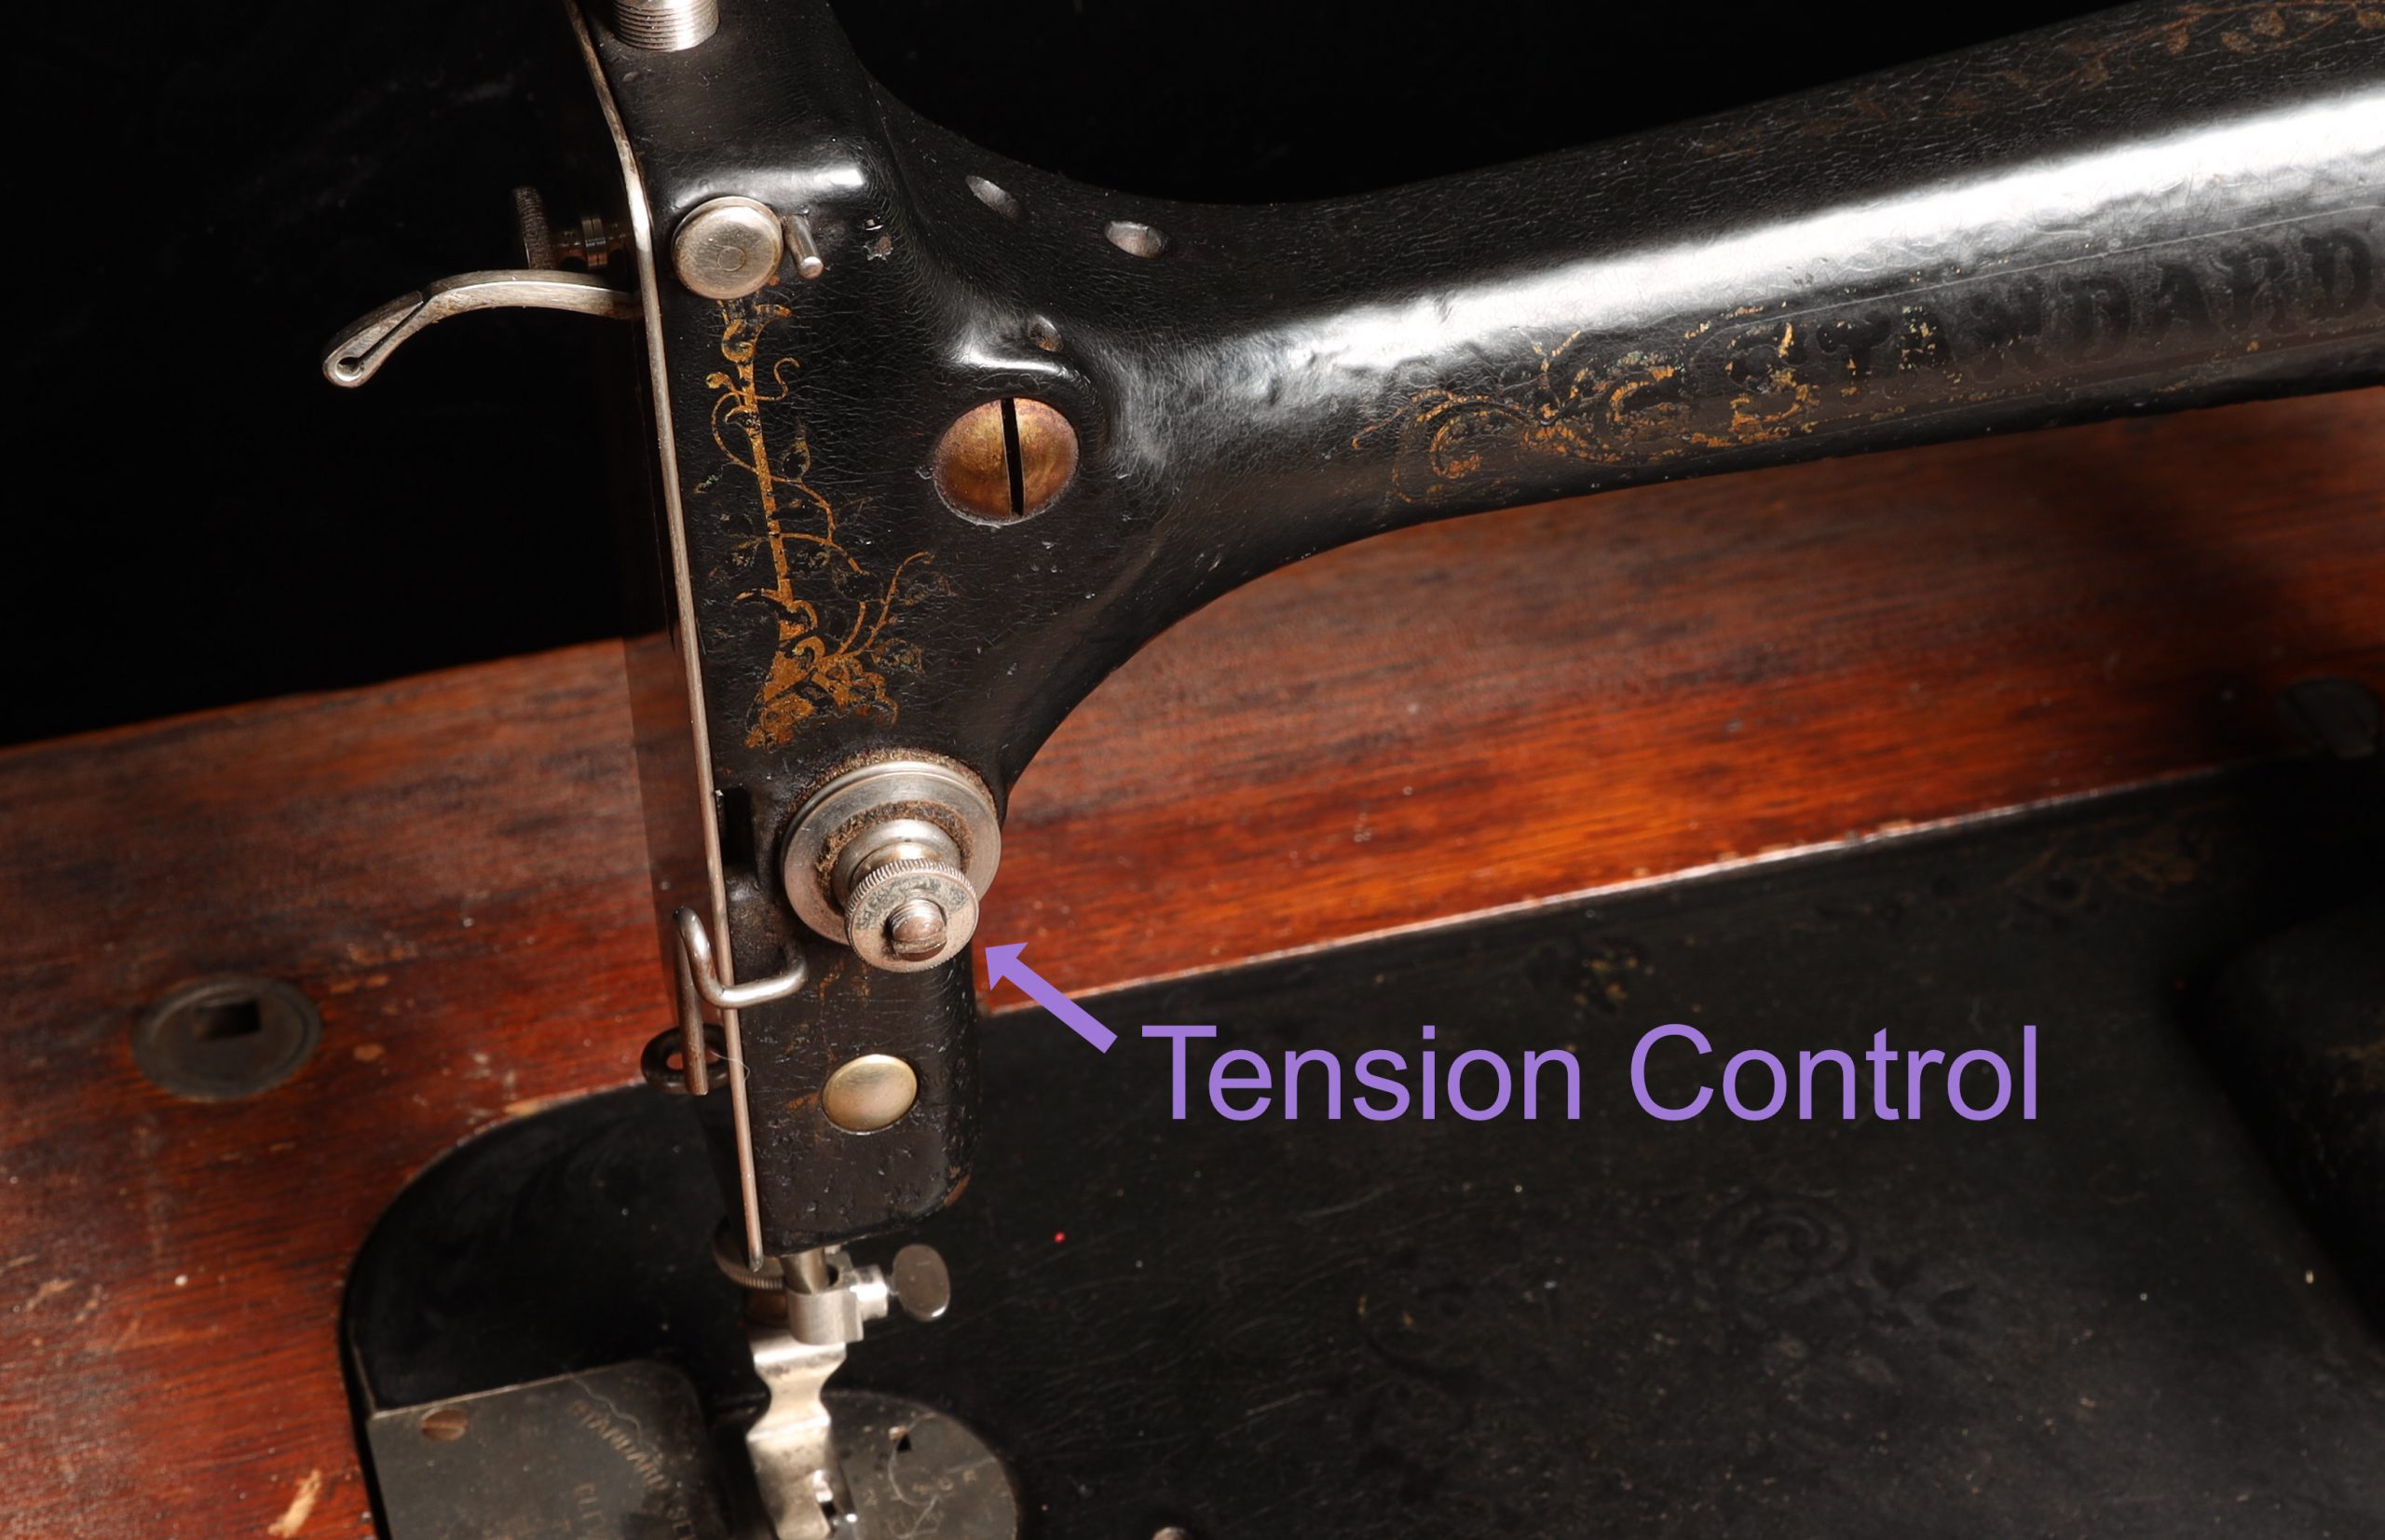
Standard Machine
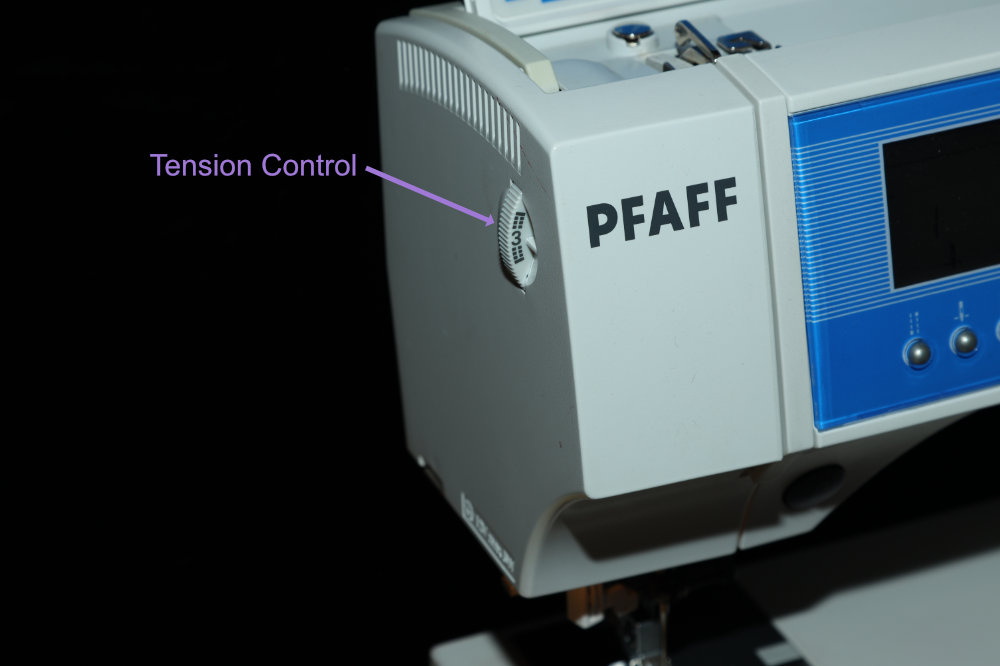
Pfaff Machine
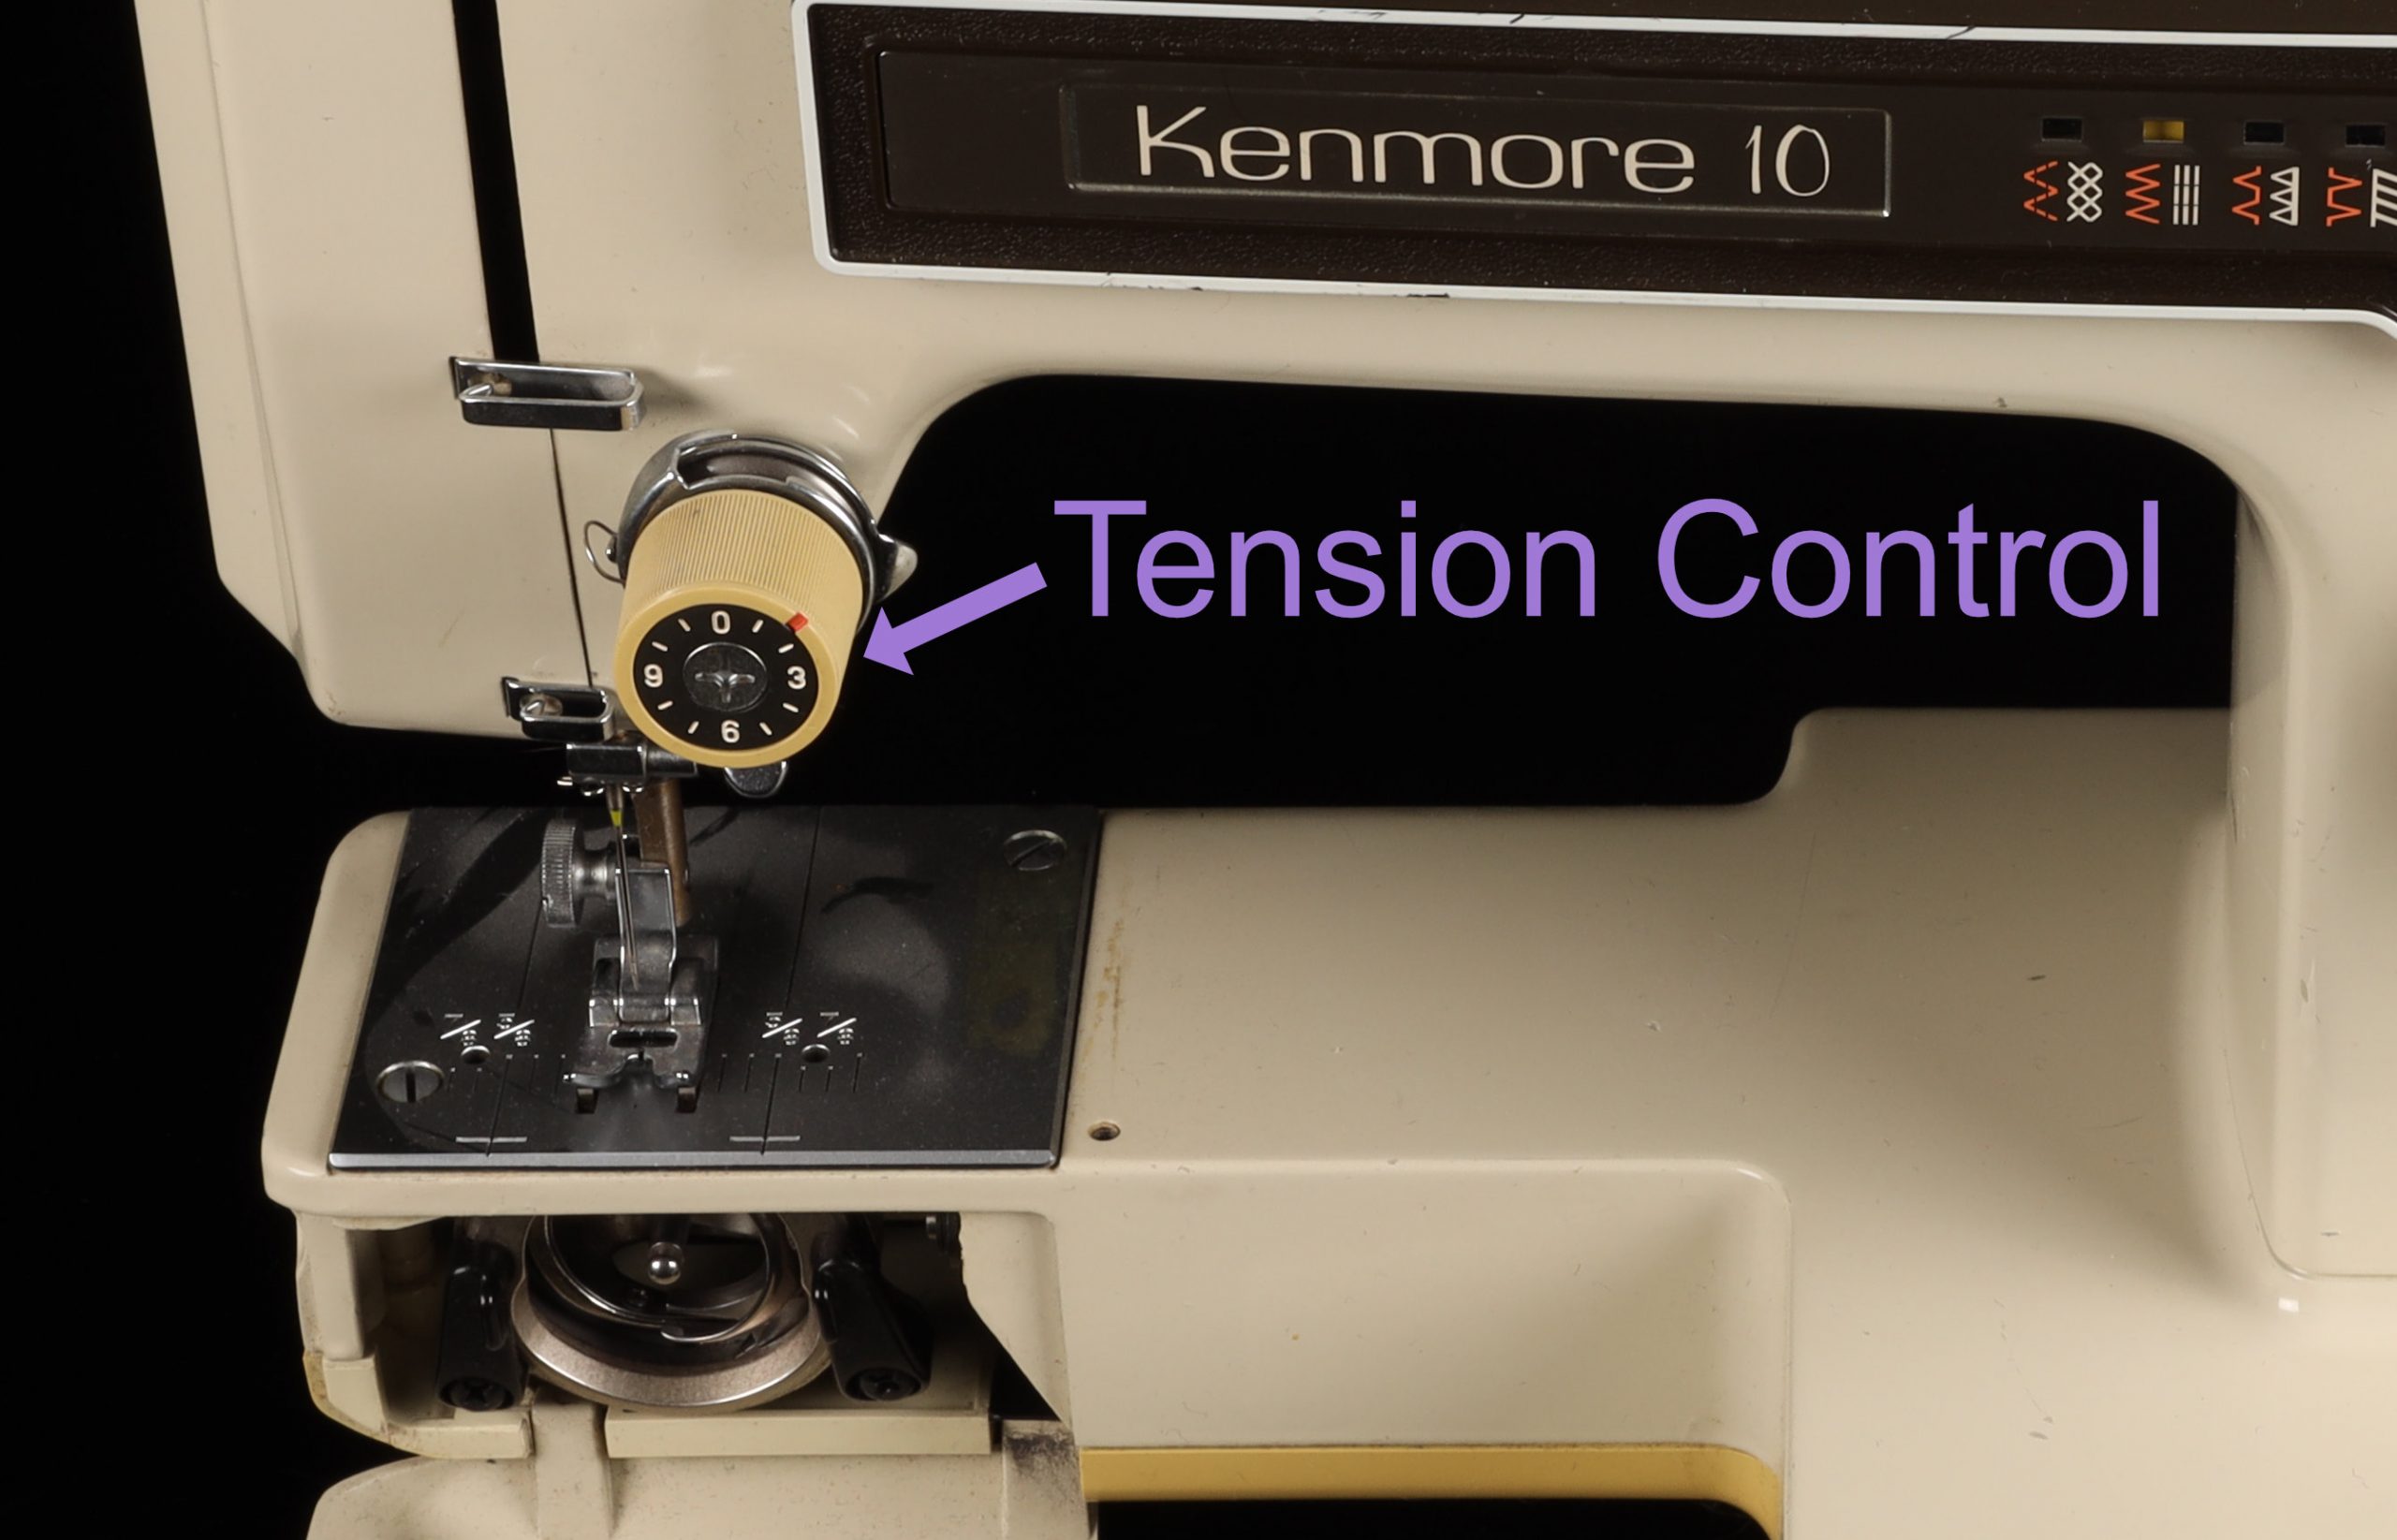
Kenmore Machine
However, if the tension is too great, you'll have crappy stitches.
For bobbin tension, it's controlled much less elegantly on those machines that have the metal bobbin case. There's a little screw that you can loosen or tighten as needed. I'm not sure how (if) bobbin thread tension is adjusted in the horizontally configured bobbins. So, if this is your machine, check your manual.
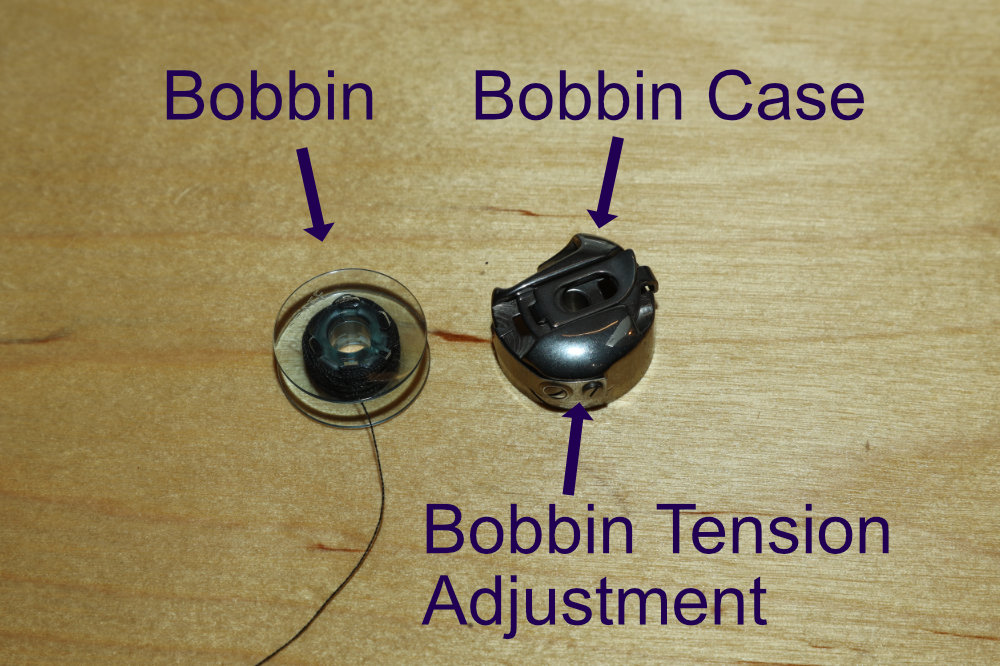
Tension is typically only adjusted if the thread balance is off when you stitch. That is, if you see your bobbin thread up top, or your top thread on the bottom, you'll need to adjust your tension.
Stitch Length
On computerized machines, the stitch length is typically controlled electronically. But older machines typically have a dial or slider that controls it.
Stitch length is often expressed in millimeters, so a setting of 2.5 means each stitch will be 2.5 millimeters long. However, I have seen some machines expressed in stitches per inch. Which means a setting of 2.5 would be a VERY long stitch, and a more common setting would be somewhere between 10 and 12.
I'm guessing the age and origin of the machine would contribute to the measurement. My Kenmore, from the 70s (I think) is in stitches per inch. But the Pfaff is in millimeters.
Stitch Width
Computerized machines will have this adjustment available electronically.
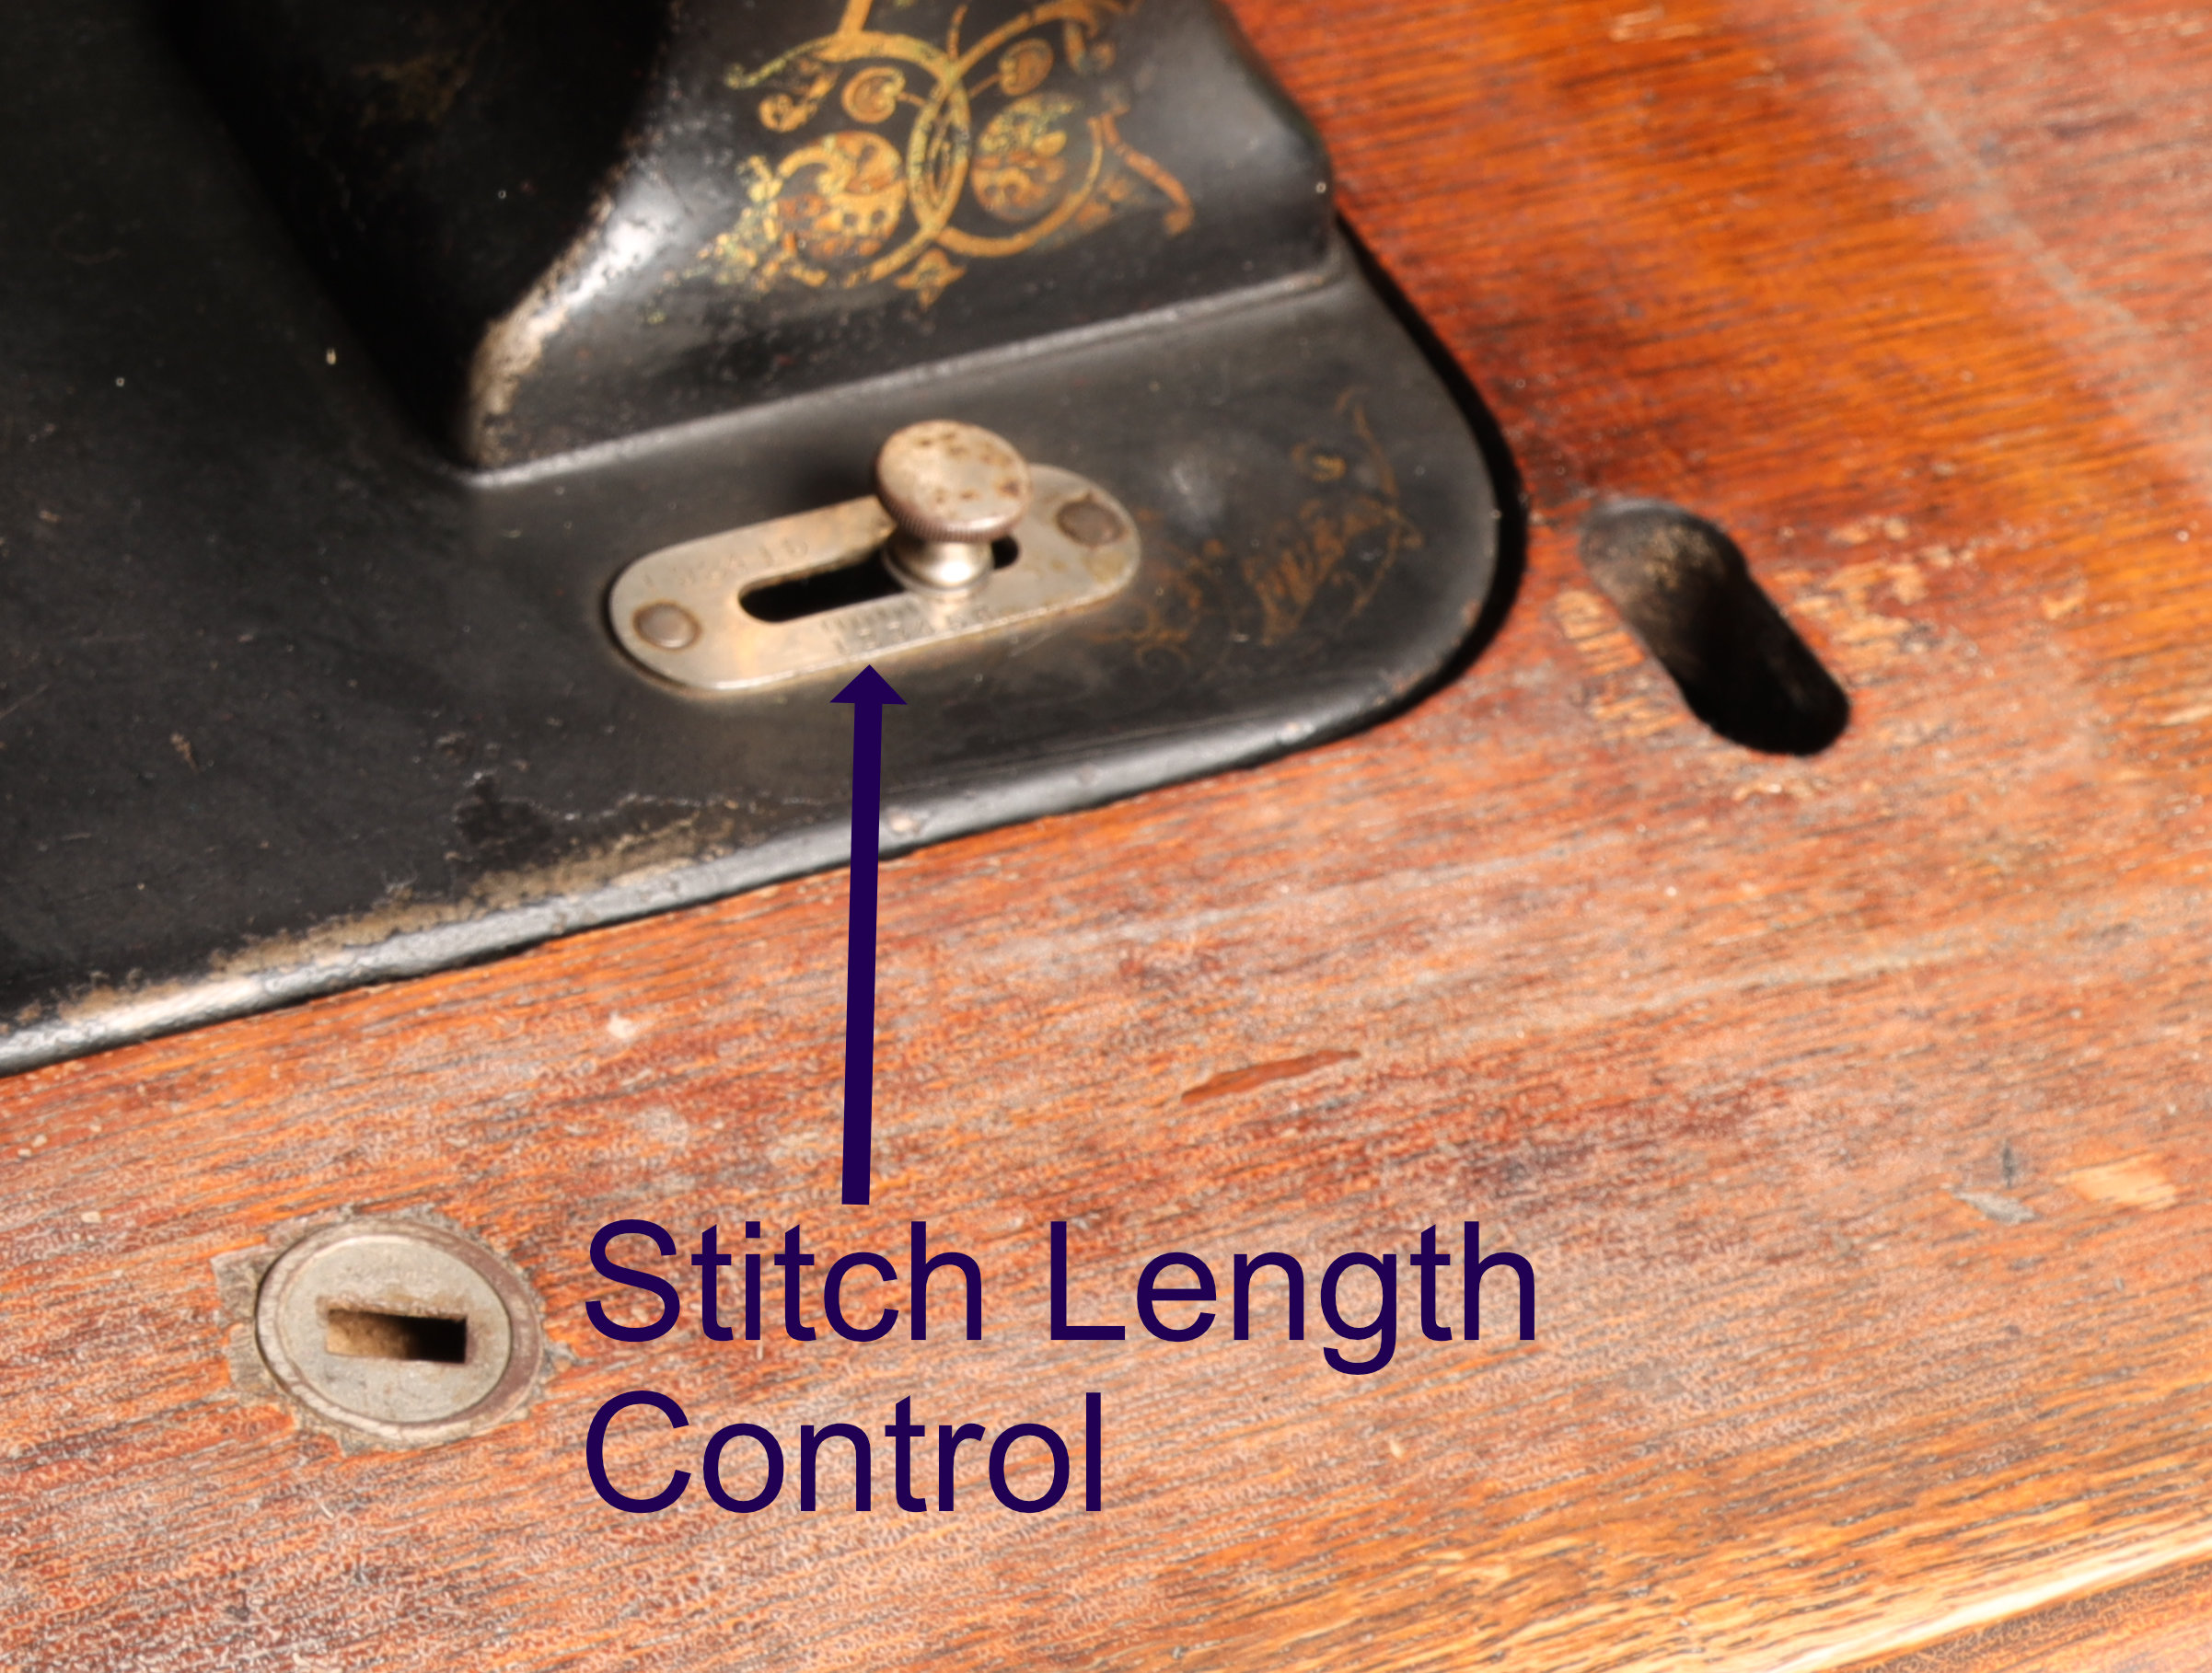
Standard Machine
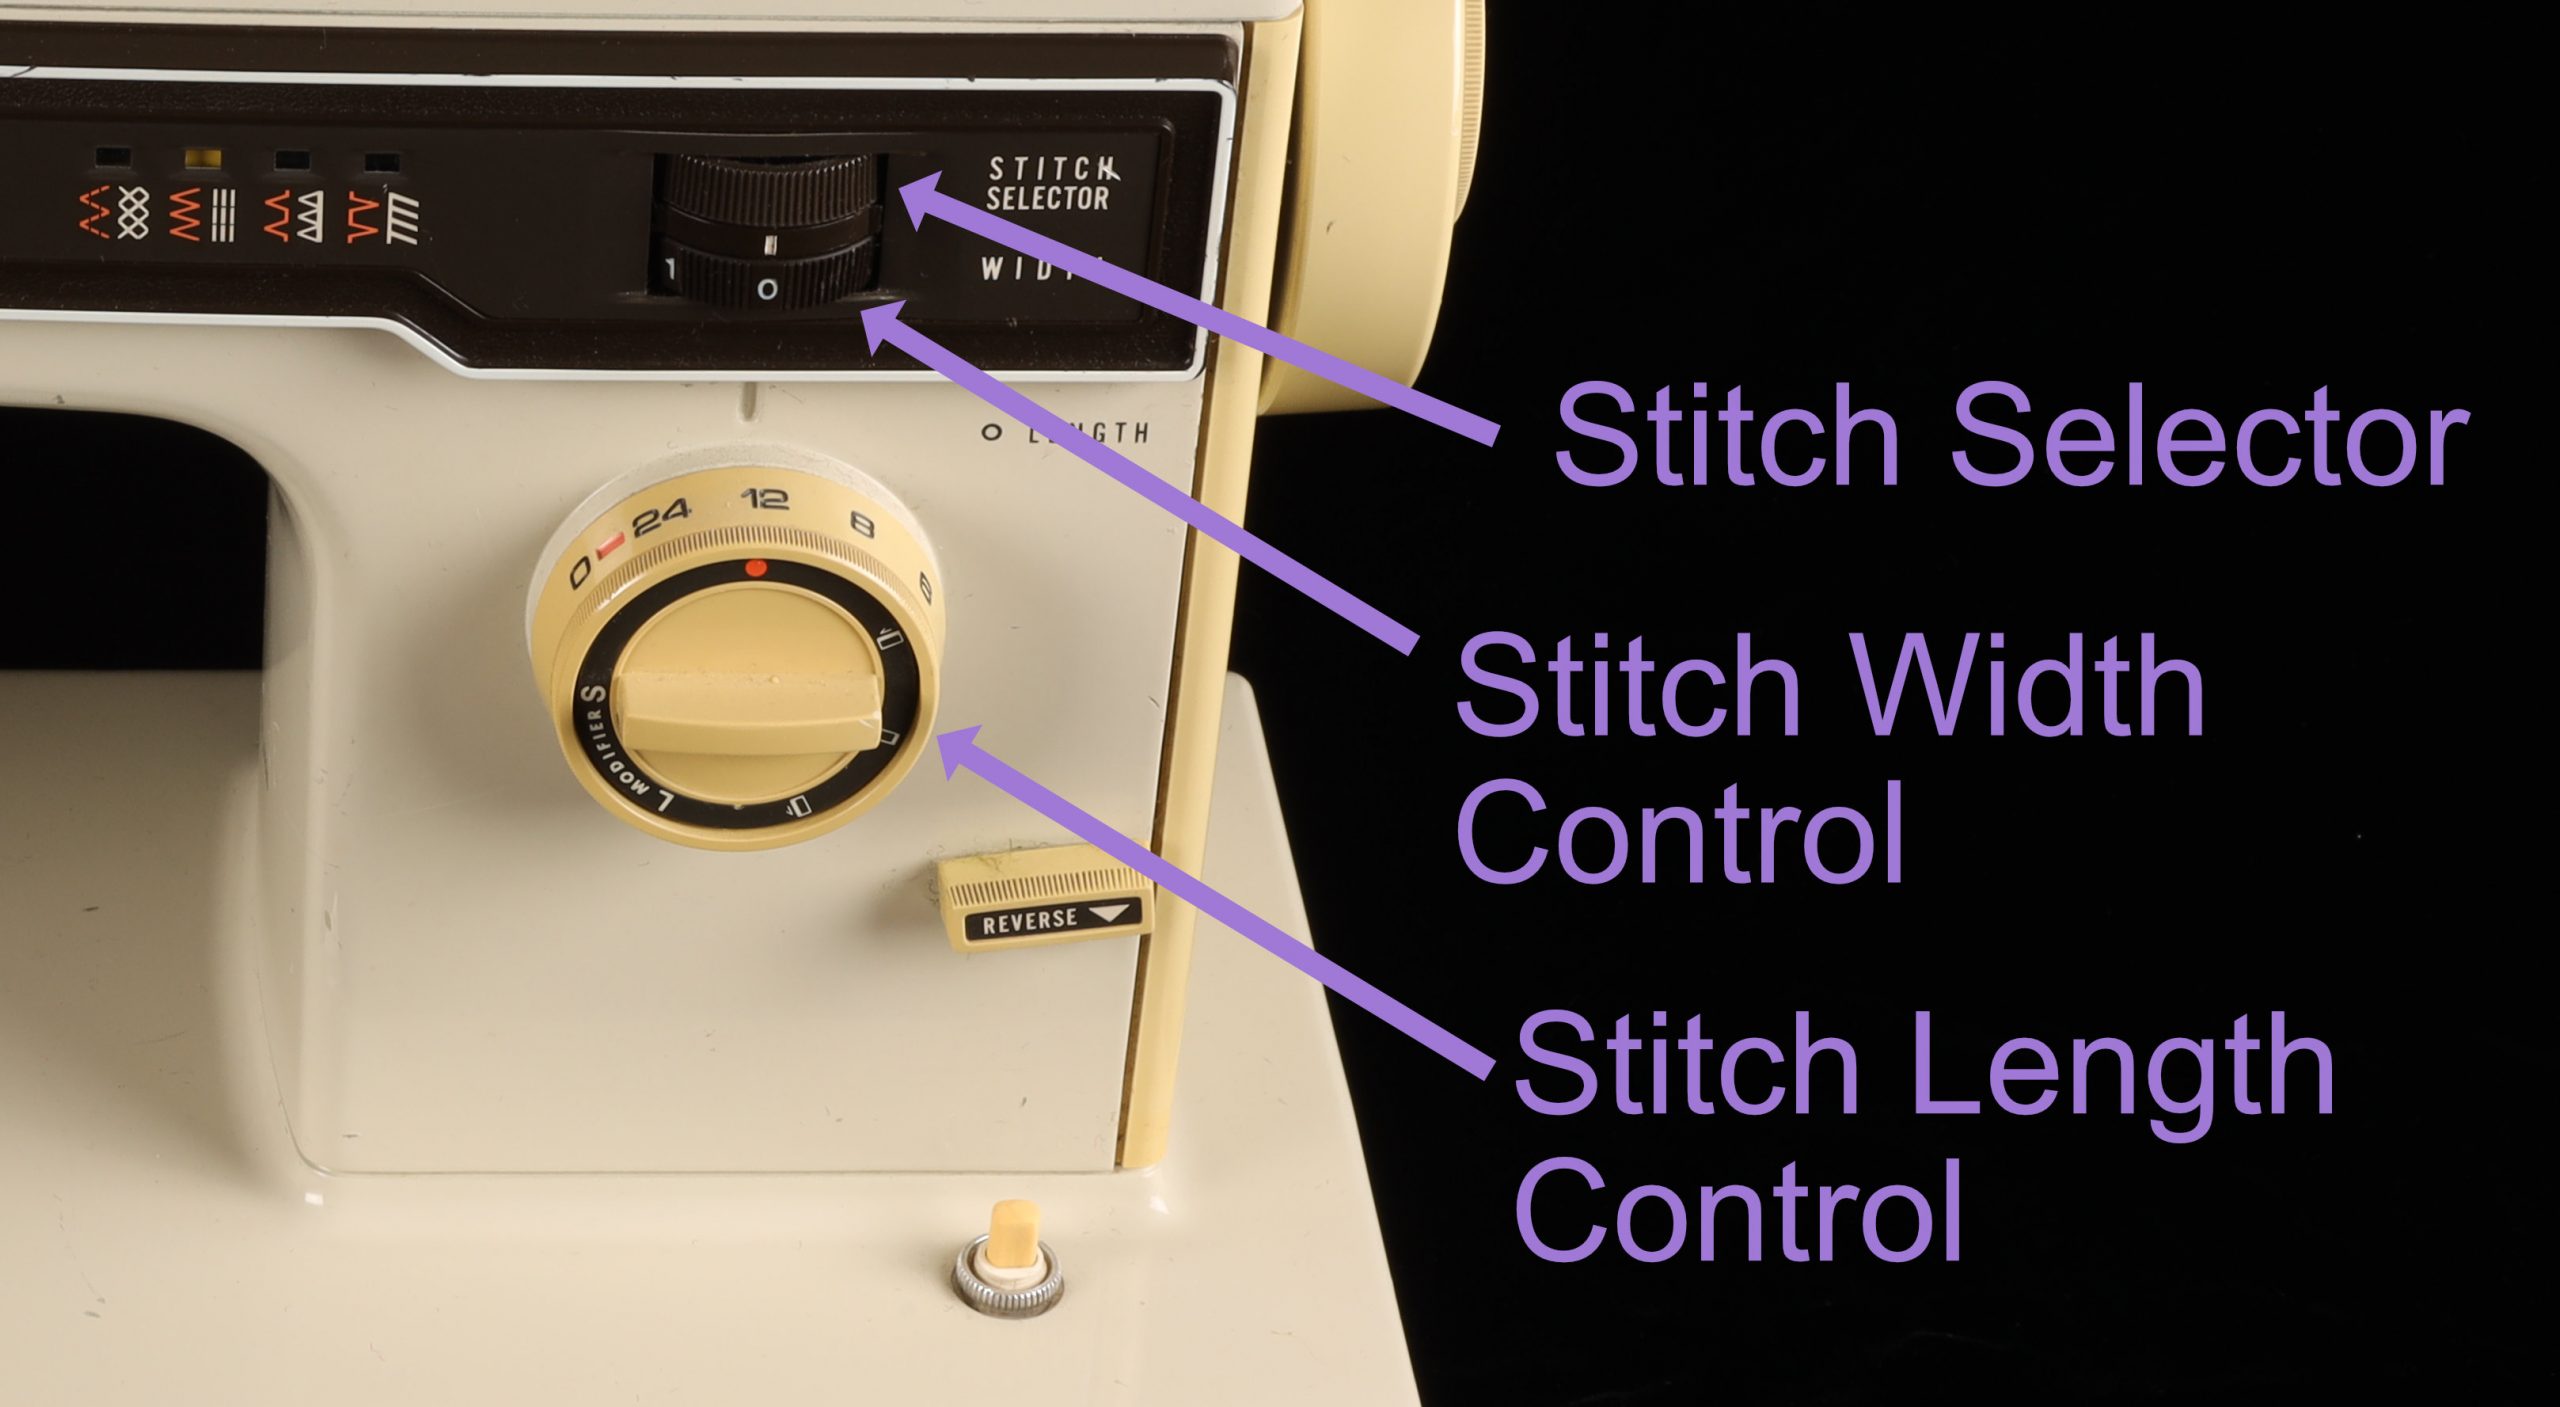
Kenmore Machine
Older machines may have a dial or slider to adjust the width. (Like my Kenmore)
Even older machines like the Standard, don't actually have the ability to go side to side with the needle so changing stitch width isn't an option.
Stitch Selector
Older machines may have an external dial for selecting the stitch. The standard does one stitch - Straight, there's no selection. The Kenmore has a handful of options.
The Pfaff? Well, it's computerized and does a whole plethora of stitches (something like 79 plus an alphabet). And it's not even an embroidery machine.
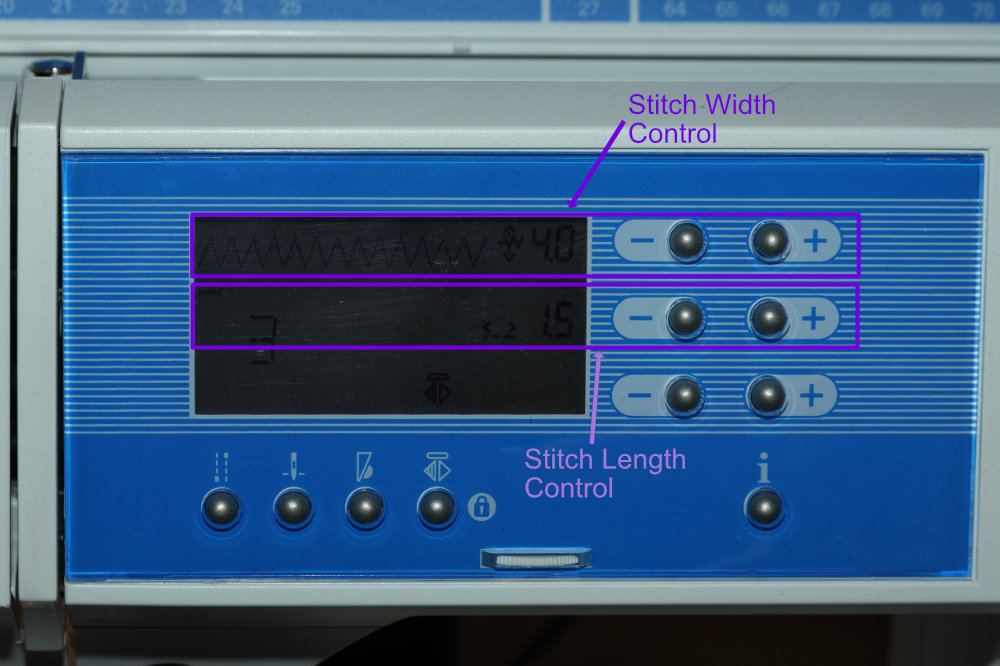
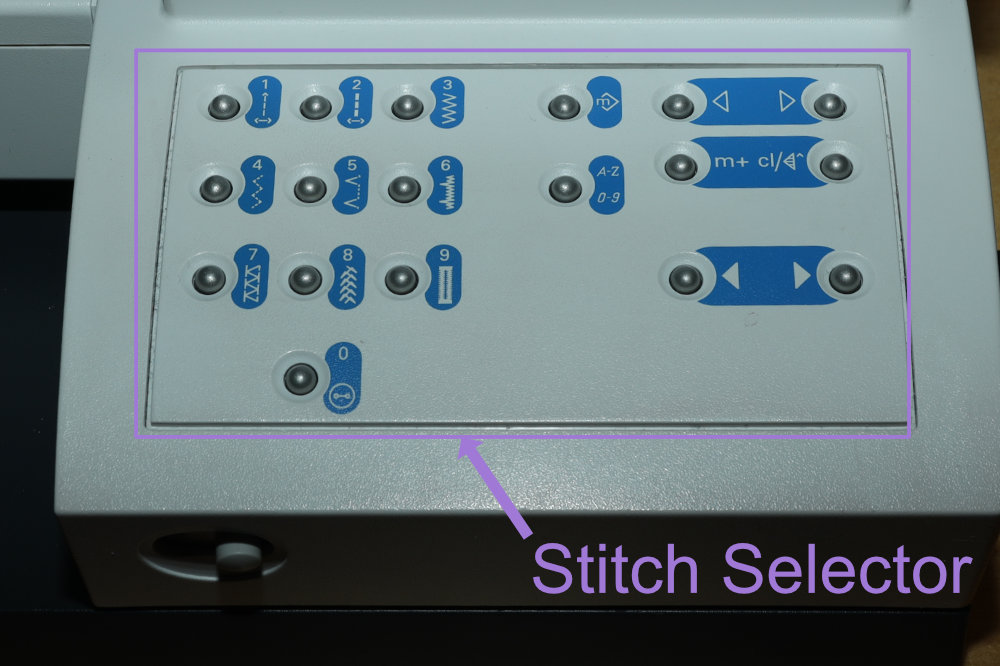
Pfaff Machine
Conclusion
If you're just getting started with your machine. I encourage you to see which of the above things I discussed you can identify on your machine.
If you haven't already, you should do a read-through of the manual. (I'm still learning things from mine.) And if you got your machine second-hand, definitely see if you can find the manual online. It's worth it. The manuals also have troubleshooting guides for many problems you may encounter.

