Fabric
Grain – The direction of the fabric parallel to the selvage. The grain of the fabric runs along the length of the fabric (not the width).
Interfacing – Specialized fabric that is meant to add support or firmness to various pieces of a garment. Interfacings come either fusible or non-fusible (sew-in) and can also come in a variety of types.
Interlining – Interlining is a fabric used between the lining and the fashion fabric. Often it’s added for warmth such as batting or insulation in outerwear. It can be constructed as part of the garment or as a removable layer.
Knit Fabric – A knit fabric is made by a machine that can loop a thread of fiber into the previous row of fibers. The “row” being made is made across the grain of the fabric, and a knit fabric will have a grain running the direction the fabric is made. There are multiple types of knits and they all bring different characteristics to the party. Most knits stretch. Though some stretch so little, they behave almost like wovens. Some stretch so much and in both directions that they can be used for very close-fitting garments without any issues.
Lining – Lining is fabric used on the inside of a garment not visible on the outside. It’s typically made separate from the garment and attached at key places such as waistbands in pants or skirts and collars in jackets. It’s often slippery so that the garment slides on and off easily and doesn’t cling to the wearer. It is often used to hide the construction (seams and seam allowance) on the inside of garments.
Nap – For fabrics “with Nap” they typically have some sort of pile or fuzz on them. And are typically directional (they appear different when hung right side up, to upside down). Not all fuzzy fabrics are napped. And not all fabrics that are directional are fuzzy. A fabric with a printed or woven design may be directional and require to be cut using the directions for napped fabric.
Pattern Repeat – for printed fabrics or fabrics that have the pattern or design woven or knit into them, they typically have a repeat of the pattern motif. For example, a floral pattern may have a specific flower that repeats every so often. The distance between the two instances of the same flower in the same direction, on the same line, is the pattern repeat. Some patterns have a design element that repeats on multiple “lines” of the fabric, but the repeat of the pattern is measured only on the same line.
Selvage – The edges of the fabric that are not cut. On a woven, this is pretty obvious and won’t fray. On a knit, it could be a little less obvious, and I’ve received chunks of fabric that didn’t have an obvious selvage because it appeared to be cut off. But on a knit sometimes it’ll curl, or look like there’s a glue on it. It’ll be easier when you buy the fabric in-person to see because it is the edge that isn’t cut by the person cutting the yardage for you.
Underlining – Underlining is fabric that is added to the fashion fabric. Often for opacity (To make it less see-through) or for body or structure. It can add weight to a lightweight fabric so that it hangs better for the pattern you are using it for, without adding as much stiffness like interfacing might. Typically it is cut out of the same pattern pieces as the fashion fabric, basted to the wrong side of the fashion fabric, and then the two pieces are treated as one during construction.
Right Side (Of the Fabric) – The fabric typically has a “right side” sometimes could also be referred to as the “correct side” and is the side of the fabric that will face out and be seen when the garment is worn. I think of it as the “face” of the fabric.
Woven Fabric – Fabric that is woven is manufactured on a loom with threads going lengthwise for the loom and the crosswise threads are inserted into the lengthwise fabrics in some pattern (etc. over, under, over, under). A woven fabric will typically fray on cut edges. Some woven fabrics have a bit of stretch based on the fiber used and the weave used. Most woven fabrics don’t stretch across or with the grain. They typically only stretch on the bias (45 degrees off the grain).
Wrong Side (Of the Fabric)– The wrong side always refers to the side of the fabric that will be inside the garment. This is super obvious when the fabric is printed, since the print will be vibrant on the right side, but not so much on the wrong side. It’s less obvious when the fabric doesn’t really have a right or wrong side.
Pattern
Bias – This is the line that is 45 degrees from the grainline of the fabric. Typically knit patterns won’t be written to be cut on the bias because there is no need. However, wovens can be. The bias of woven fabric has more give or stretch than the grainline or cross-grain.
DOGS (Direction of Greatest Stretch) – for stretch fabrics that stretch both length and crosswise, one may stretch more than the other. A simple test is to pinch 2 to 4 inches of fabric and stretch it out, measure the stretch, then do the same in the other (perpendicular) direction. Whatever stretches further for the same amount of fabric is the direction of greater stretch.
Ease (noun) – The amount circumference different than the body measurements. Sometimes called “Wearing ease”. For example, someone with 40inch hips in the circumference may make a garment with 2 inches of ease, which would make the garment’s final dimensions 42 inches in circumference. Close fit garments may have very little ease. Some knit garments, especially for activewear like sports bras, leotards, and leggings, will have “negative ease”. This means the circumference of the garment is smaller than the circumference of the person wearing it. That same 40-inch hip person might make a pair of leggings with a 38 ” circumference. That’s -2 Inches of ease.
Circle – on a pattern, a circle is used to note the placement of something. This could be a design element. But most likely it is located on the sewing line and notes a place to match to points up, or where to start or stop sewing.
Dart – A dart is a seam that is used to fit the “Flat” fabric around a curved body. It is used to taper the piece of the garment in the middle of the piece rather than the construction seams. Darts can be one-sided or two-sided. A one-sided dart starts wide and ends at a single point. On a pattern, it looks like two lines in a v-shape from a single point. That single point is typically denoted by a circle. Often at the open end of the dart on the seam line, there will be two more circles showing where to match the sewing lines of the dart. A 2-sided dart will look like two one-sided darts with the open ends together. Depending on the length needed the two darts could be joined by longer parallel lines. Two-sided darts are often found on dresses or long shirts that nip in at the waist and flare back out for bust and hip. One-sided darts are common at the side of shirts at the bust-level and on the tops of pants both front and back to nip the fabric in more for the waist.
Grainline – the line on the pattern that marks how it should line up with the “grain” of the fabric. It can be one or two-directional. If the arrowhead is only on one end, it suggests that all pieces cut from the fabric should have the arrow pointing the same direction. This more often the case when the suggested fabric is typically a napped fabric.
Muslin – A muslin (not the fabric) is what some sewists call their test garments. Sometimes it is made out of muslin (the fabric), but it doesn’t have to be. I like to think of it as a test garment for fit and flow. If you need to test drape or are making the garment out of fabric that is considerably thicker than or stretchier than muslin (the fabric) you should avoid using muslin and pick something with characteristics closer to the final fabric choice.
Notches – Notches are markings on the pattern that typically look like triangles (or diamonds) and are on the cut line of the fabric. They are intended to be matched up to corresponding notches in other pieces when assembling the garment. Some pattern companies use just a triangle that points out of the cut line, some use one that just points in, and some use a diamond that points both out and in from the cut line. Rarer, a line or T type marking may be used to denote a notch, and usually points in toward the seam line.
Pleat – A pleat is also a design element marked on a pattern with fold and sew lines. Typically, the pleat sew lines will be parallel to each other, but they don’t have to be.
Sloper – A sloper is a pattern that is drafted from base measurements. Often it doesn’t have any seam allowance. It also doesn’t have any embellishments. It lacks even facings and additional pieces for zipper plackets, buttonholes, etc. Basic slopers are drafted for skirts, bodices, and pants. And are used to adjust the actual pattern for fit. They can also be used as the basis of a pattern with other design elements such as flares, gathers, princess seams, etc.
Square – on a pattern, a square is another marking that acts a lot like a circle. Usually used to note where to match specific pattern parts.
Construction
Instructions
Baste (verb) – Stitch using a “basting stitch”. 😂 Yeah, not helpful. Basically basting just means use a stitch type that is meant to be temporary, something you can easily remove after sewing the seam with a regular stitch. Some sewing machines have a specific basting stitch, but it is not necessary to use a machine programmed basting stitch. Sometimes you may want to “baste” with a zigzag. Or, just pin baste. You can also hand-baste. I often use a regular straight stitch with a longer stitch length, and a loose tension.
Ease (verb) – A technique used when fitting together two pieces of different lengths. The longer pieces can be “eased” into the shorter piece. When you ease two pieces together, the goal is to not have any lumps or tucks in the longer piece. It should lie smoothly against the shorter piece.This is common on the tops of sleeves, some types of collars and occasionally in the crotch of pants on the inseam, and the bust of shirts under the armpit.
Gather – There’s multiple ways to gather fabric. But to gather fabric really means to scrunch up all the fabric in one piece to match up to the way shorter length of the other piece. Unlike with easing, it is ok to have tucks and puckers in the longer piece. The trick is getting the gathers (lumps and tucks) to be evenly spaced across the length of the gathered seam.
Stitches
Back Stitch – One or two stitches in the reverse direction before (and at the end of) sewing the seam. Used to “set” the stitches so they don’t pull apart. (Some machines have an automatic button for this feature and will take 1-3 stitches in place to start and stop seams)
Basting Stitch – A stitch that is easily removed. Typically longer in length than any regular stitch would be. But sometimes is sewn by hand and sometimes done as a zig-zag.
Chain Stitch – A stitch sewn on a coverstitch machine (a type of machine similar to a serger) or a 5-thread serger. It looks like a regular sewing stitch on the topside, but under the stitch appears to be a little chain of thread. It is easy to remove by pulling on one thread. There is a bit of stretch in this stitch so it is a good stitch to use on stretchy fabrics where an overlock isn’t needed.
Cover Stitch – A stitch sewn on a coverstitch machine that has 2 or 3 rows of regular looking stitches on the top, but a woven lattice of thread on the backside. This is frequently used for hems on ready-to-wear garments. It has some stretch and is a good fit for knits – especially activewear.
Edge Stitch – Edge stitching is a line of stitching along the folded edge of something such as a turned-in seam (Like something made double-sided, sewn right sides together and turned right side out), patch pocket, or facing edge It is typically 1/8″ or less away from the folded edge.
Flat-Felled – (Flat fell, or felled seam) A flat-felled seam is one in which the seam allowance is wrapped up in the seam itself. It is finished with a second line of stitching (topstitching) viewable from the outside of the garment. In most jeans, you can find flat-felled seams along the crotch curve and the outer leg.
Flatlock Seam – A stitch done on an overlock machine (a type of serger) that wraps the cut edge of the seam allowance, but is meant to have the two pieces pulled apart spreading the seam. It then looks similar to the loopy side of the coverstitch on one side, and a ladder stitch on the other.
French Seam – A French seam is similar to the flat-felled in that the seam allowance is wrapped up within the seam itself. It presents a nice finished look on the inside of garments. But unlike the flat-felled seam, there is no topstitching visible on the outside of the garment. This is a couture way to finish the inside of your garment.
Overcast – A stitch that mocks an overlock stitch, but is sewn on a regular sewing machine. It is used to finish the raw edges of the seam allowance.
Overlock – A stitch sewn on an overlock machine (commonly known as a serger). It trims and finishes the seam allowance in one step by either wrapping thread around the seam allowance or by wrapping 2 threads around the seam allowance by looping them together at the edge.
Satin Stitch – A zig-zag stitch that is sewn with a very short stitch length so the threads are placed really close together. This is used for attaching pieces in an appliqué. But also can be used to reinforce a corner or as a decorative embellishment
Stay Stitch – A regular stitch sewn in the seam allowance between 1/8″ and 1/4″ from the stitch line. This is typically done on curves such as around necklines to help keep the shape of the curve since part of the fabric is on the bias and can really easily stretch out of shape. Stay stitching may also be called for on crotch curves, shoulder seams, or along waistbands.
Tailor Tack – a means to mark a pattern without using chalk or tracing paper. Using a double piece of thread, the thread is looped through both layers of fabric and cut apart leaving half in one piece and half in the other.
Top Stitch – A straight stitch that is typically somewhere between 1/8″ and 3/8″ from the edge of a garment. Often it is a longer stitch than the regular seam. It can be done with decorative thread. It is meant to be visible on the outside of the garment and can also be functional closing off turned edges or securing facing to the inside of the garment.
Understitch – Stitching the facing of a garment to the seam allowance where it was attached to encourage it to lay flat against the inside of the garment and not flop out all the time. It is also not visible from the outside of the garment.
Garment Parts
Armscye – The armhole of the shirt. I mean, they could have just called it an armhole. (I’ve seen it spelled Armscythe too)
Bust Point – Sometimes this is marked on a pattern. But it’s the point of the shirt that would fall at your nipple. Depending on your proportions, you may need to adjust the pattern to move it for a better fit.
Crotch Curve – This is the part of pants that goes from waistband in the back to waistband in the front around the center of your body. For pants that are not fitted like trousers or slacks, it’s important that the size and shape of the crotch curve actually match the size and shape of your body in that area.
Facing – An a garment like a shirt with no collar, or no sleeves, or pants or skirt with no waistband, the garment is finished with a facing. This is a strip of fabric that is the same shape as the whole of the garment you are making it for, and it is sewn to the hole then folded to the wrong side thereby finishing the hole.
Design
Dolman Sleeve – a dolman sleeve is typically narrower at the wrist and wider at the point where it joins to the body of the top. Unlike regular sleeves, there is no shoulder cap seam. The sleeve extends from the body of the shirt in one piece. Therefore, a dolman sleeve would typically have both a top seam that is basically an extension of the shoulder seam and an underarm seam. The size of the sleeve opening can vary but is usually MUCH larger than a typical sleeve.
Flounce – a decorative piece of fabric that flows away from the body. It is similar to a ruffle except that it is typically made out of a curved piece of fabric so that where it attaches to the garment, it is smooth and not gathered. The part of the fabric that hangs away from the garment is more full.
Peplum – A peplum is basically a flounce that is attached specifically at the waistline of a shirt, jacket, skirt, or dress.
Princess Seam – a (mostly) vertical seam used to fit a garment to the body. It is used to replace darts on shirts, dresses, and jackets. The seam can go from the shoulder seam to the hem, or from the armscye to the hem.
Raglan Sleeve – a raglan sleeve extends all the way to the neckline of the shirt. It’s often found on t-shirts, sweatshirts, and hoodies. Because the sleeve extends to the collar of the shirt, there is no shoulder seam down the top of the shoulder. Instead, there are two seams that go from the neckline to the armpit. There is also no shoulder cap seam like there is in a set-in-sleeve.
Ruffle – a decorative piece of fabric that flows away from the body. It’s typically a longer strip of fabric than what it’s being attached to and is gathered at the attachment point.
Set-In Sleeve – A set-in-sleeve is a standard sleeve. It can be a 1-piece construction as in a standard button-down shirt or a 2 piece as some jackets or blazers have. It is characterized by having a round shoulder cap and a curved under-arm. it often has a longer seam length on the sleeve than the body of the garment requiring the sleeve to be eased (see above) to the garment over the top of the shoulder. This is probably one of the most difficult things to sew. The more fitted the garment, the harder to sew (the more it has to be eased) and, the more the sleeve will restrict movement of the arm.
Taper – Something that gets narrower at the bottom than the top. Such as a skirt or pant leg. Tapering is typically done at the side seams of the garment, rather than inside the piece using darts or princess seams.
Machine Parts
Feed Dogs – The little ridged metal bits that are under the presser foot. They grab the fabric and move it through the machine as you sew.
Foot Pedal – The go-pedal. This is used like a gas pedal to make your machine sew. 😃
Hand Wheel – A wheel on the side of the machine that allows you to manually move the needle up and down.
Needle Plate – The metal plate that has a hole for the needle, and slots for the feed dogs to move up into and back down. Typically this is interchangeable.
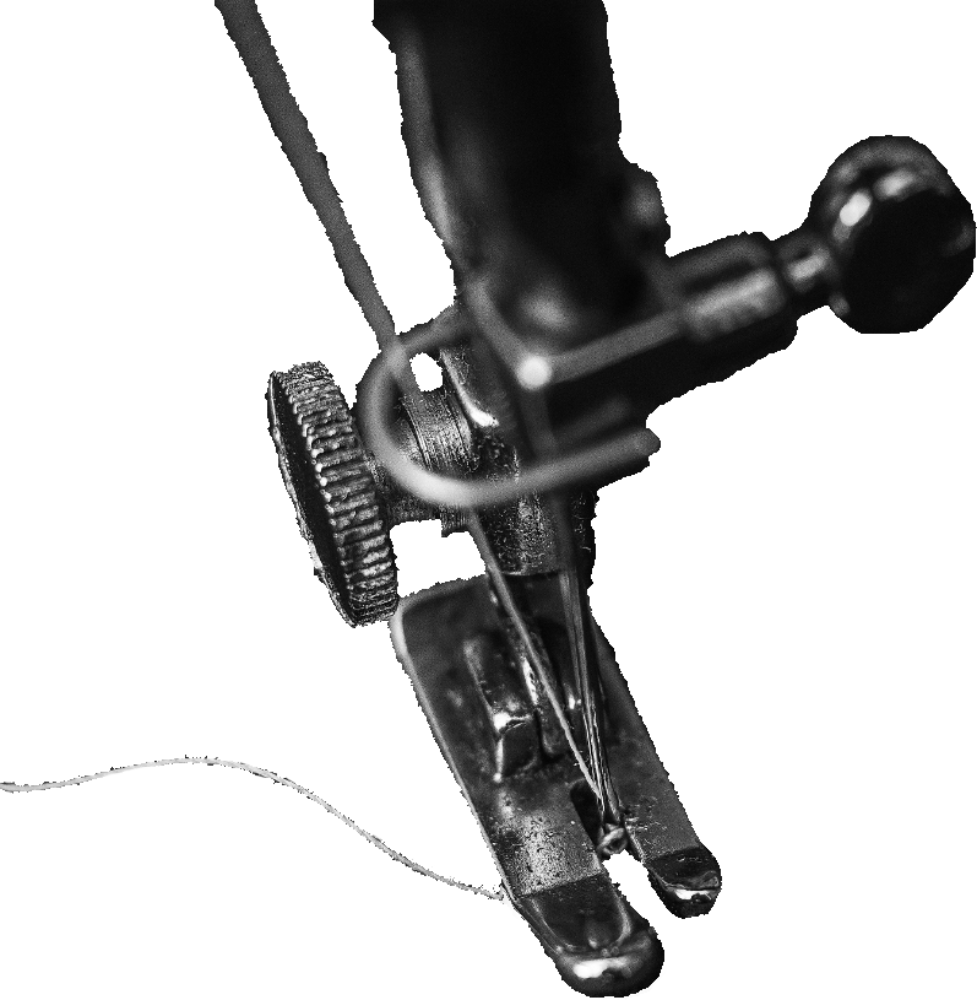
Presser foot – The part of the machine that sits on top of the fabric when sewing. There are many types of presser feet.
Tension Dial – The top thread is threaded through a set of disks that press together to clamp on the thread. These can be adjusted to change how much pressure is put on the thread with the tension dial. The higher the pressure (tension) the harder it will be to pull the thread through it. This can be manually adjusted on most machines and may need to be depending on the type of thread you are using. Also, when the presser foot is lifted, the tension plates re disengaged and the thread can move freely through the plates.
0 Comments