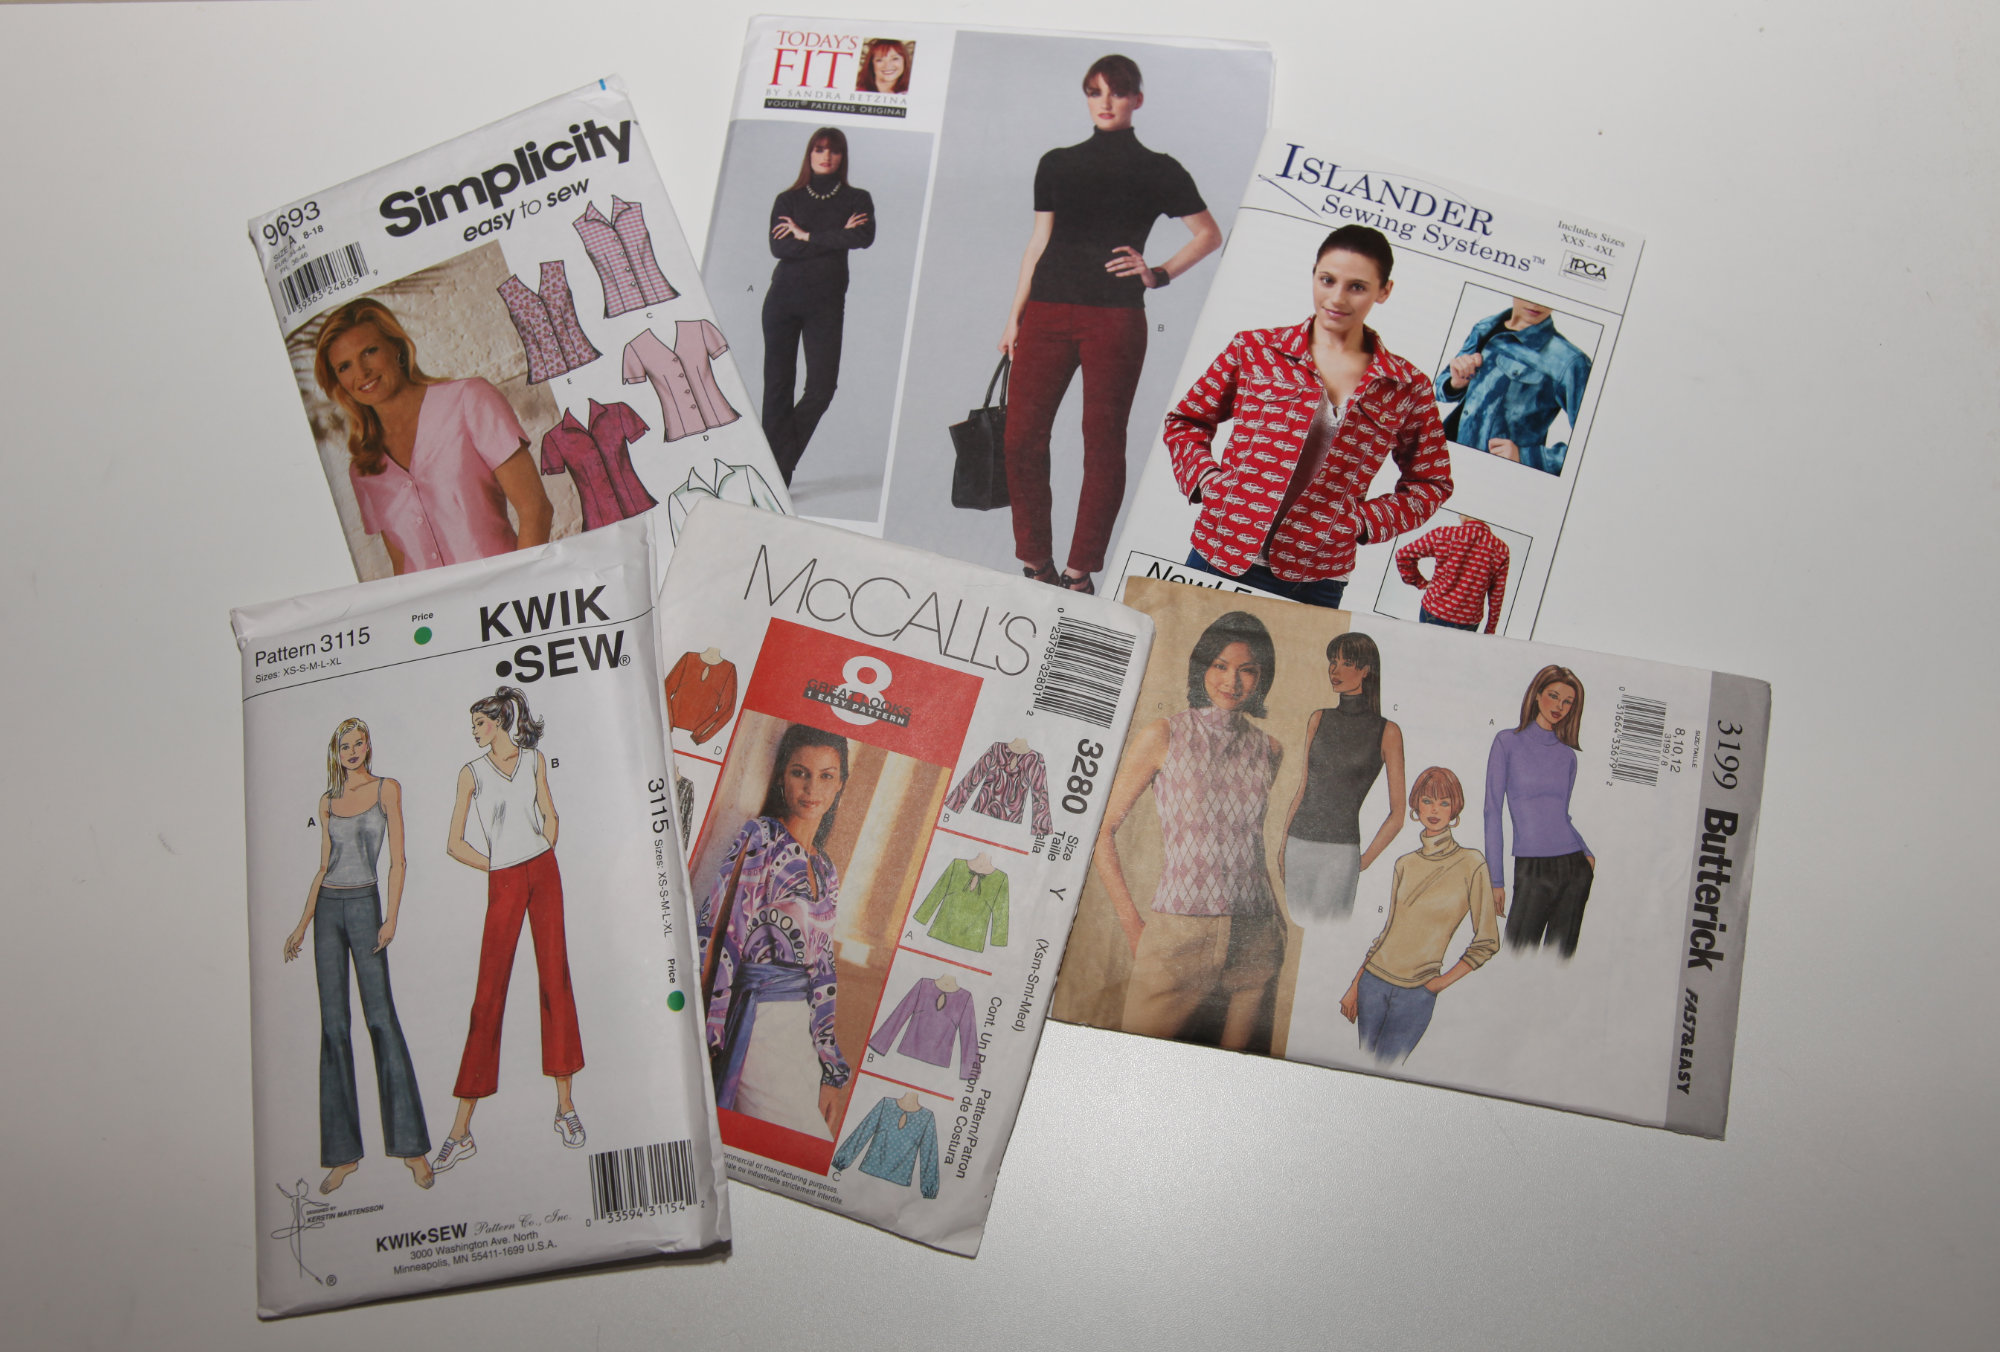
If you've found your way to this article, chances are, you want to sew clothes and you need to know how to read the pattern.
I'll start by saying that there are a bunch of commercial and indy pattern companies. Most have the same information on them, but some put a little more info on the pattern. And often, between pattern manufacturers, the information is in different places.
So, let's take a deeper dive into reading a sewing pattern.
What's in a Pattern
There are 3 "parts" to a pattern. The pattern envelope, the instructions, and the pattern tissue itself.
Each of these contains some piece of the pattern puzzle. Sometimes, a part of this is on one but not the other.
The Envelope
Back in the day, patterns were only available in physical print form. So, today's patterns may come electronically, but they will still have a front and back of envelope if there is a print version available. If there isn't, usually you'll still see the basics of the pattern envelope somewhere, but some of the information typically on the back of the envelope will be available as part of the instructions that you can usually download or view without purchasing the pattern.
So, what information is generally on an envelope? Glad you asked.
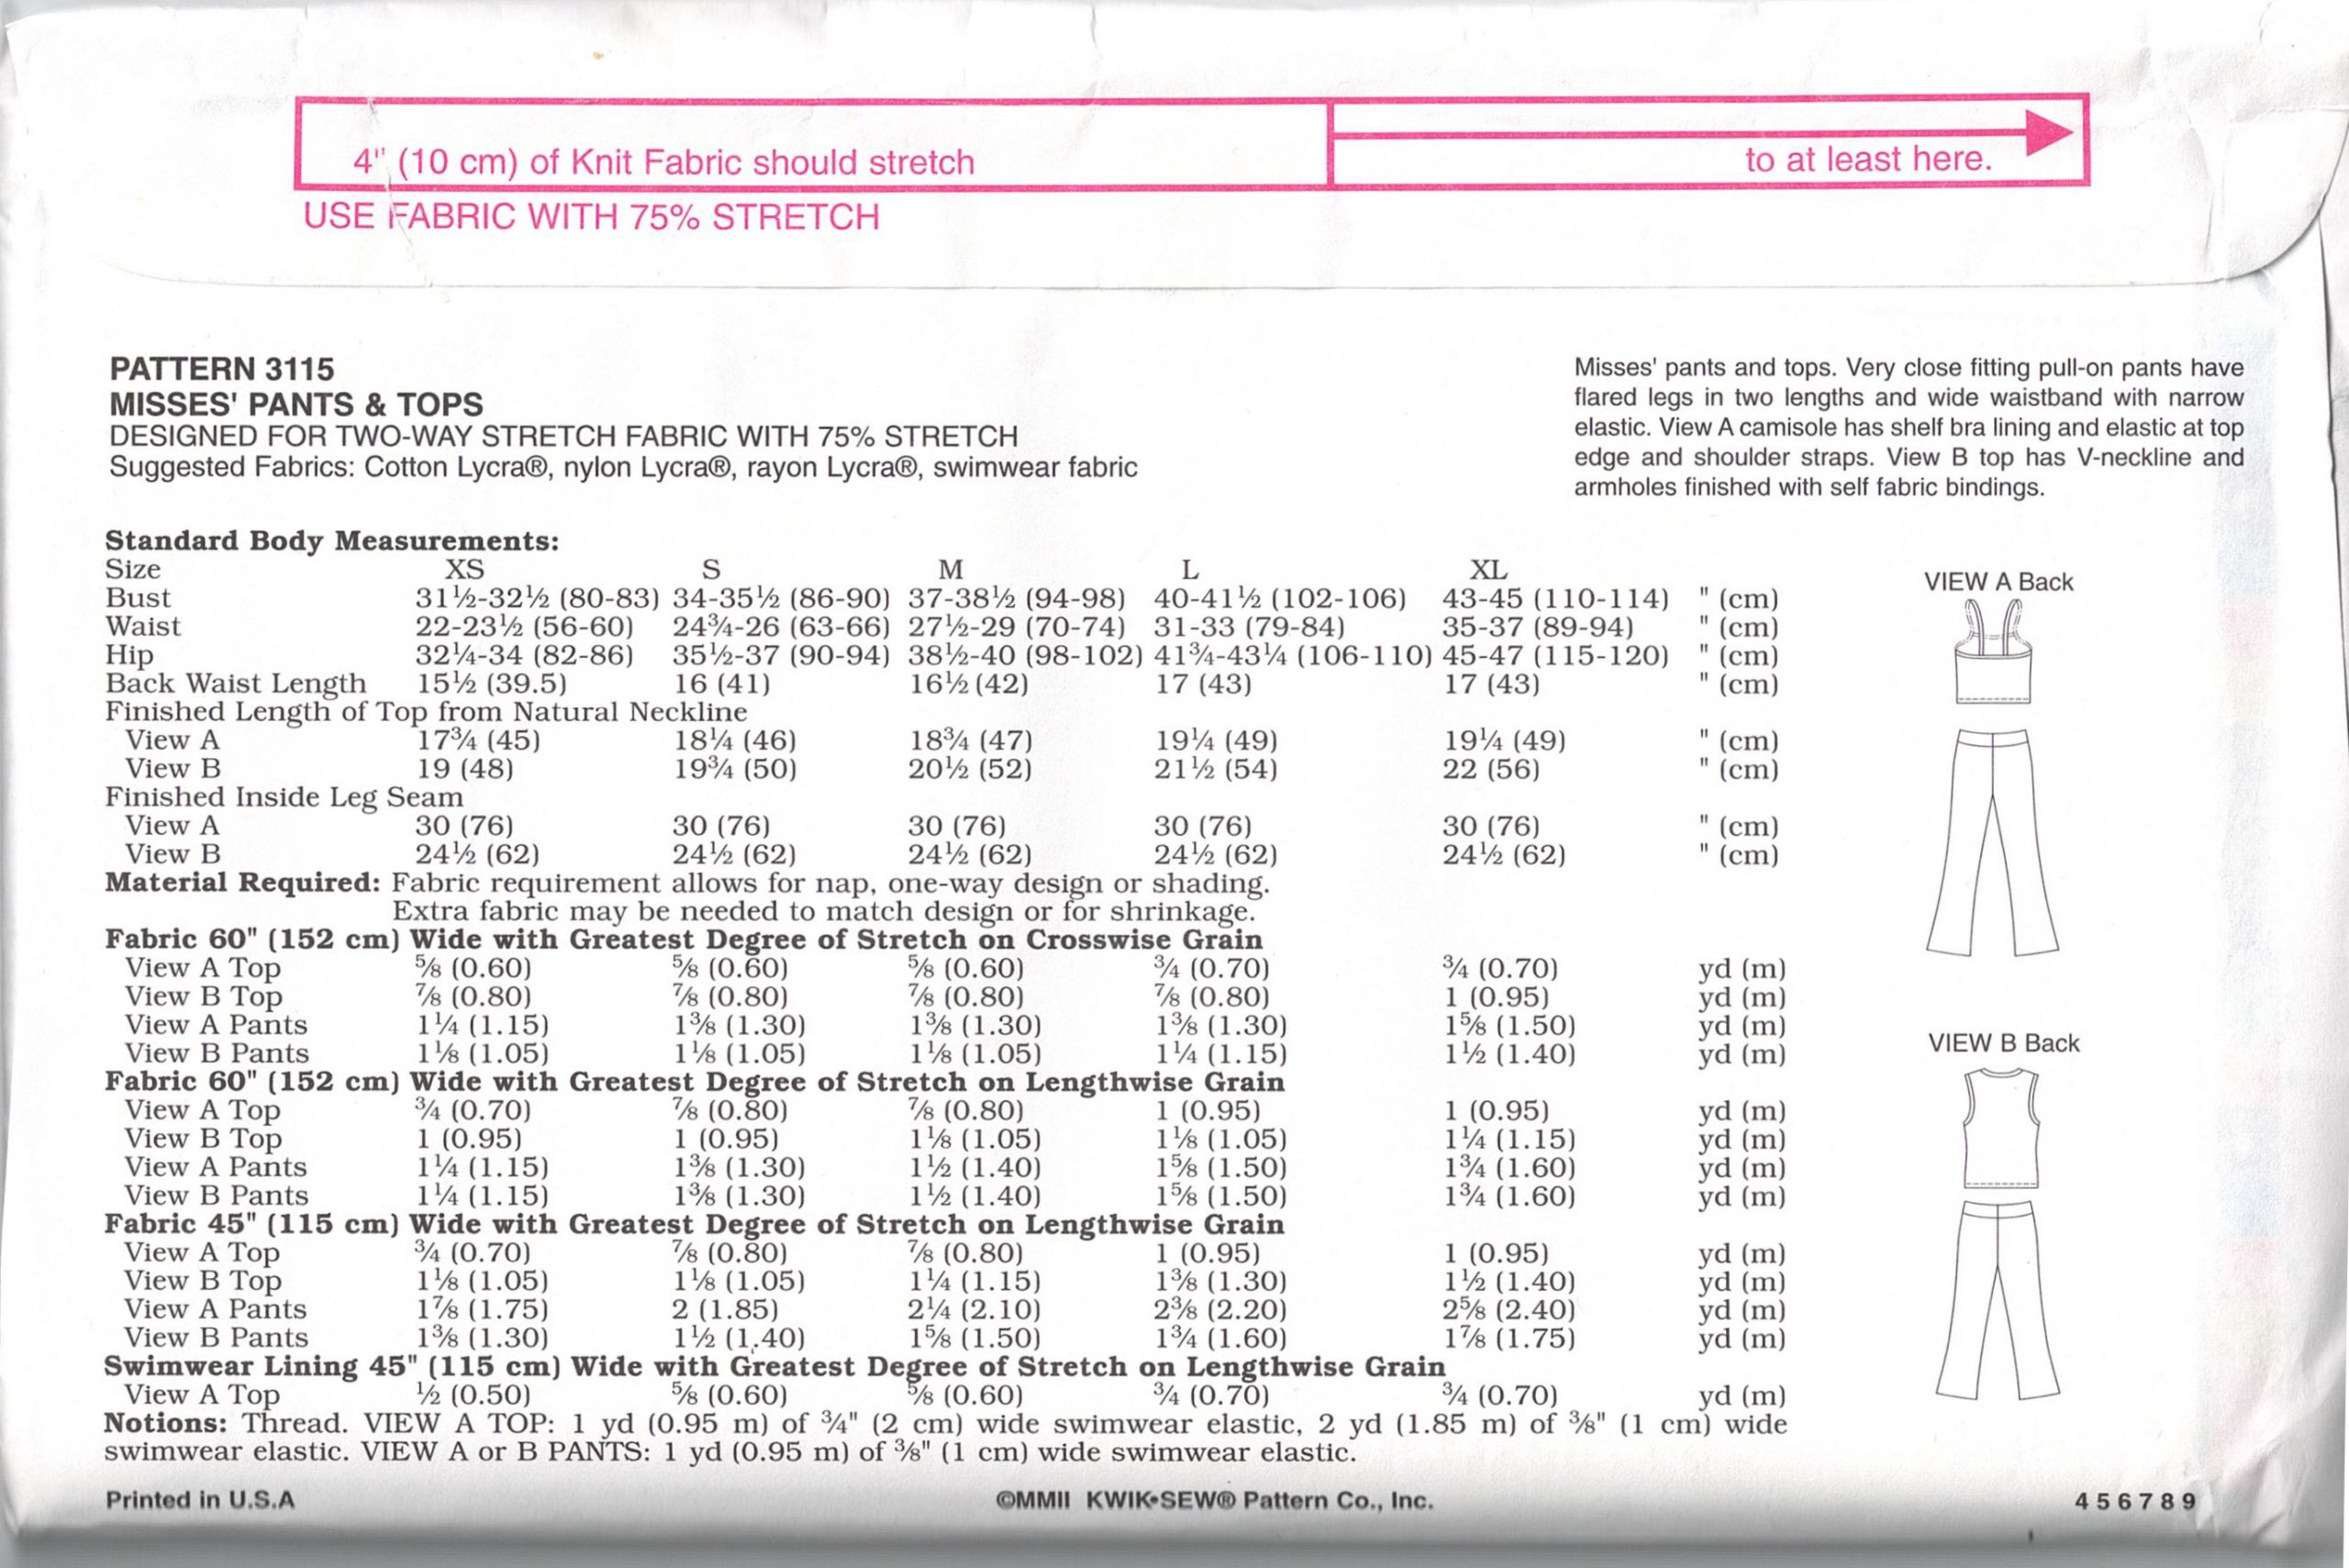
The envelope of the pattern typically has the illustration or photo of the finished garment. As well as any additional views or variants of the style. So the illustration or the photo is usually on the front of the envelope, whereas a line drawing (that would indicate seams and details) is typically available on the back of the envelope. It can be helpful to look at the line drawings for a variety of reasons. 1) It's good to know if you are getting the whole outfit shown on the front (if a whole outfit is shown). Sometimes they show pants and shirts, and only the pants are included. 2) If the picture is a photo on the front, it's not always obvious where seams are. The more seams, the more difficult the pattern, but also the more options for fit adjustments and style variations. I've hunted for patterns that have very specific construction details just because I wanted a specific feature or style. Sometimes that's only obvious on the line drawing.
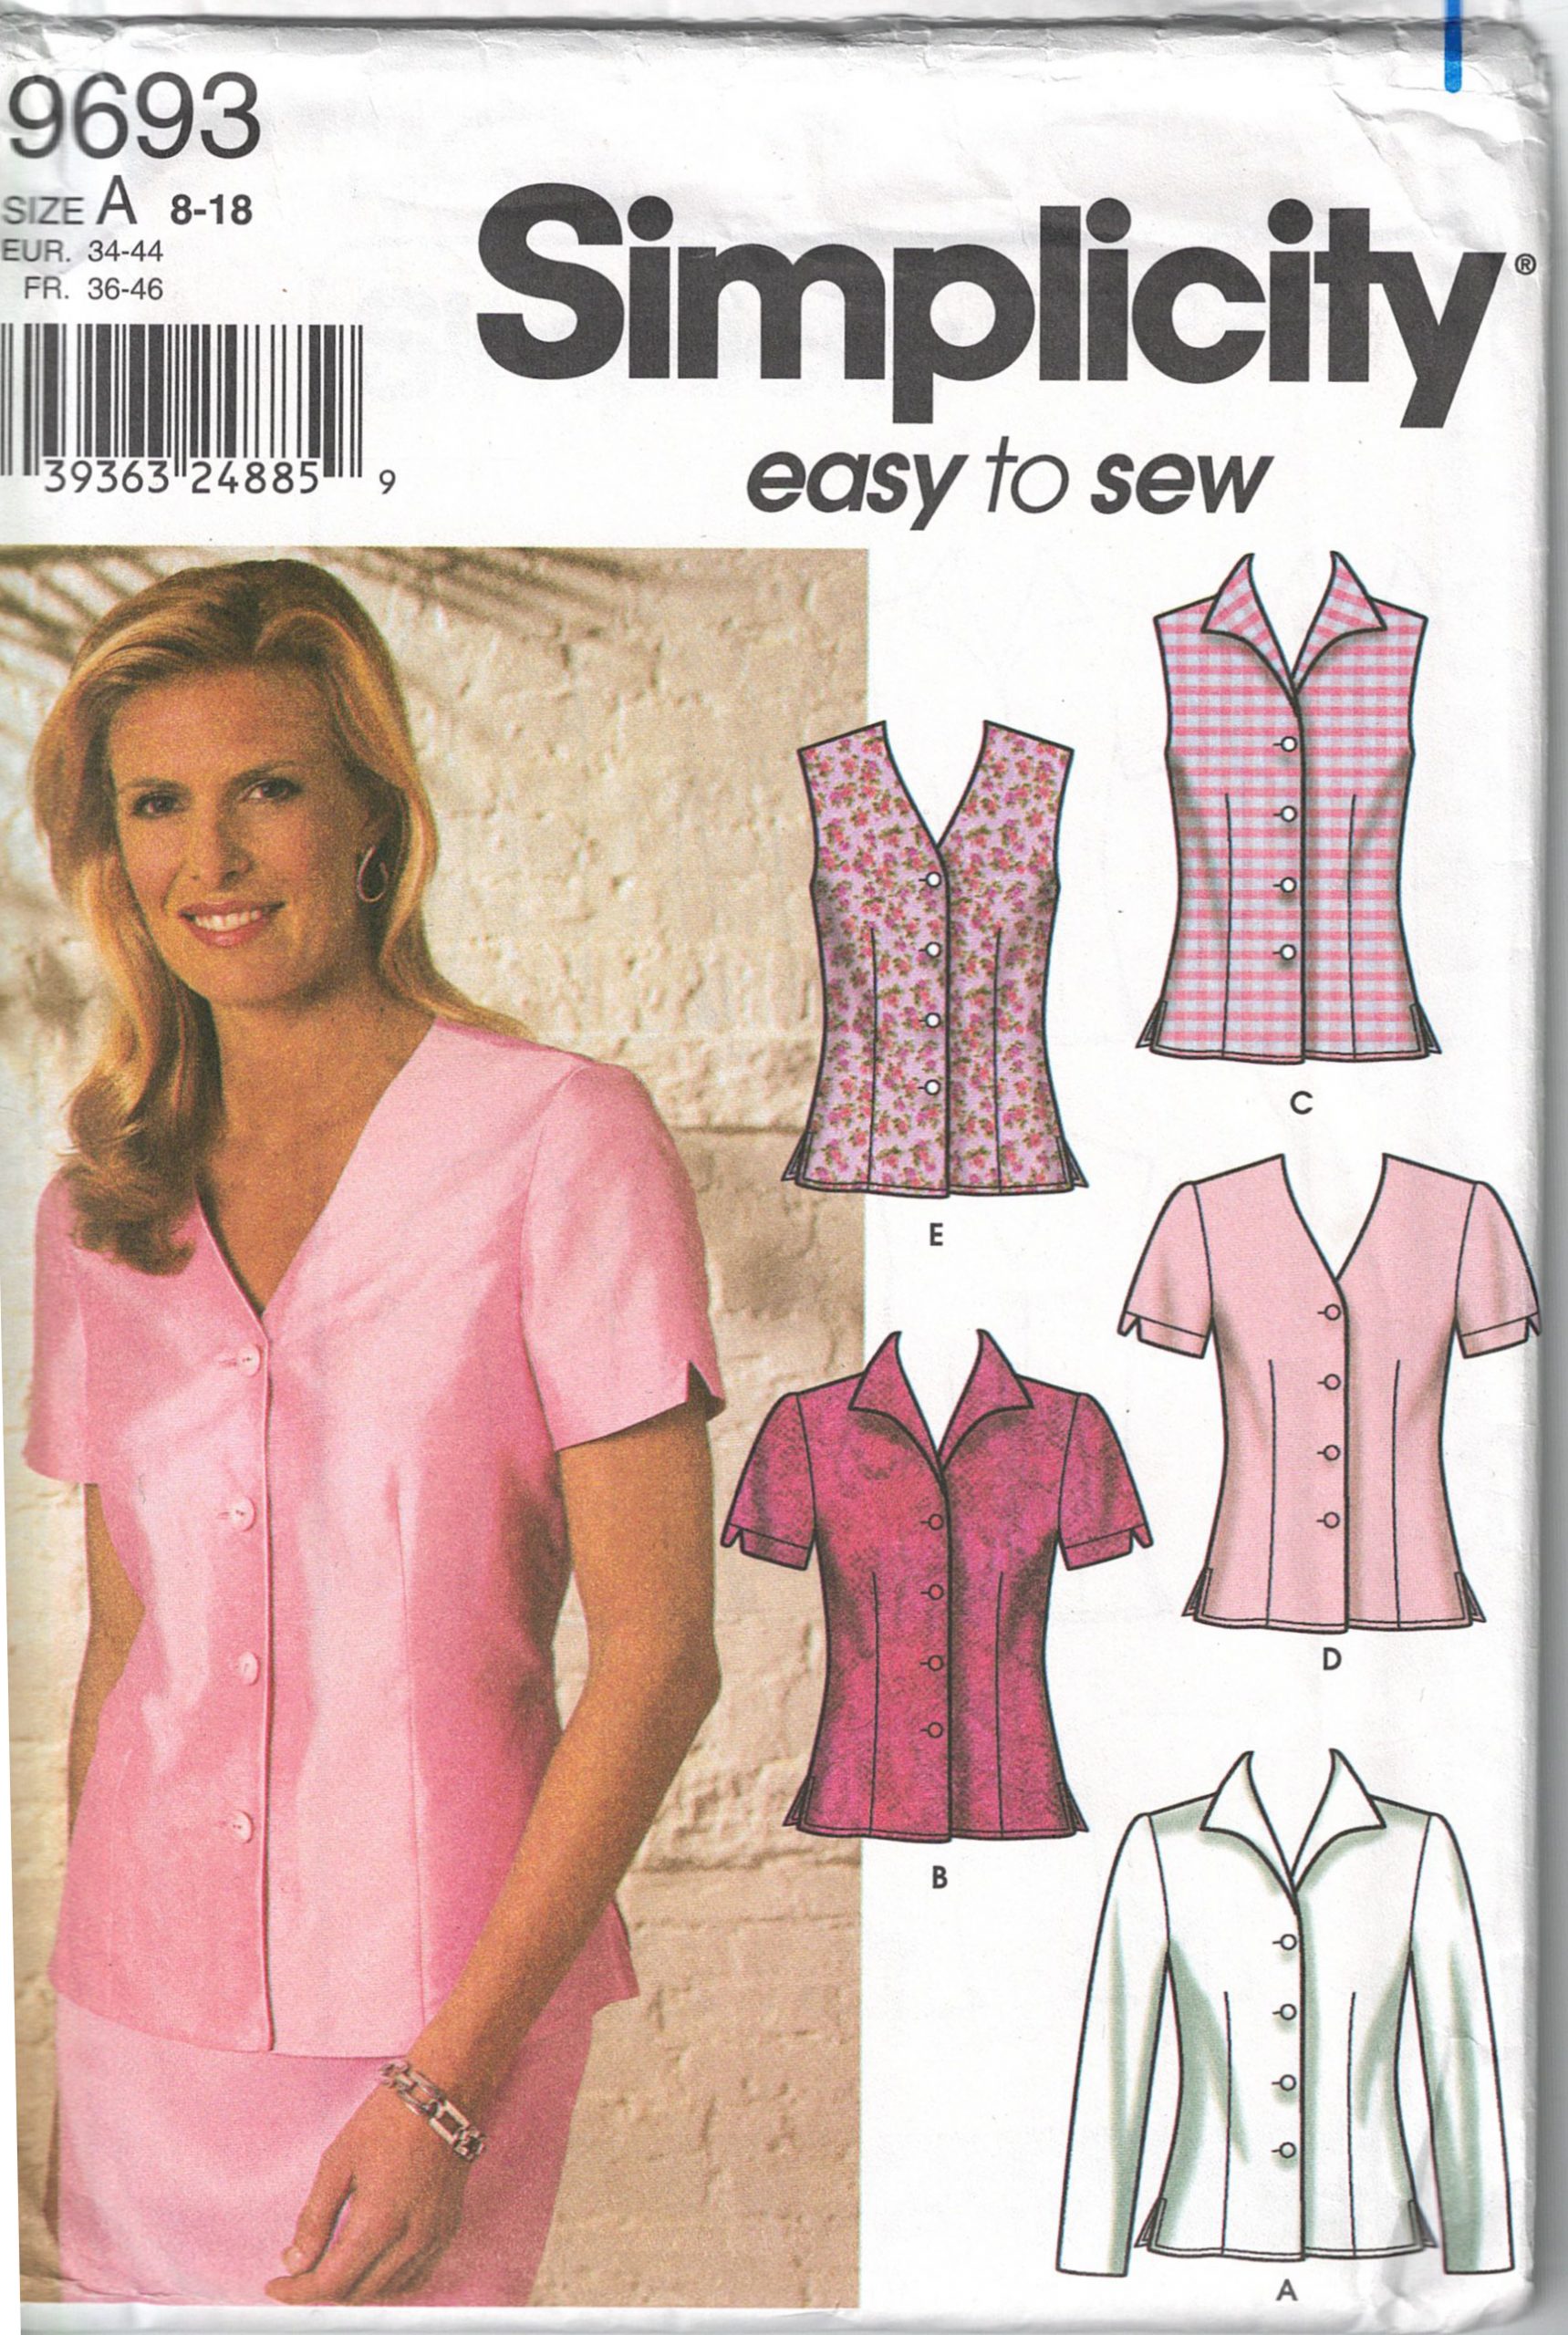

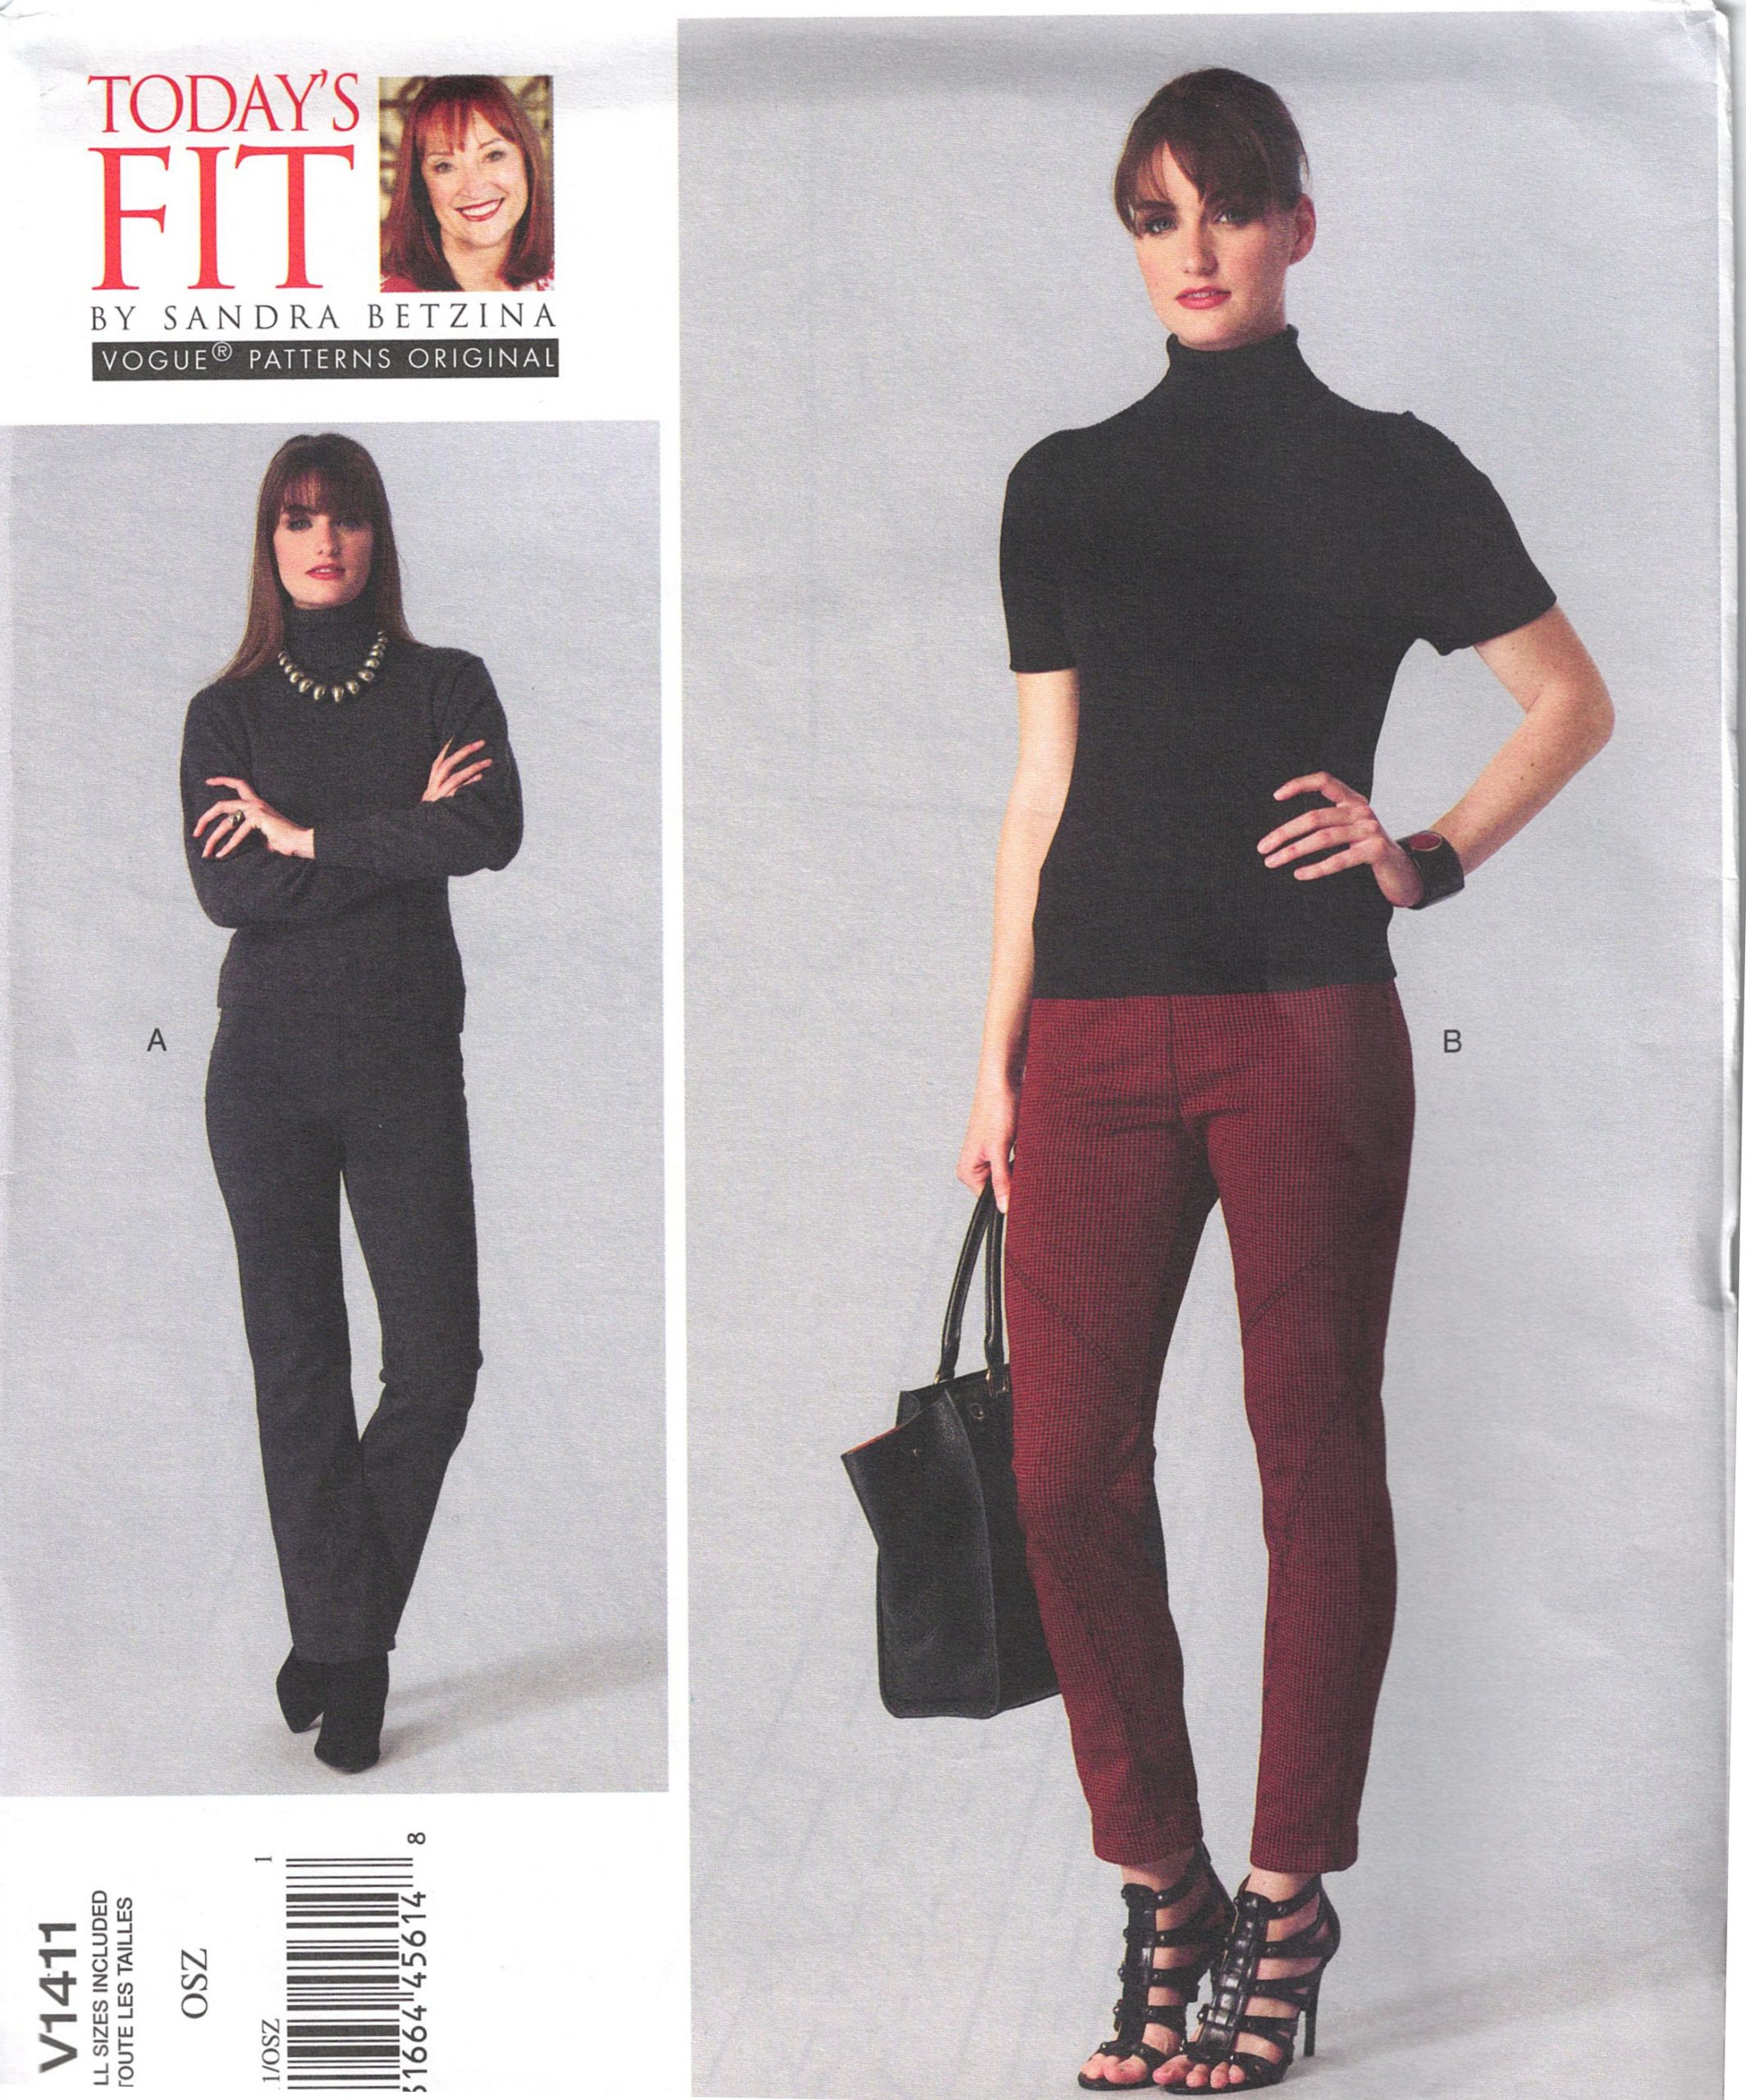
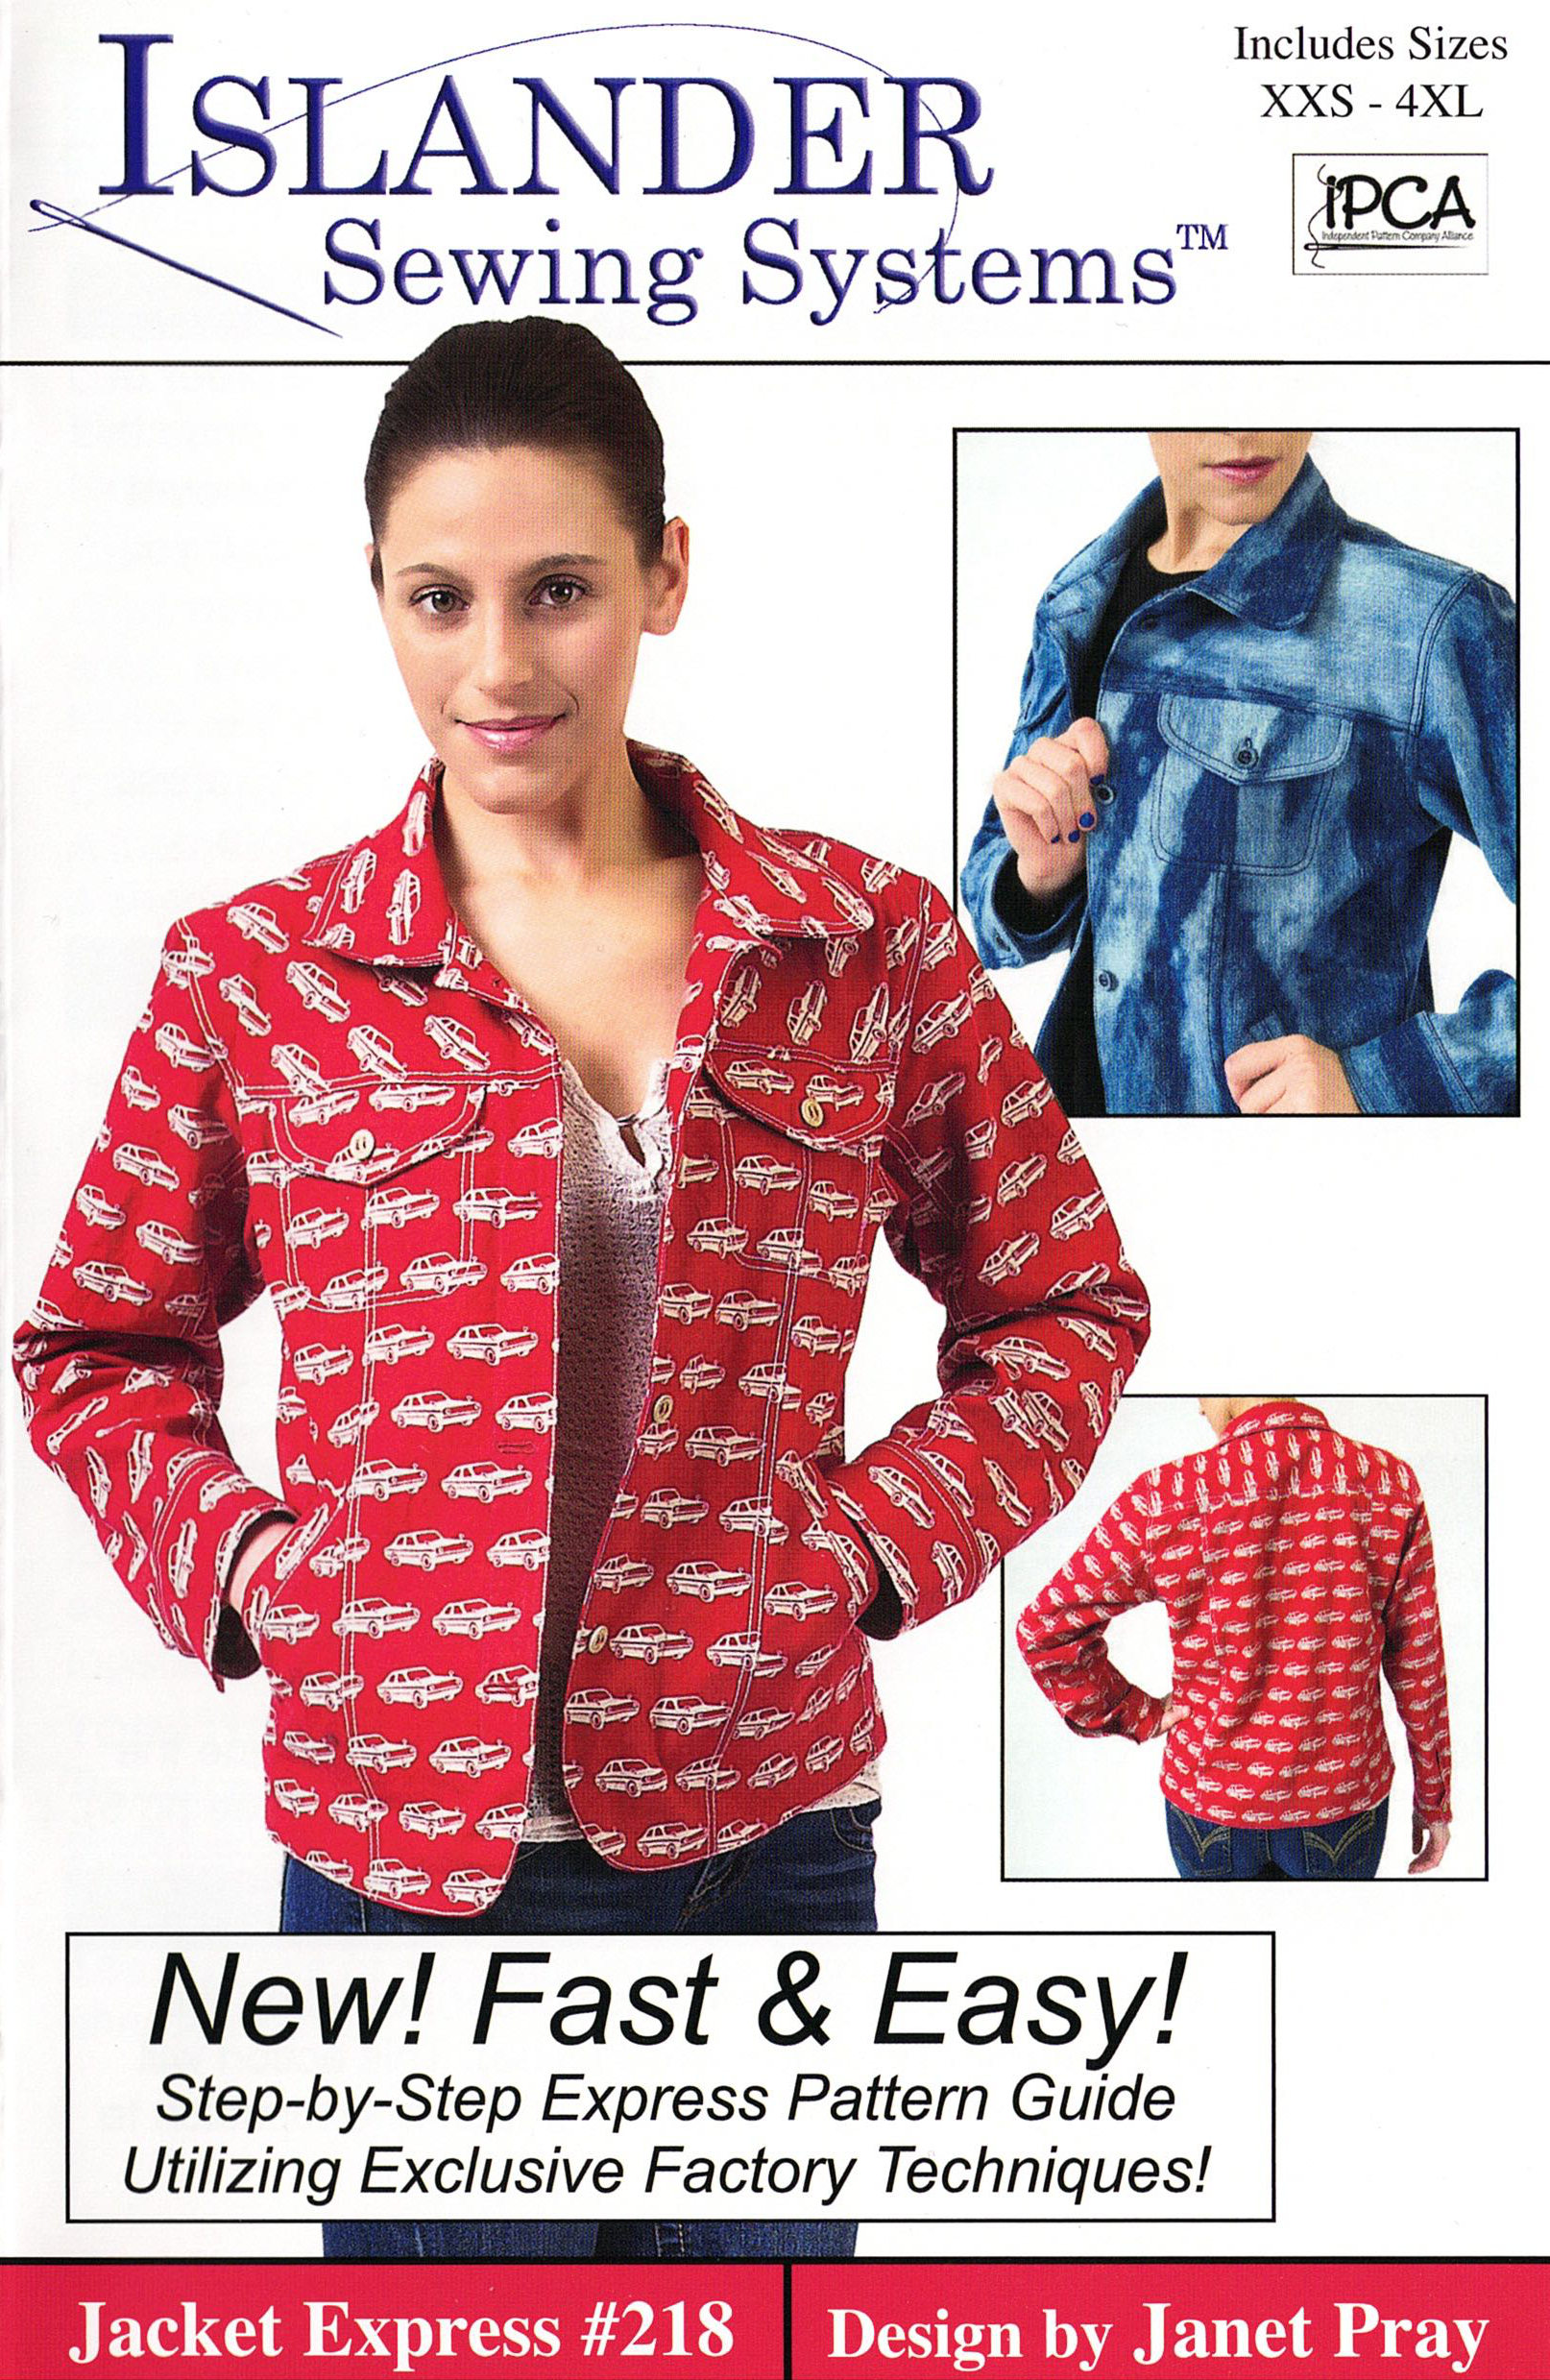
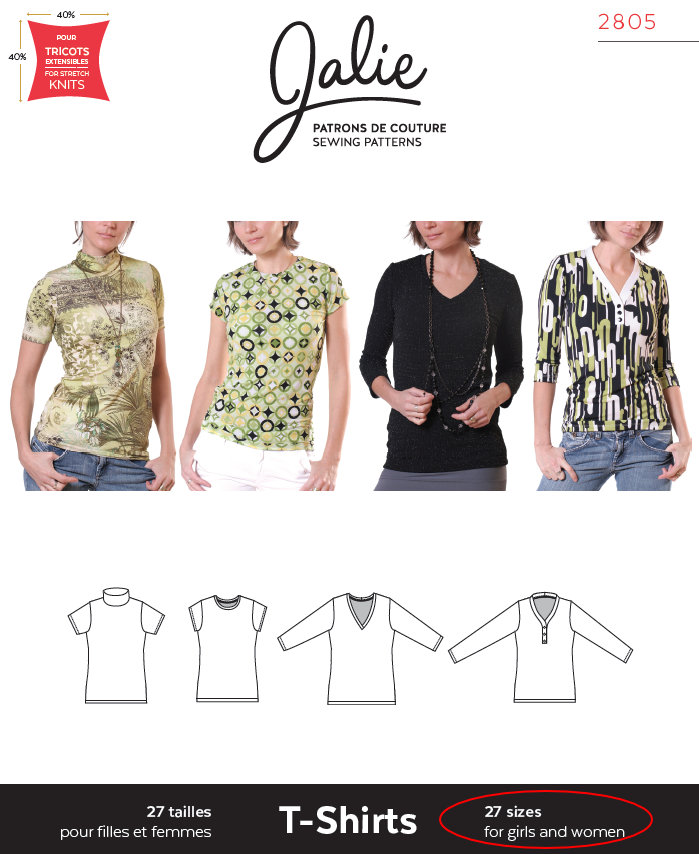
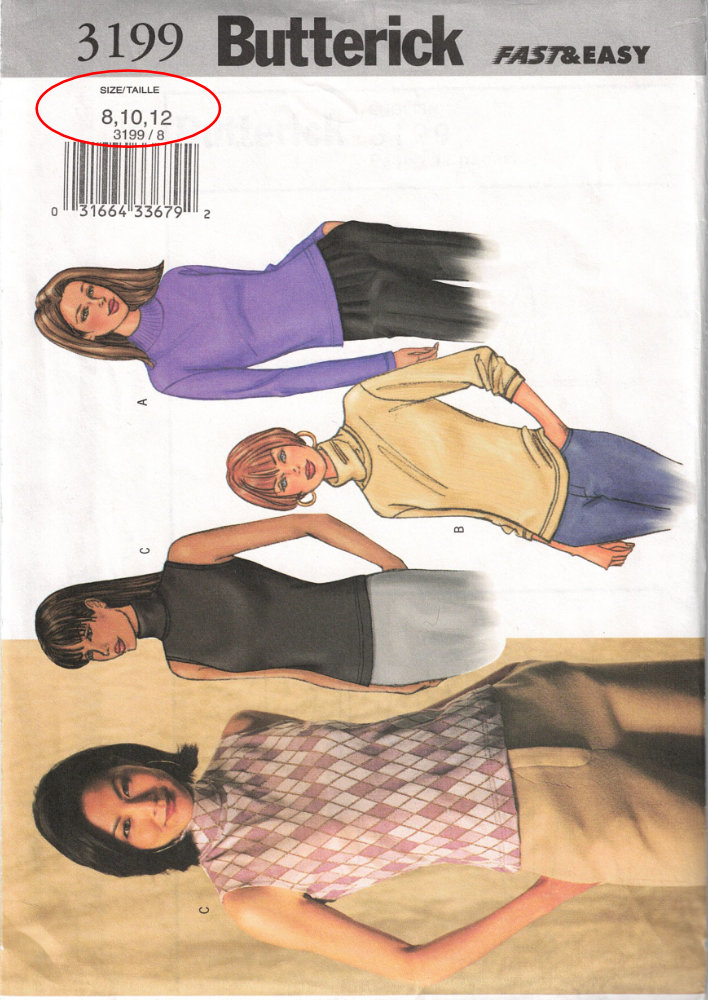
The pattern envelope usually has the pattern number as well. So, all pieces and instructions will be labeled with the pattern number. Typically on the front of the envelope the size range included in the pattern is noted. Some pattern companies have started including "all sizes" or a larger range of sizes. If you are ordering on the internet, this might be stated in the pattern description rather than on the photo of the envelope. For example, Jalie often includes up to 27 sizes in on one pattern. Traditional patterns from Butterick and McCalls tend to include only 3 sizes. That's kind of a pain in the ass if you are between sizes that bridge two envelopes, because technically you should buy both size ranges to get the best fit. This is one HUGE benefit of online PDF downloadable patterns. You can get all the sizes and use all the ones you want or need.
Usually there is a description of the garment. I.e. "Close fit pants with elastic waist" or "Pull over top with neckline variation" And more details about the garment.
Somewhere, usually the pattern back, the suggested fabrics will be listed. Fabric suggestions might be listed by view. For example, I have a shirt, pants and jacket pattern and the shirt requires a different type of fabric from the pants and jacket. Also, if the pattern requires a stretch fabric with a minimum amount of stretch, this information will typically be on the pattern back.
If the pattern requires any additional notions to make the garment (zippers, buttons, elastic etc), these will typically be listed with the fabric suggestions by view.
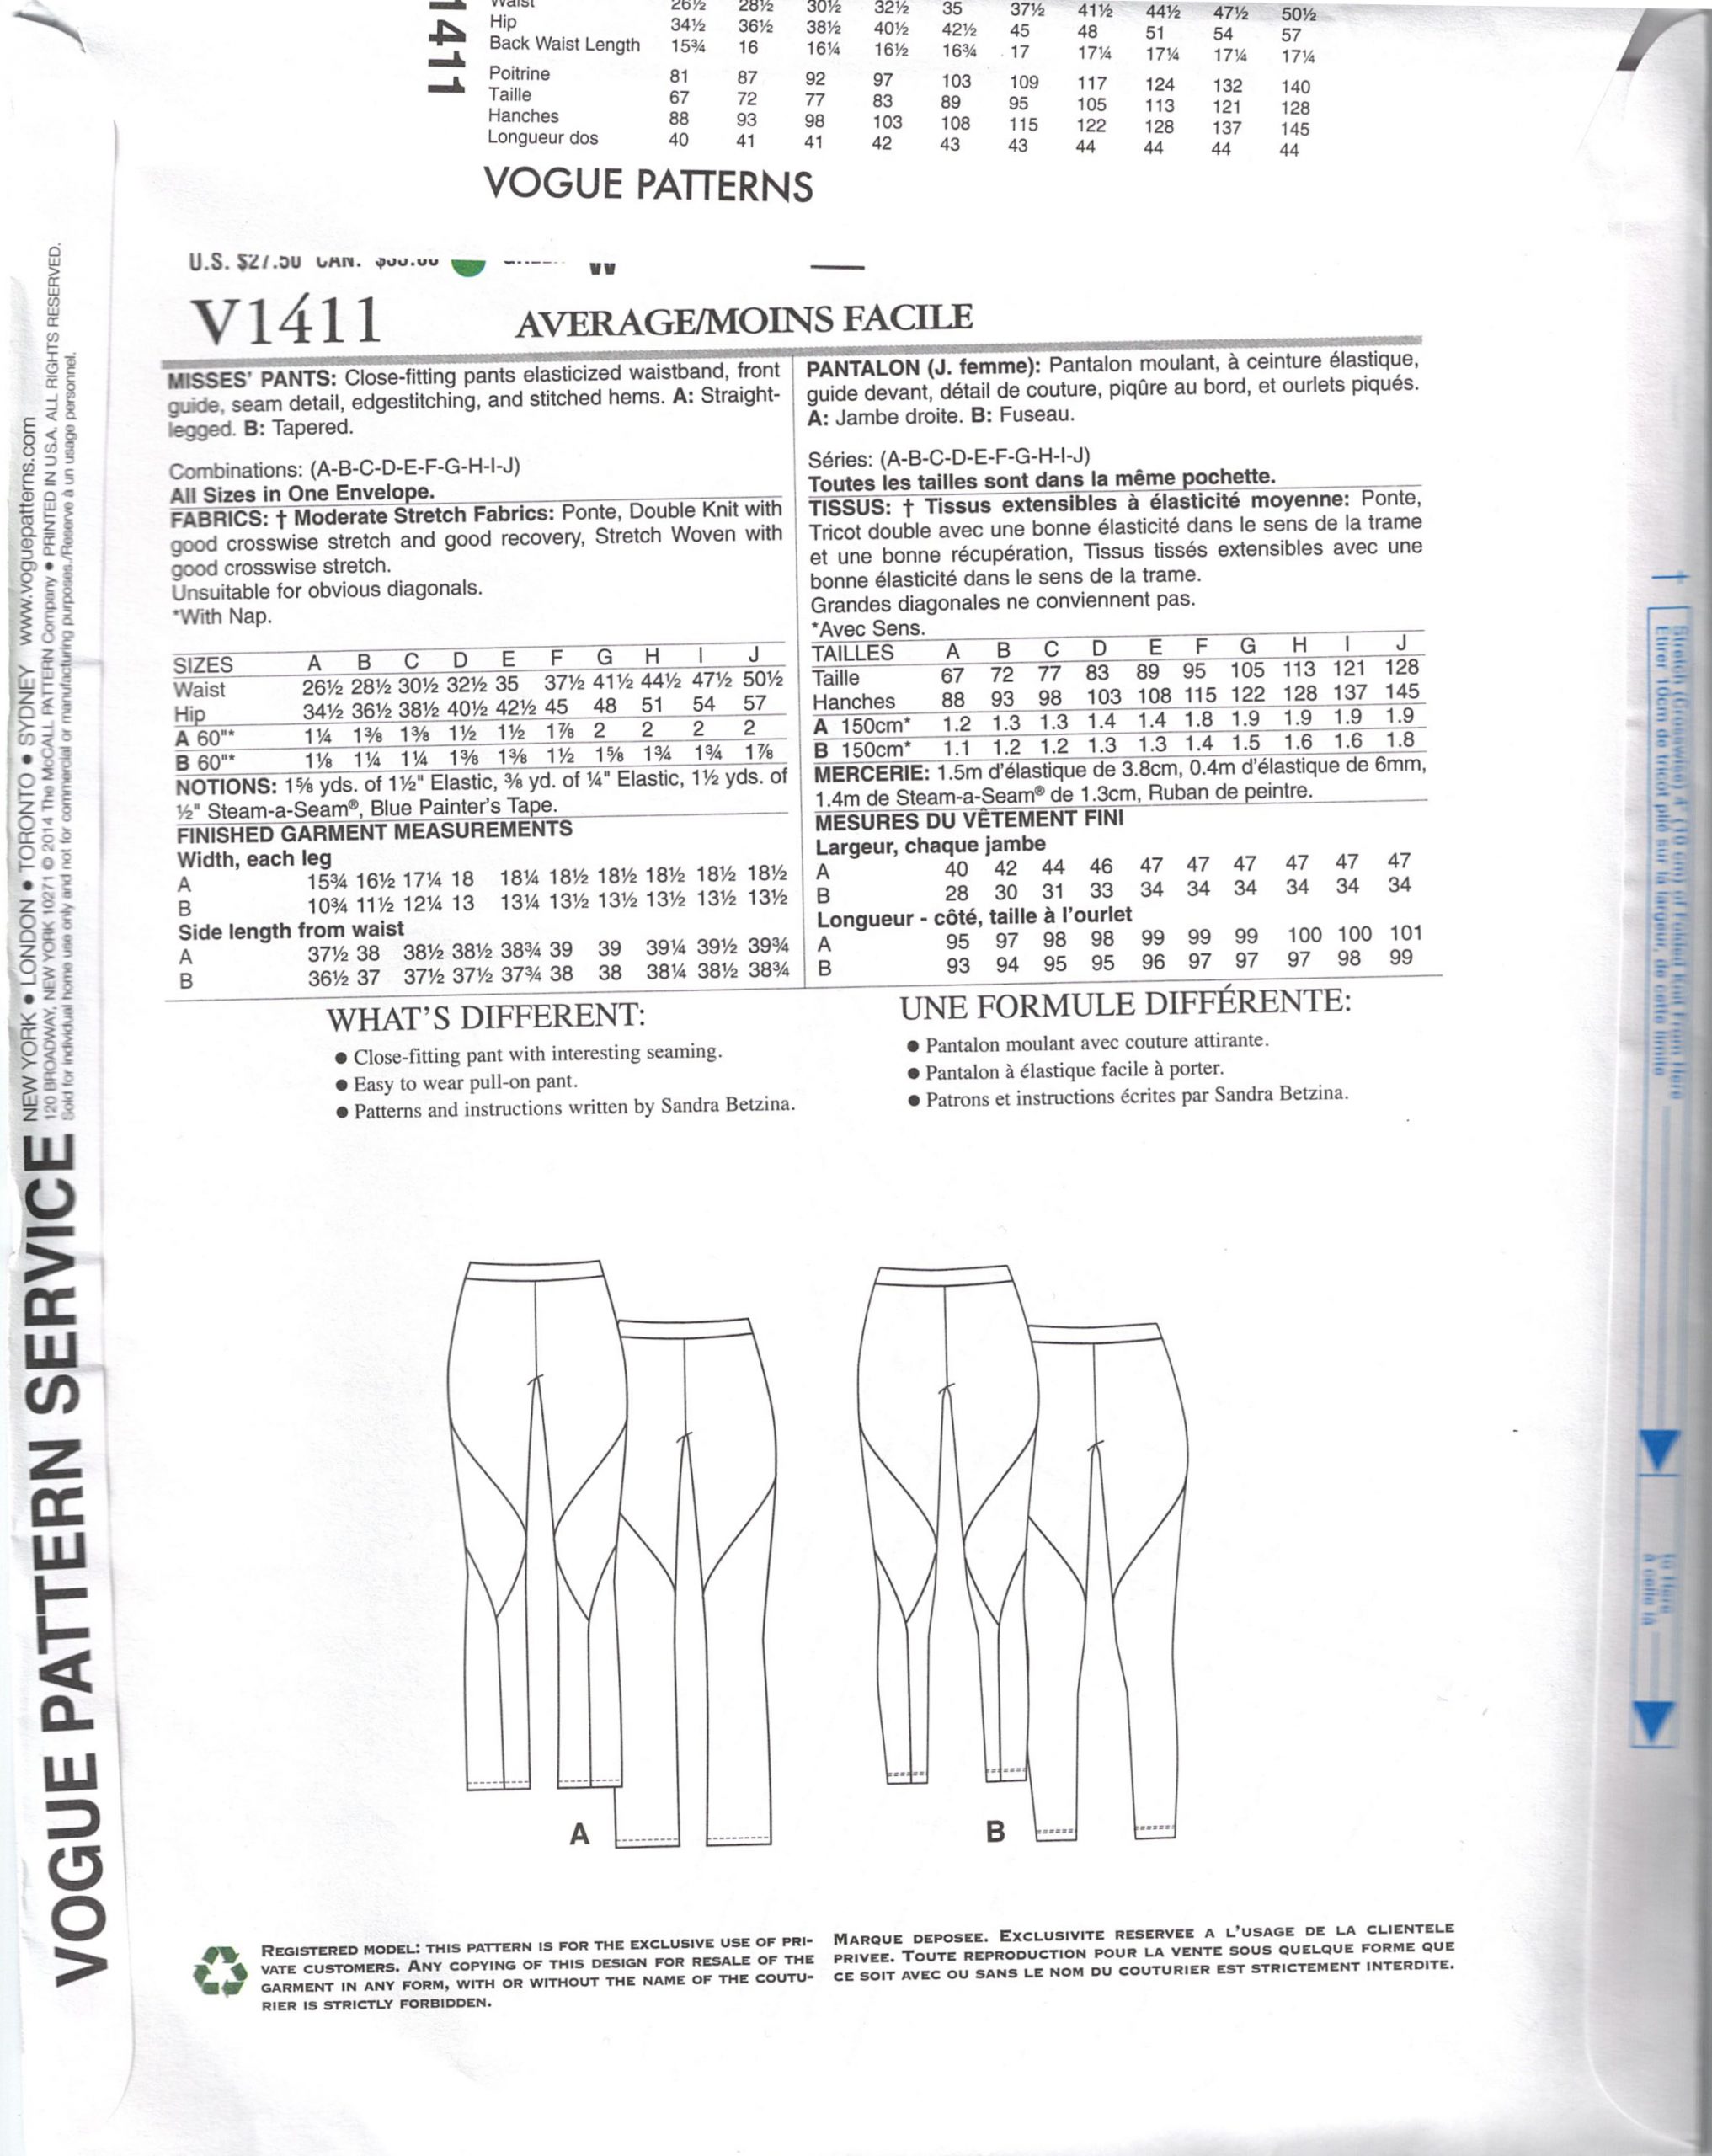
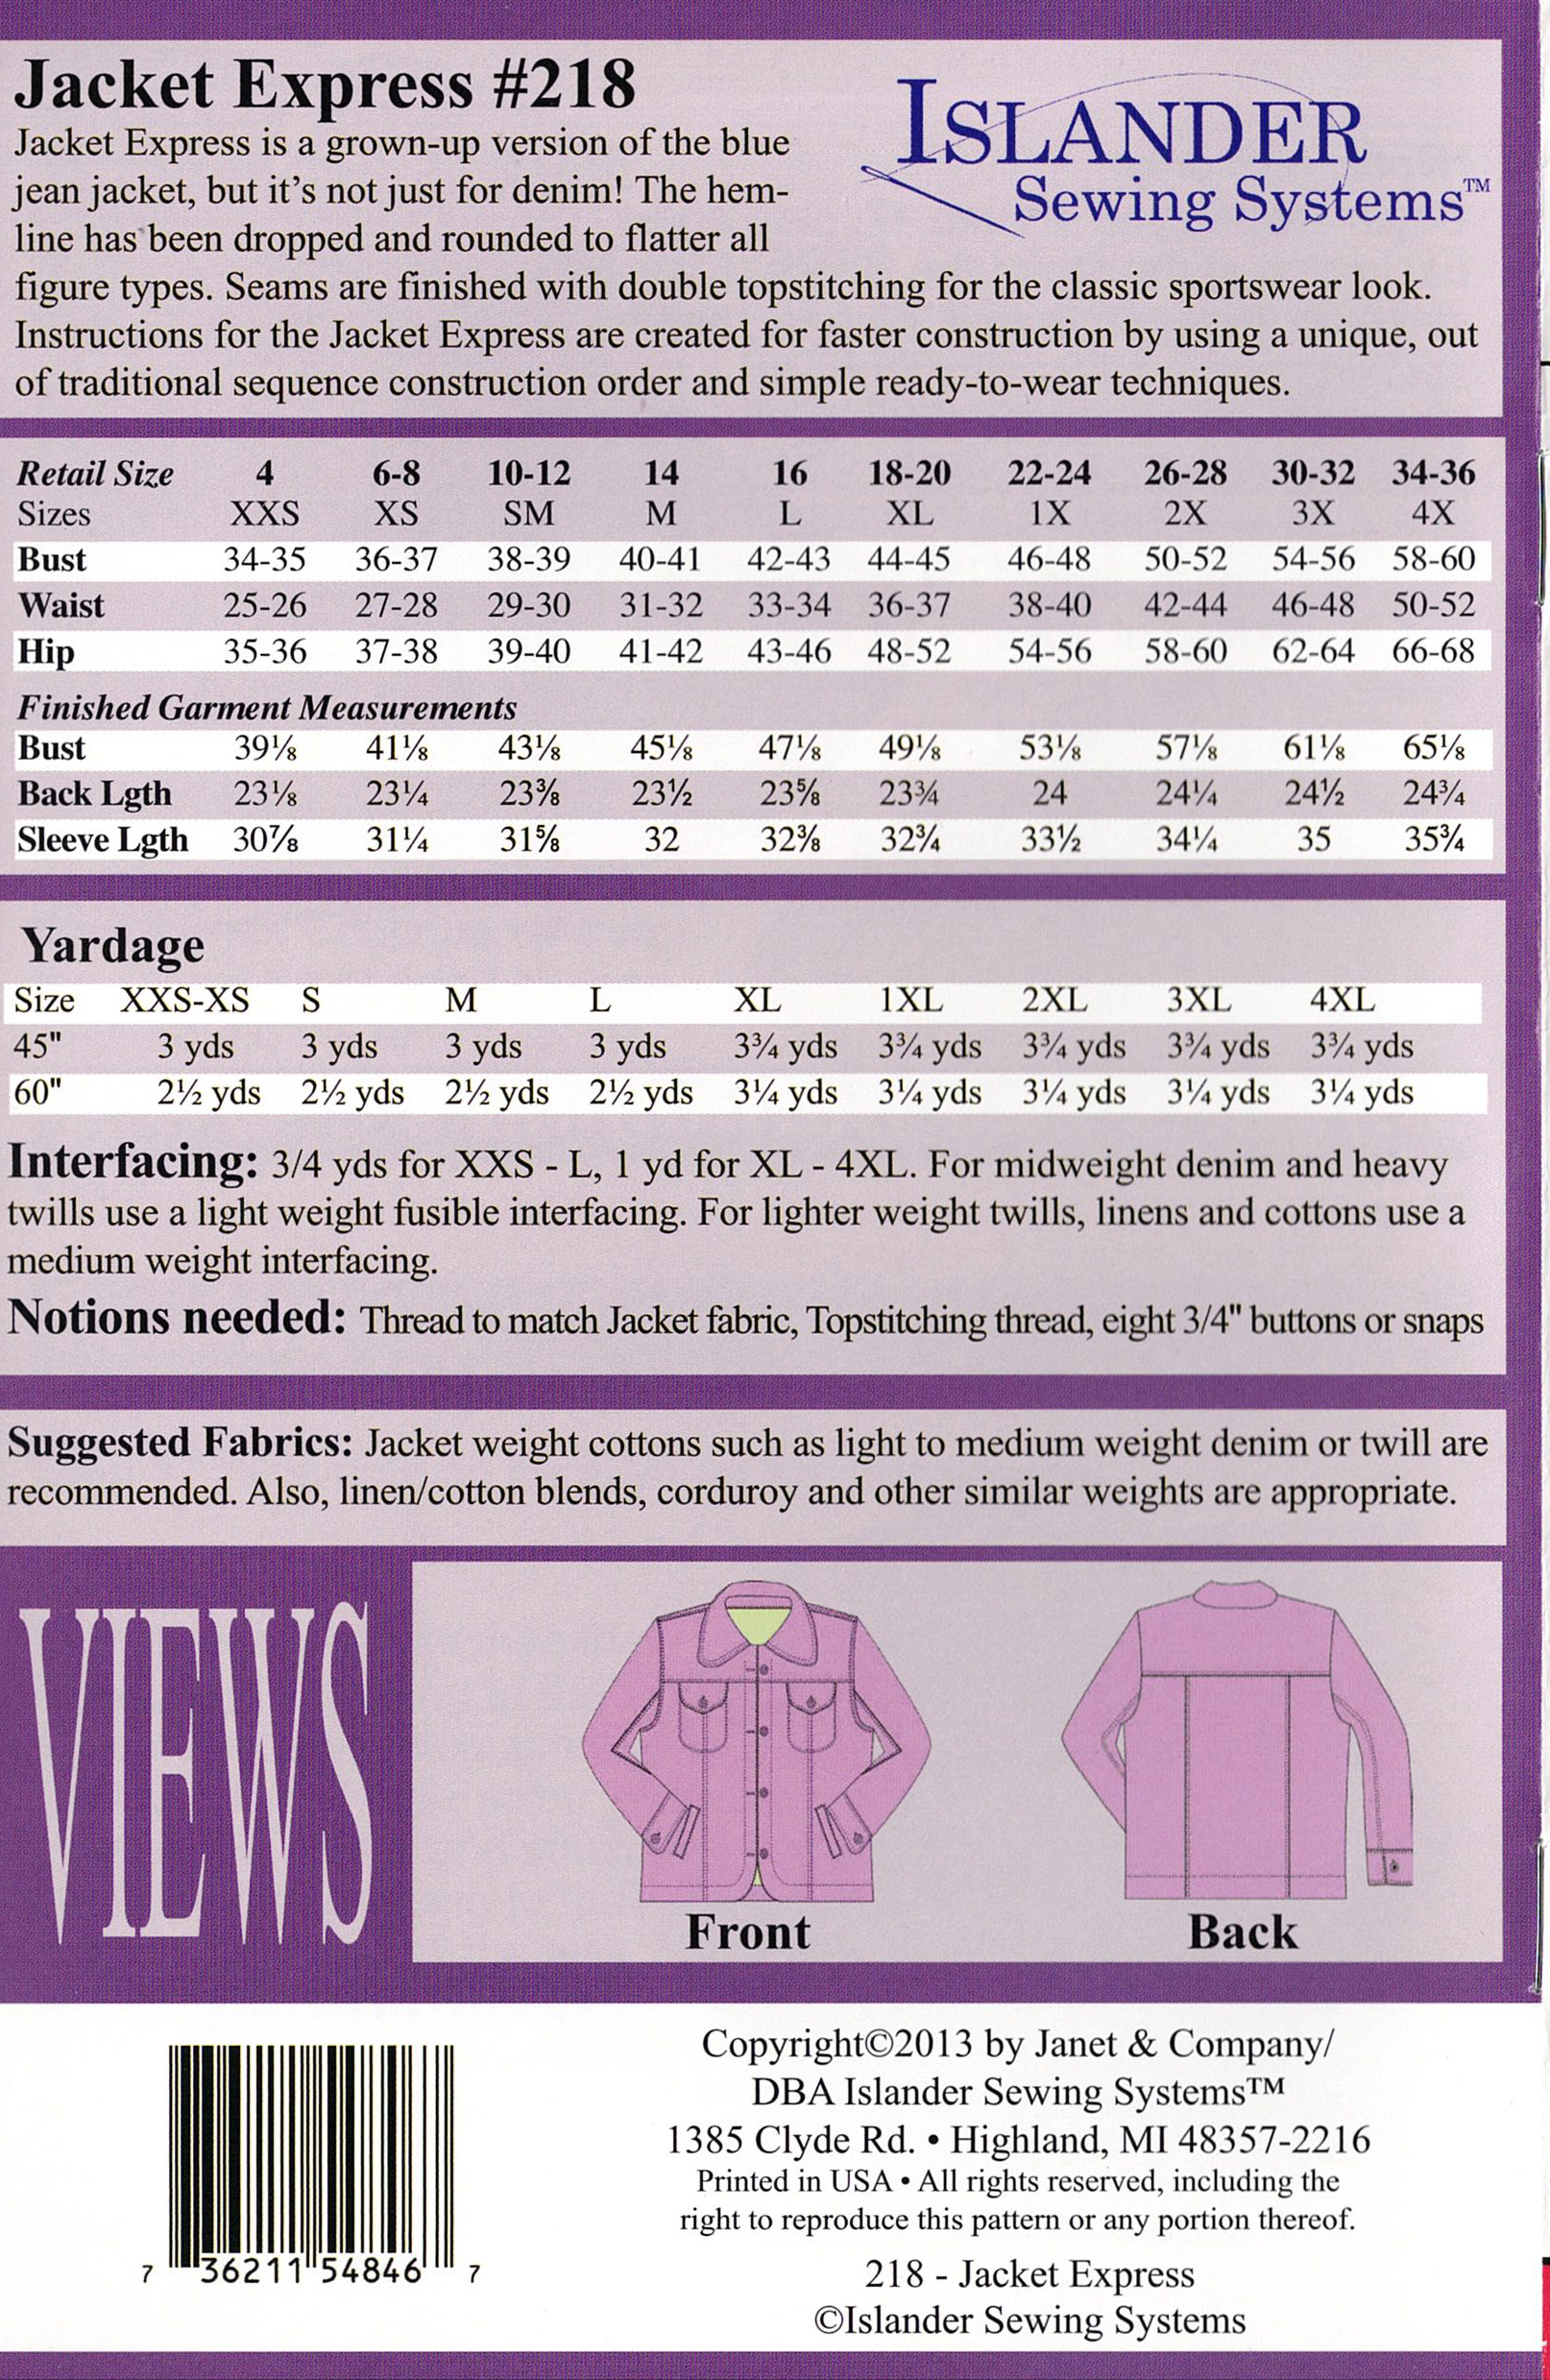
Also, you should see a size chart and a fabric yardage chart. The size chart will indicate what size you need to make of the pattern according to your body measurements. Important: pattern sizes are NOT the same as ready-to-wear sizes. You may wear an 8 in ready-to-wear, but your pattern size would be a 14. Or maybe a T, depending on the brand. So before you buy a pattern, know your measurements.
Typically, you will want to choose a top size based on your bust or chest measurement, and pants will be picked by hip measurement. But, if your midsection is much bigger than the associated size listed on the envelop for the chest or hip, you may want to go pick the size according to that measurement and make adjustments.
Fabric yardage is given per size. And often there may be two different yardage amounts listed. Like, one for with nap fabric and one without, or a 45" Width and 60" width fabric. IF the garment has the option to use different kinds or colors of fabric this may be listed separately (typically they will have a view for the style that has the different colors).
You will also see yardage required for lining fabrics, interlining fabrics and interfacing, if required.
Some patterns will provide finished garment measurements. This is useful to see how much ease is in the garment.
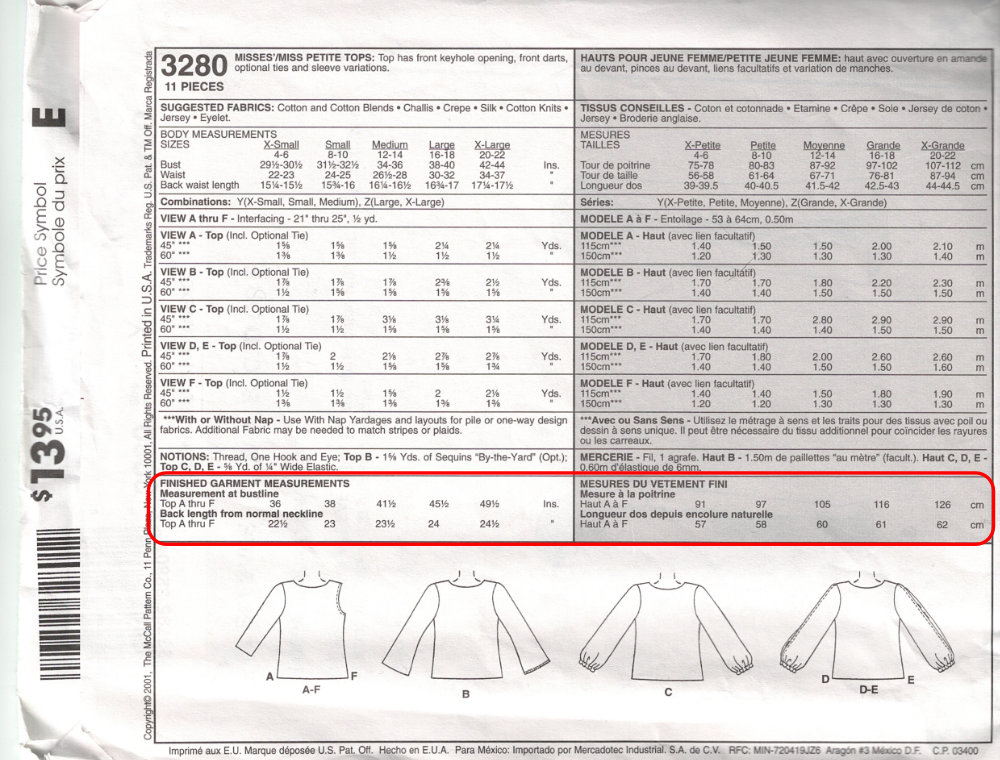
Most of this information is absolutely critical to know before buying the pattern and fabric. Imagine back in the day when only print patterns were available. You might go to the store, pick out a pattern, take the pattern with you as you browse the fabrics, then head over and select the rest of your notions. It would be very inconvenient to have to take the pattern out and walk around with it partially unfolded to get all the shopping done. Of course, now you can buy everything online. So, you can have one browser window open with the pattern details, another with fabric and a third with a notions assortment.
The Instructions
This kind of goes without saying, but the instructions include the step-by-step instructions on how to sew the garment. But they include soooooo much more.
Usually, there is another illustration of the views included in the pattern. Sometimes there might be another measurement chart.
The list of pattern pieces is also included. This will typically show what view each piece goes with. When making a pattern that has multiple views, it's good to know what pieces you need before you start pulling out the tissue and preparing to cut the fabric. If I'm using a printed PDF, I might print a copy of the size chart and piece list and highlight the size and pieces I need for the specific garment.
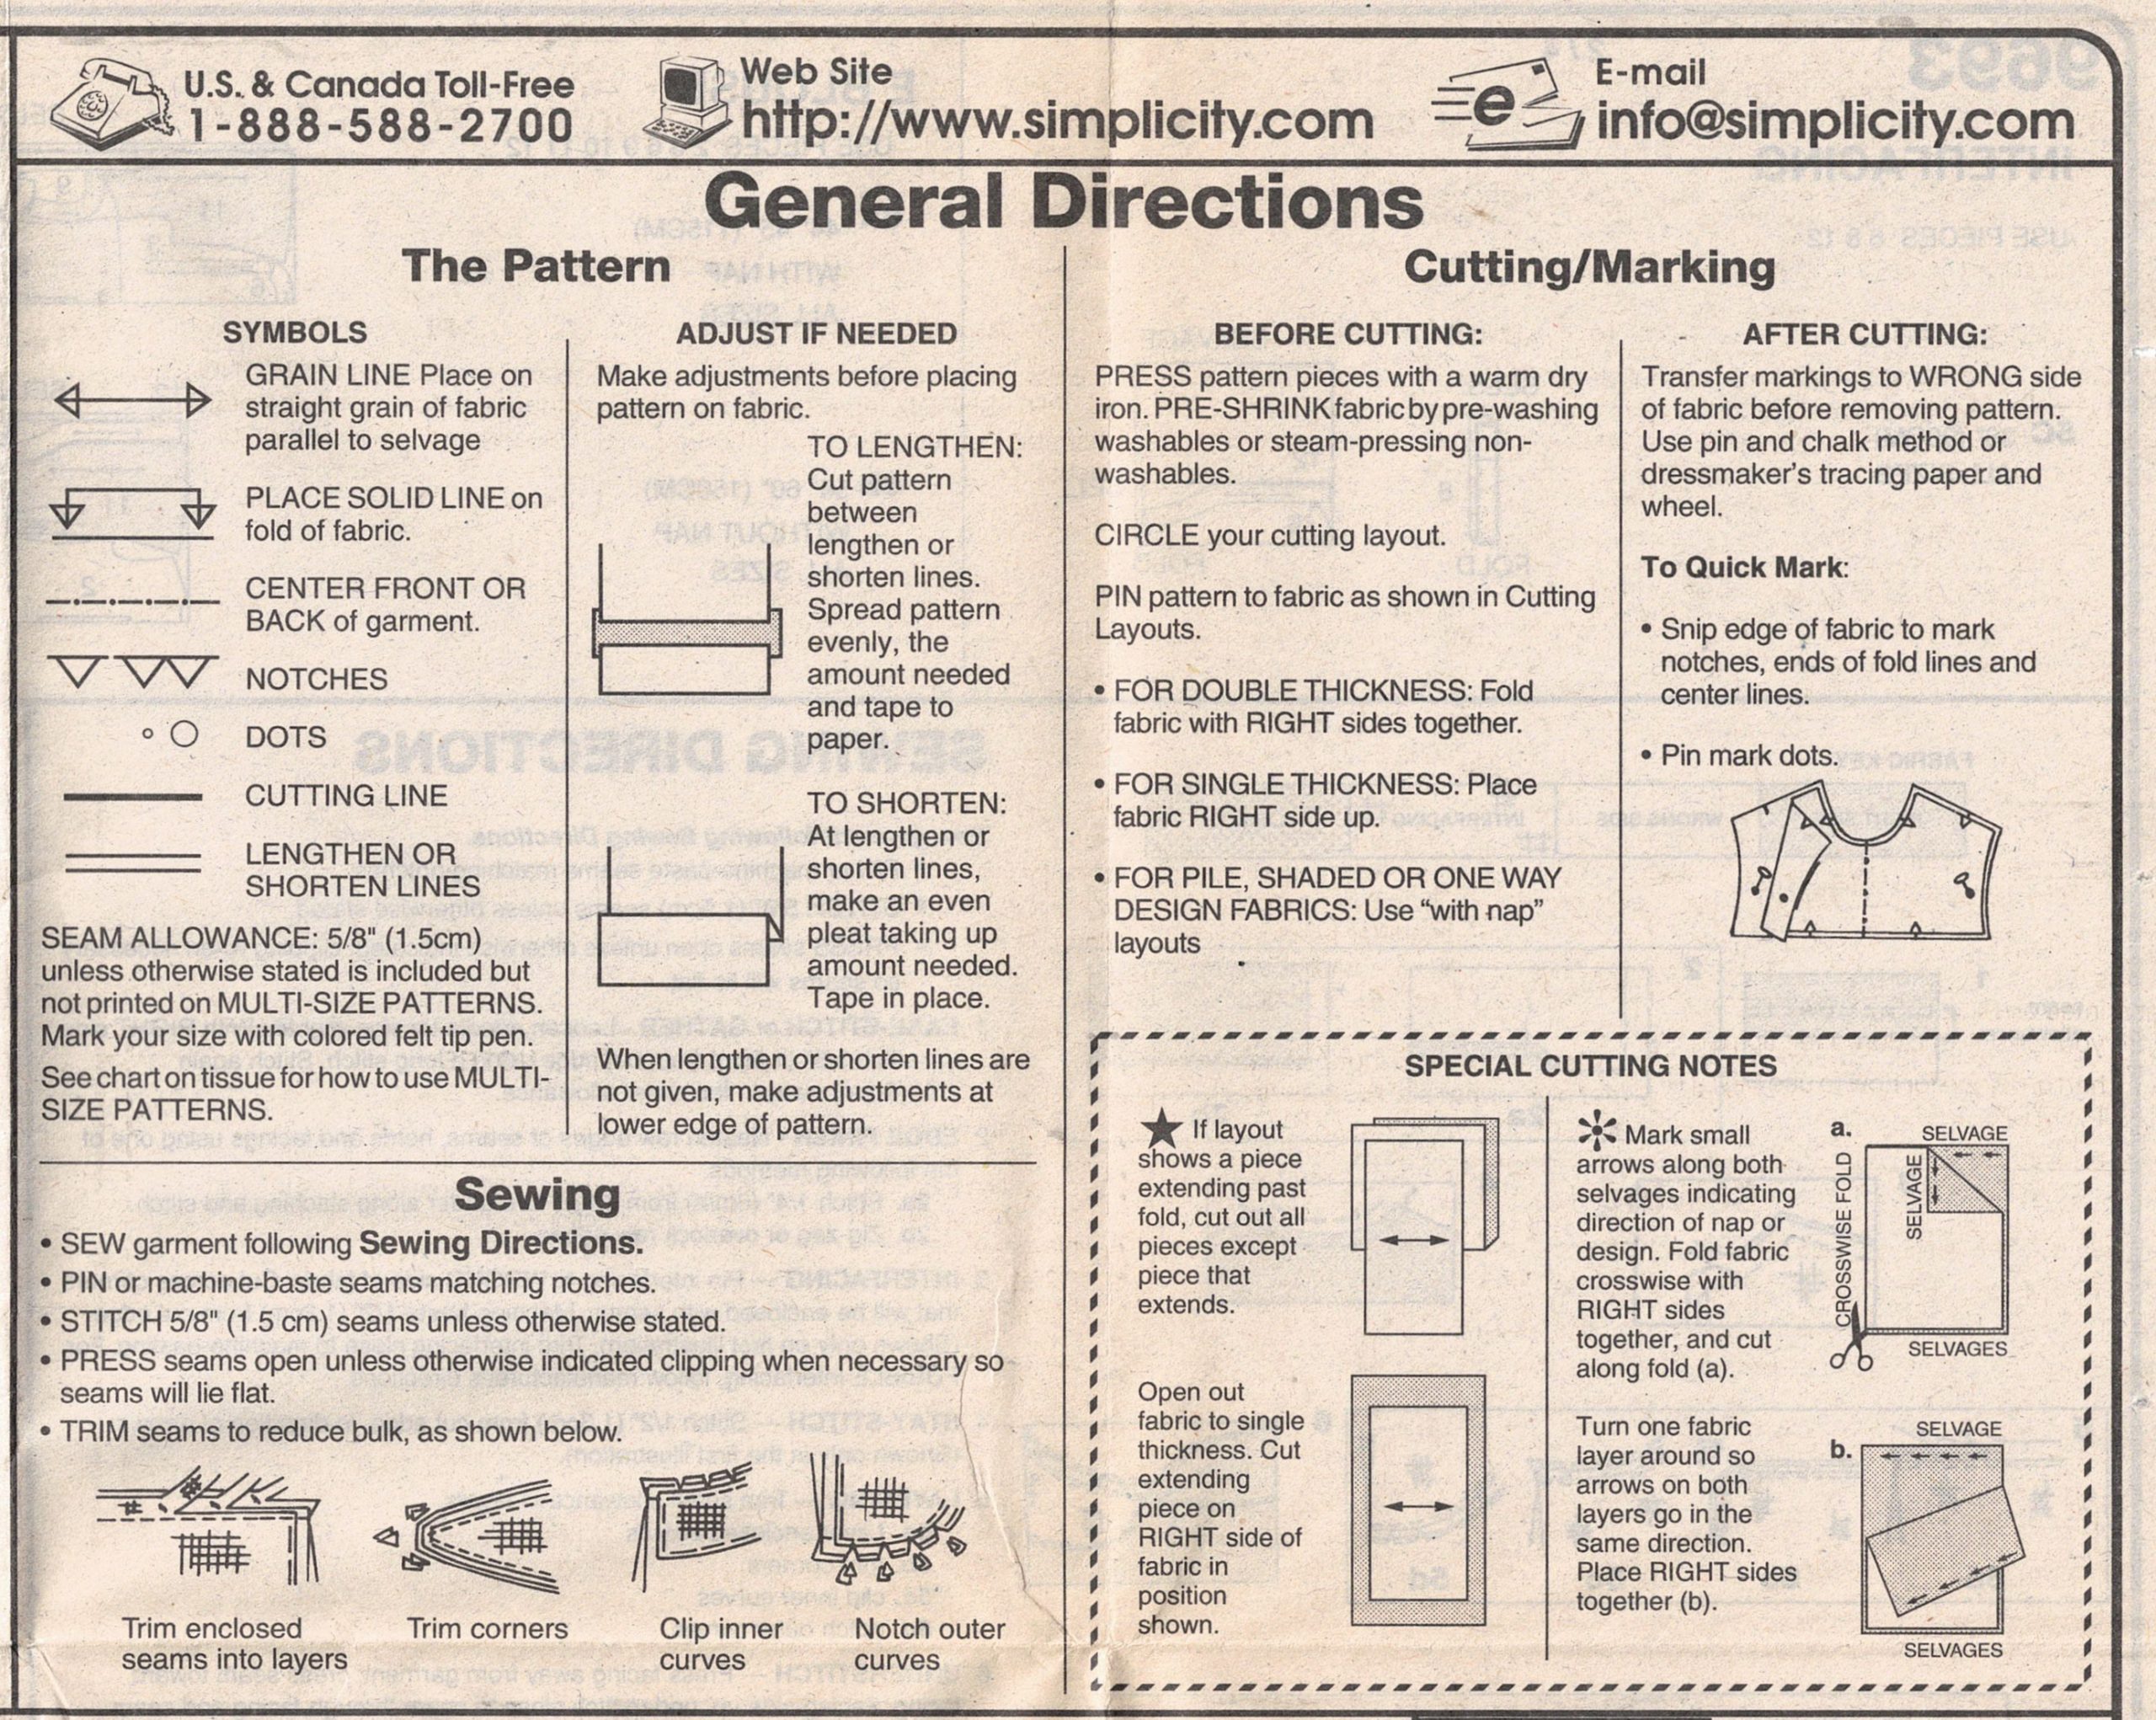
Some instructions include additional glossary information on pattern markings. Pattern tissue has a standard set of markings that I'll cover below.
But they all have a fabric layout guide for cutting. The layout is a suggested layout, and will have variations for different fabric widths, and And with that, they generally include a code, or key for how they illustrate the fabric wrong side, right side, interfacing, lining etc.
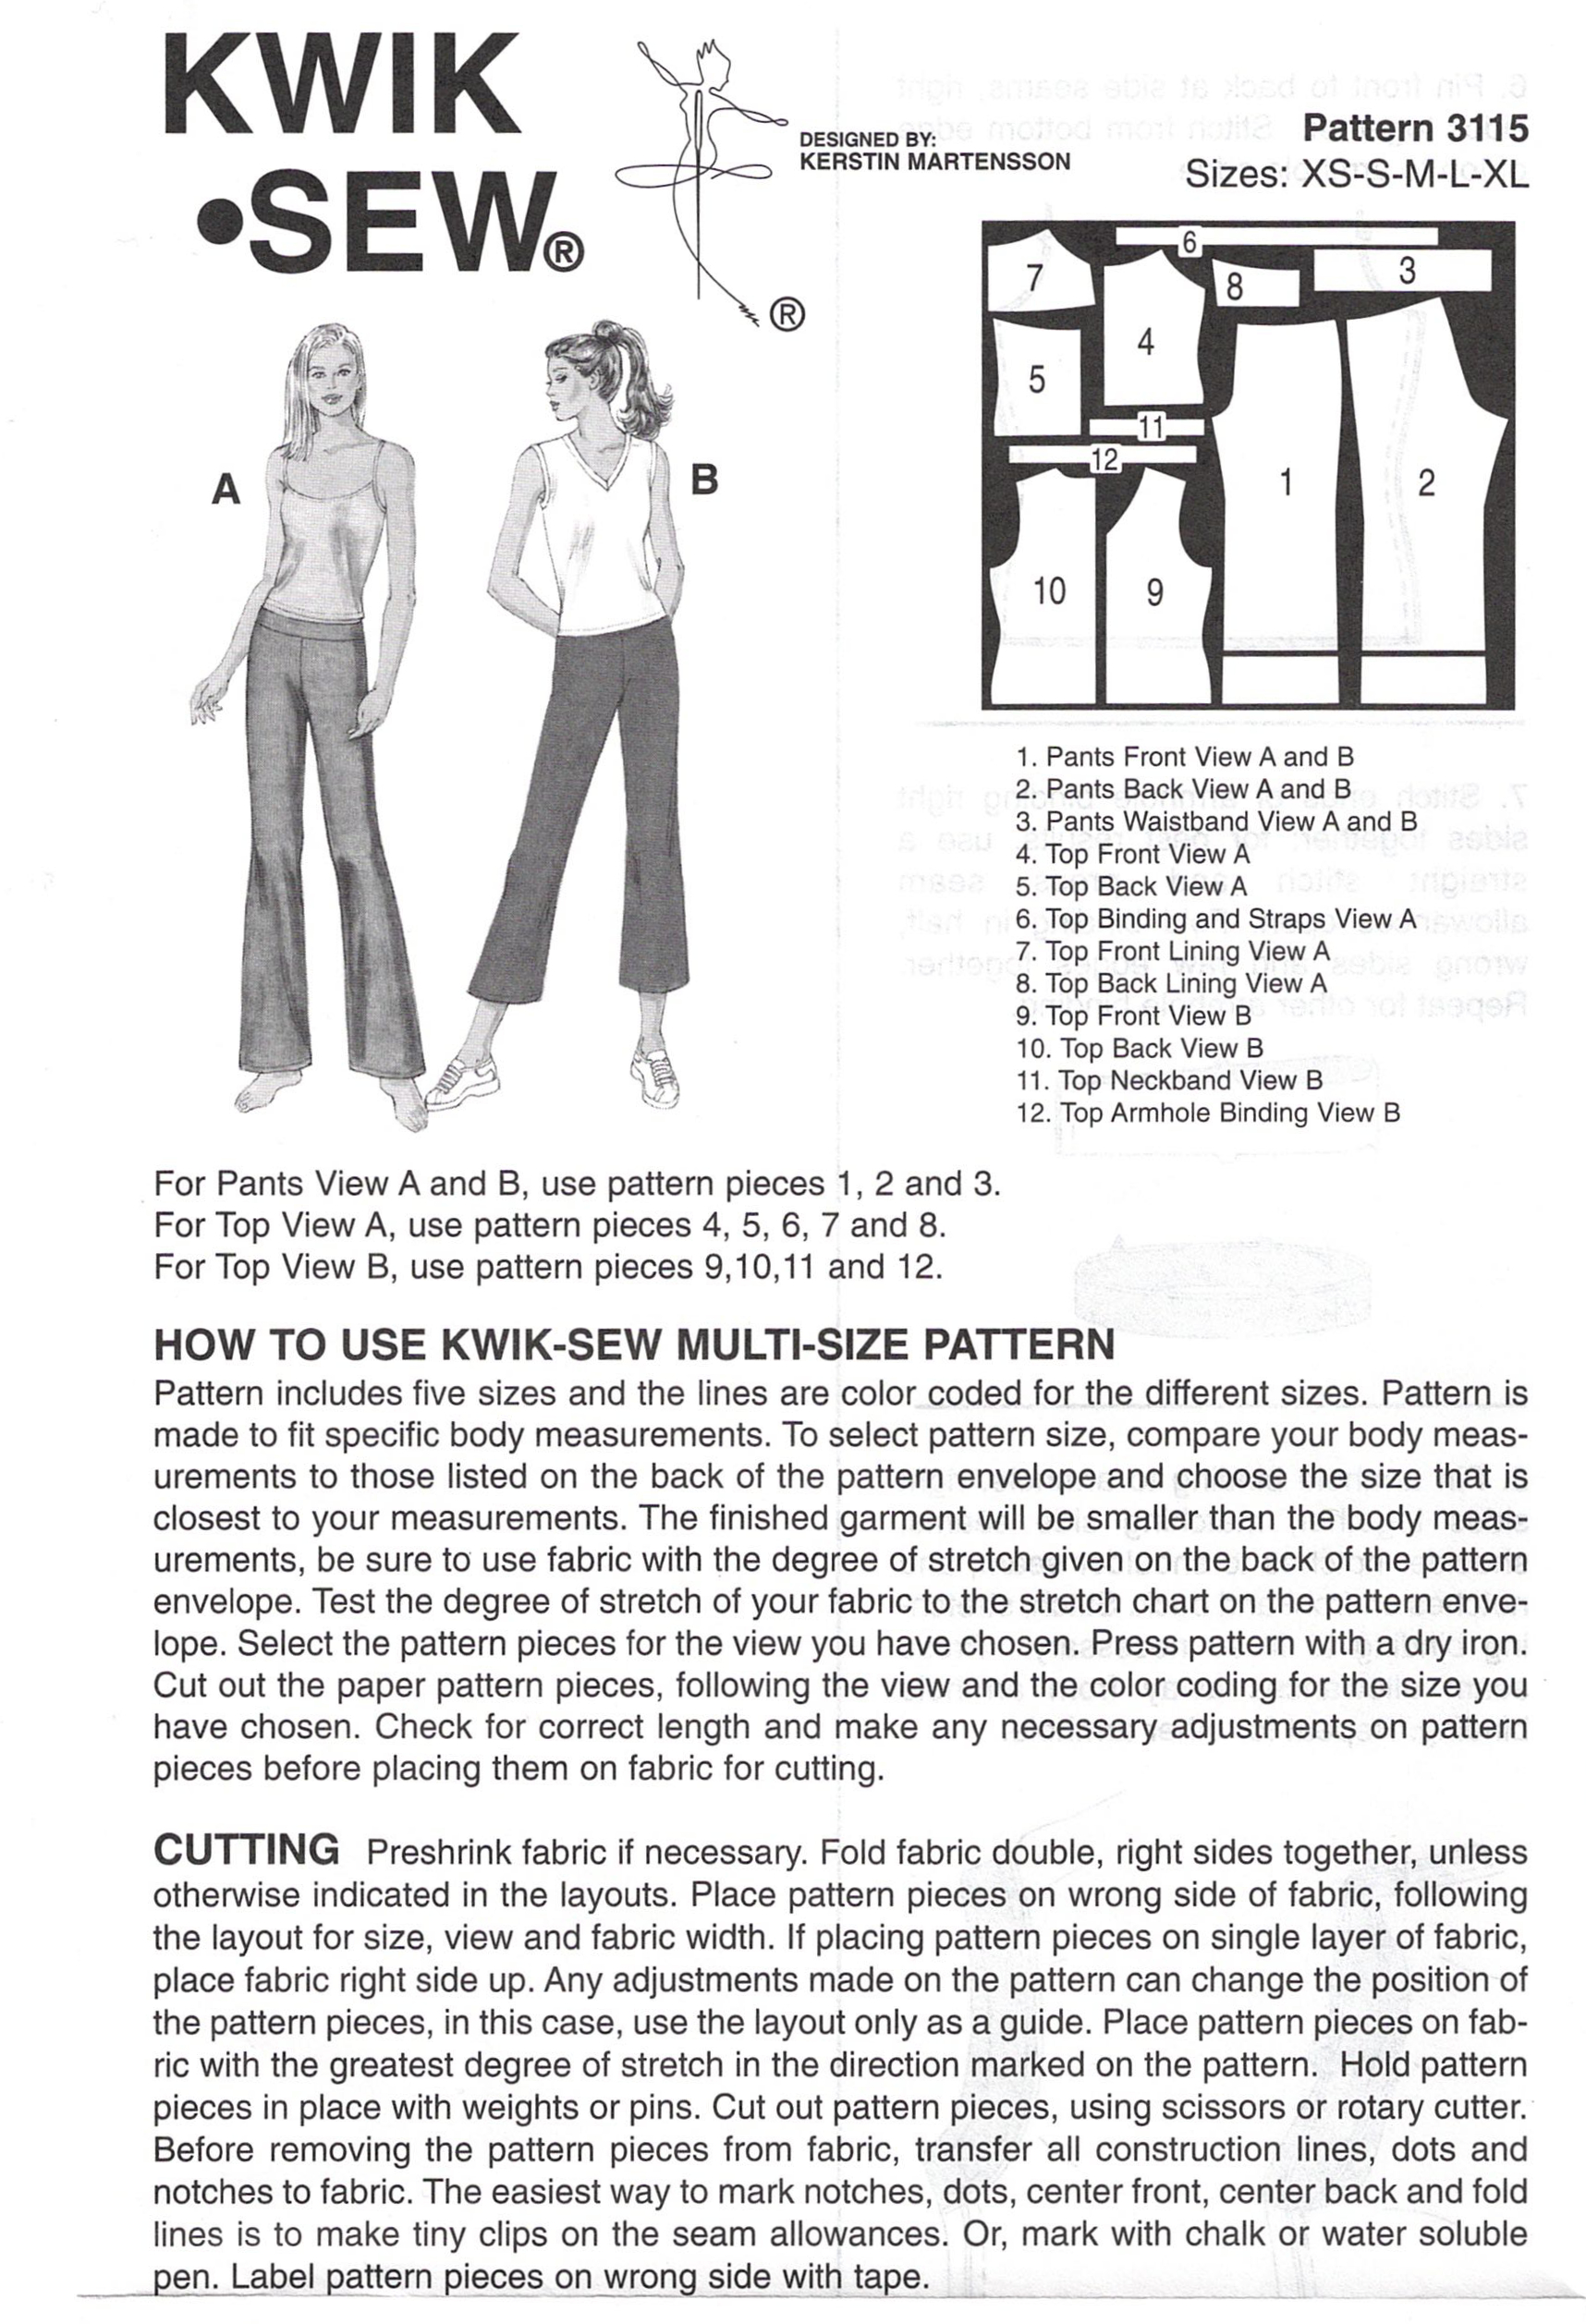
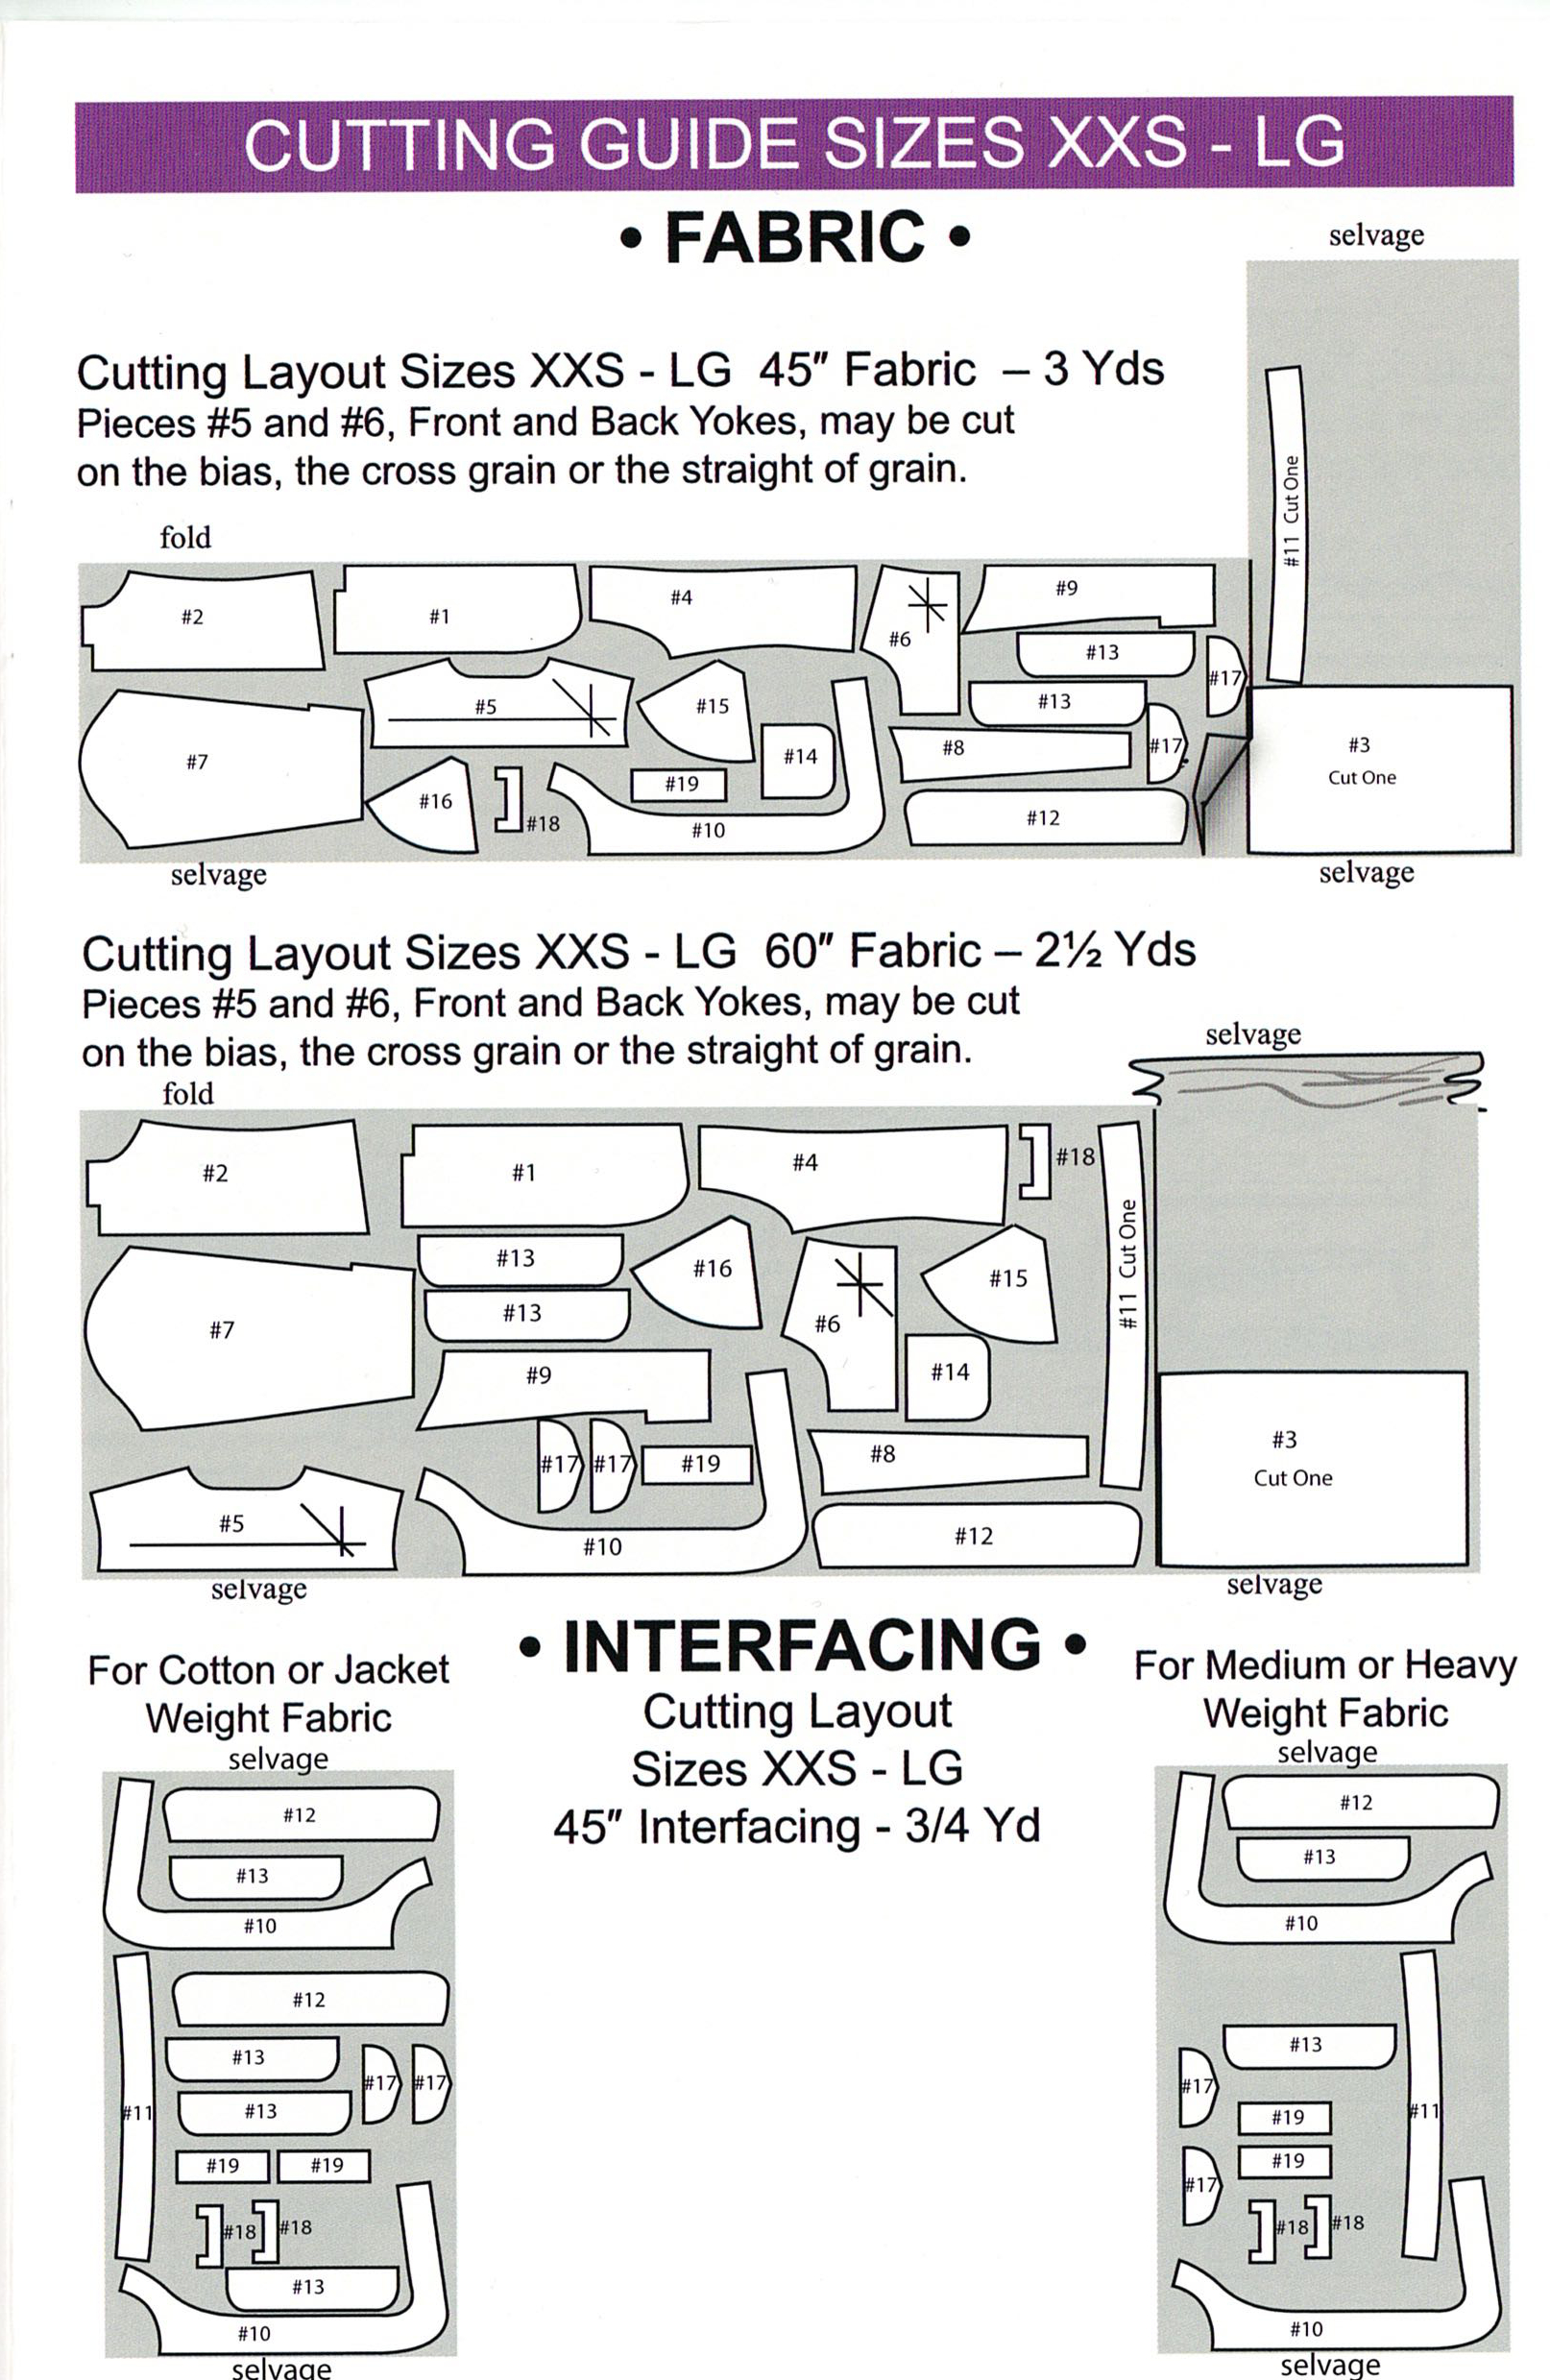
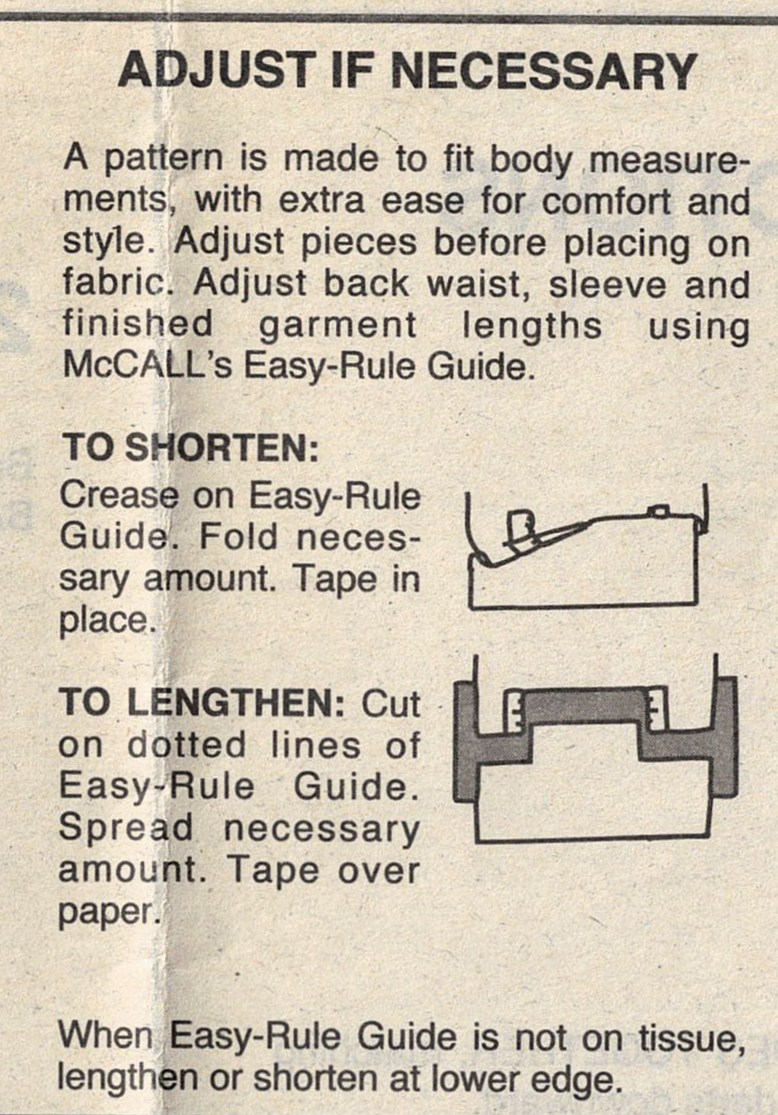
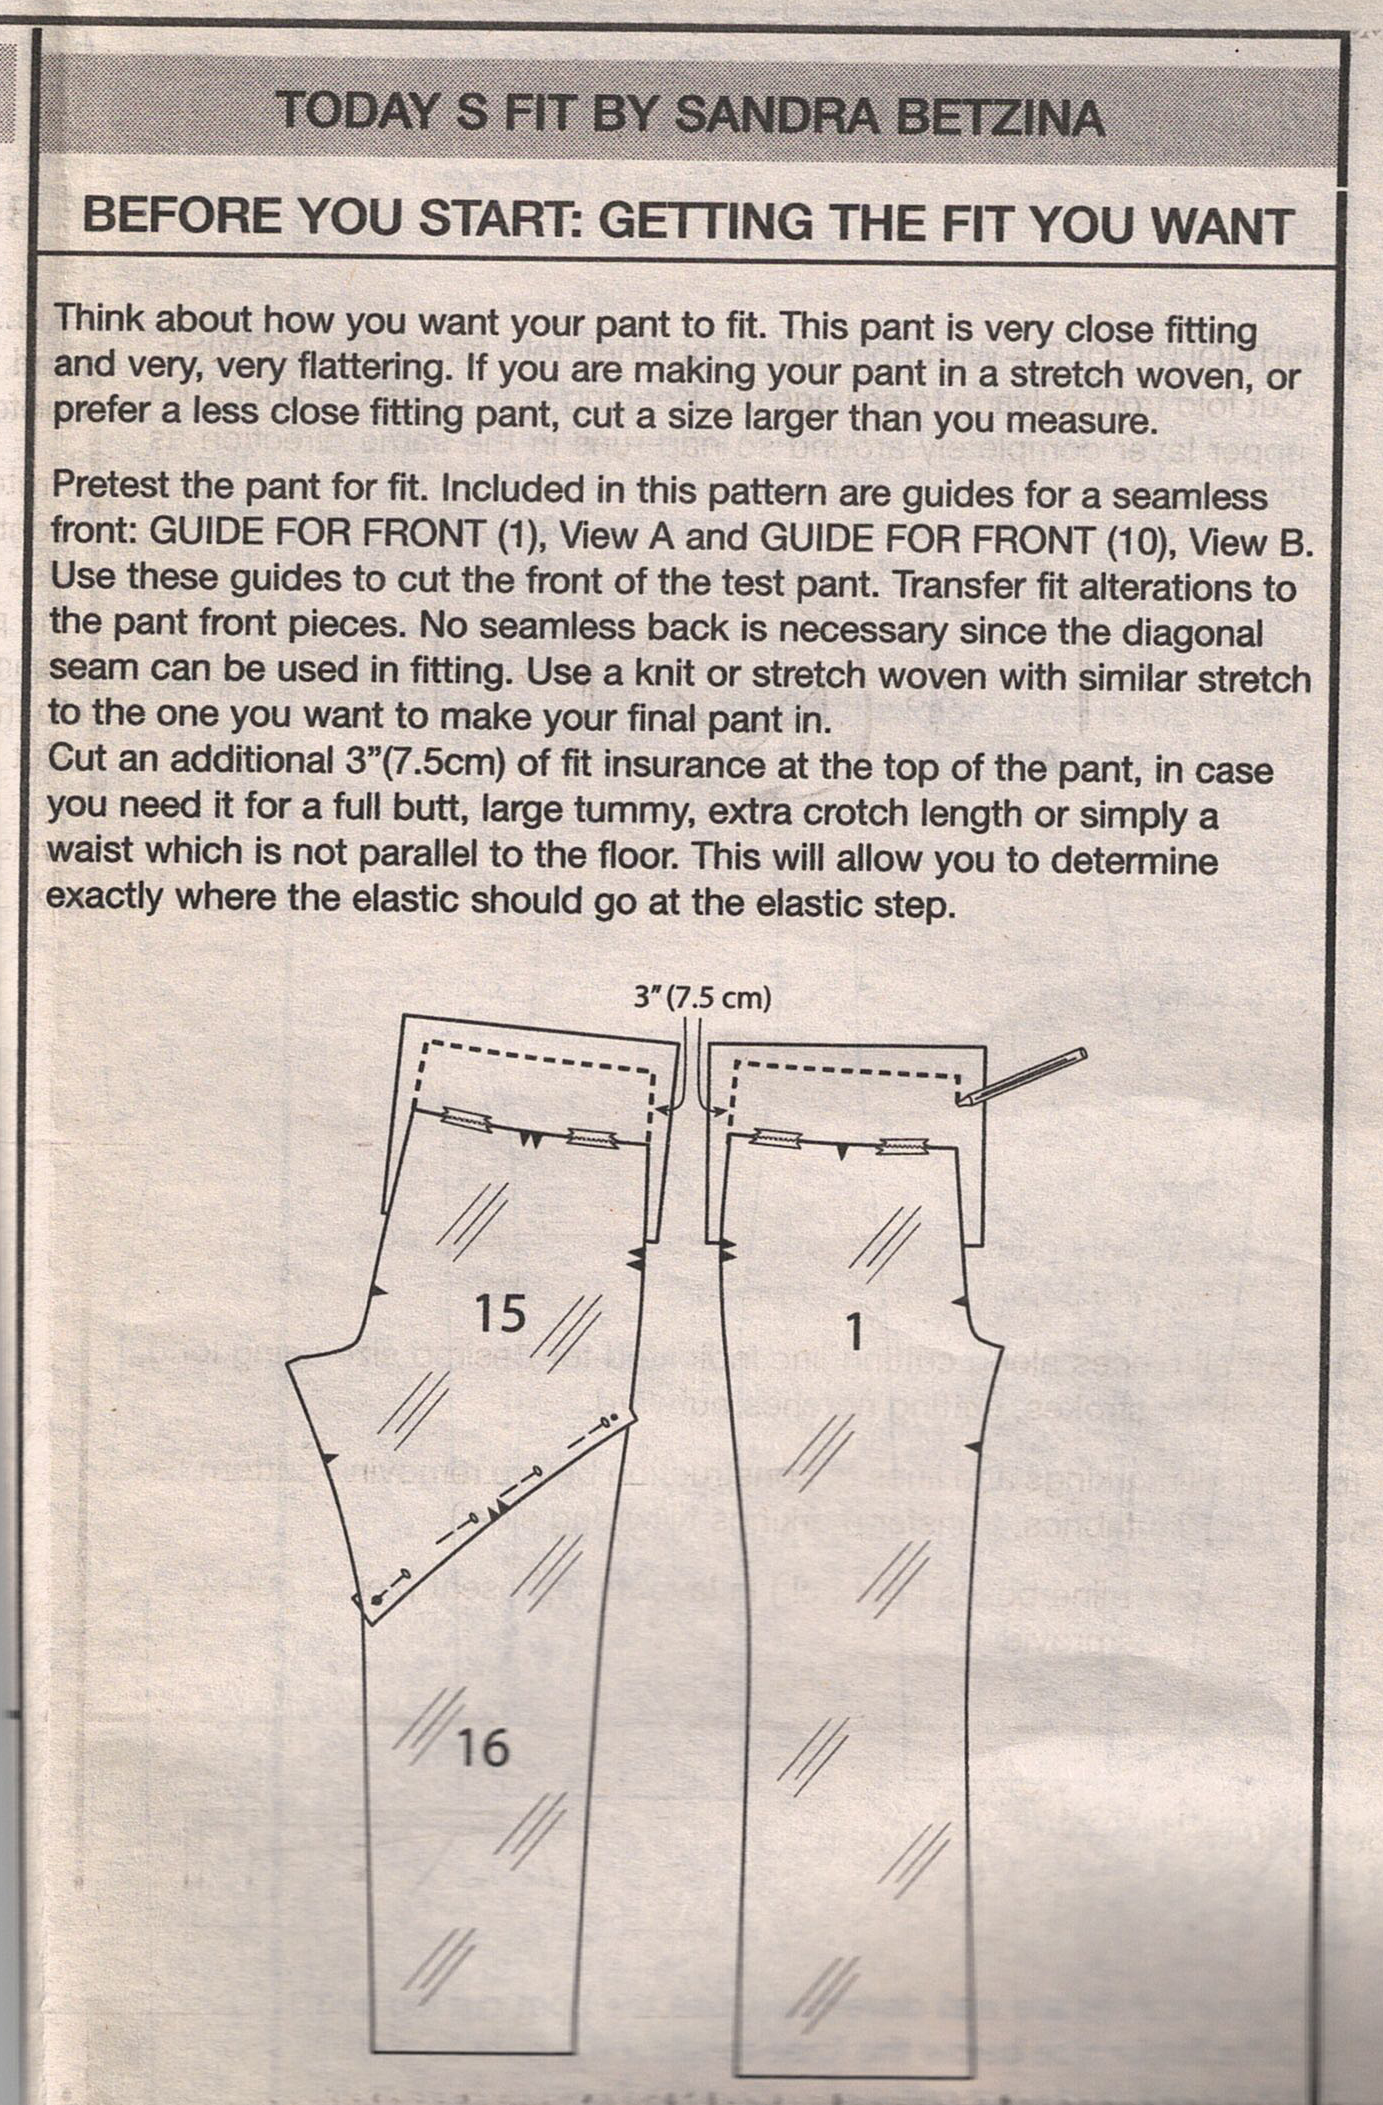
The instruction sheet will typically give generic information on adjusting the pattern for fit. Only some patterns actually give more detailed information on fitting for your body. These patterns typically have some indication that they include this. Today's Fit by Sandra Betzina, for example, includes instructions for modifying the pattern tissue for specific fit issues. Most patterns only contain generic "lengthen or shorten" instructions though.
The instructions will also include information on seam allowance, clipping curves, types of stitches to use and how to make them (like top stitching or stretch stitching).
The instructions are typically broken out by view. Some patterns re-use steps from one view to the next so it's good to read through them to get an idea of where all the information is.
Pattern instructions are typically printed on larger sheets of paper, rather than a standard letter size. If you have bought a PDF pattern, the instructions should be available in letter size for you.
Pattern Tissue
It's called pattern tissue because it is typically printed on super light tissue paper. It's relatively resilient, but it's still easy to tear. It's also semi-transparent. If you print your own PDF pattern from a downloaded one, I recommend printing onto a tracing paper. That will make adjoining all the sheets easier.
Pattern tissue is really large. A single piece of tissue will likely have multiple pattern pieces on it. You'll need to sort through all of these to find the ones you need and separate them out.
Sometimes there's additional information about sizes on the tissue, but in my experience if the information isn't printed on a pattern piece, it's a duplicate of information already on a piece, the instructions, or the envelope.
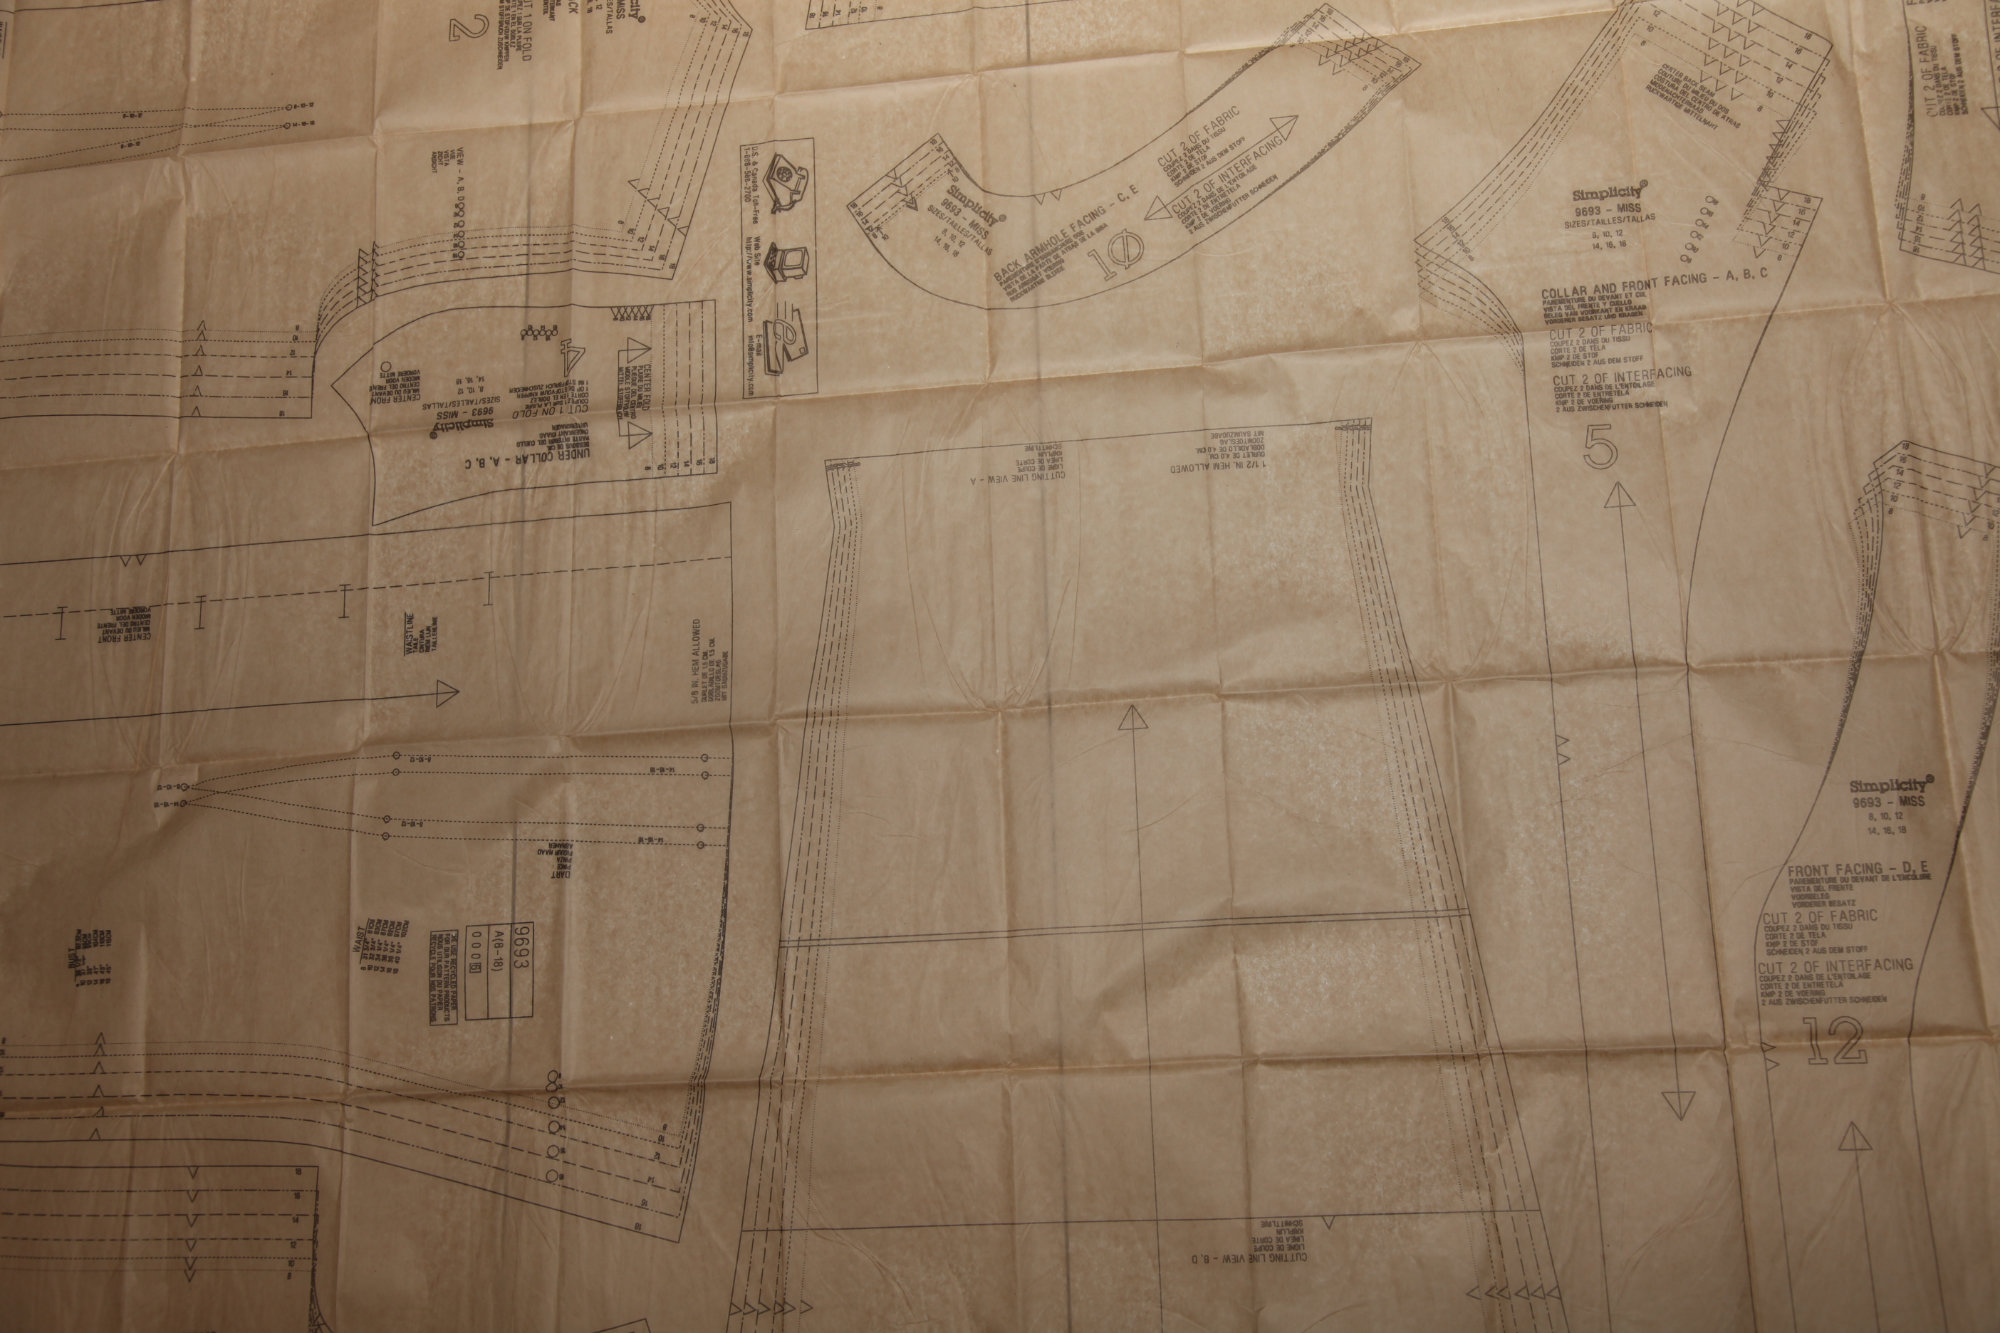
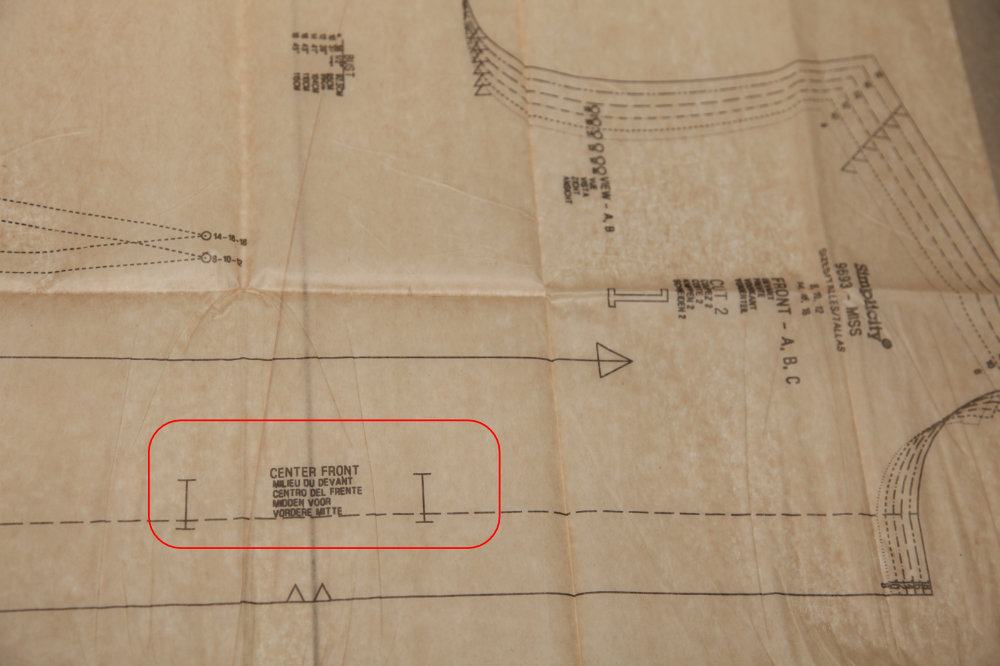
Each pattern piece will be labeled with the pattern number, the view, the piece letter or number, how many times to cut it out (I.e. cut 2) and what fabric to cut it from (i.e. Cut 2 main fabric, cut 1 of interfacing).
Pattern Markings
There are some standard marks on a pattern that one must be aware of when laying out, marking and cutting the pieces for the garment. Pattern markings tend to fall into 3 categories: Cutting and Layout information, Size or fit adjustment, Construction Information. Some of the most common seen are these.
Cutting and Layout
- Cut Line(s)
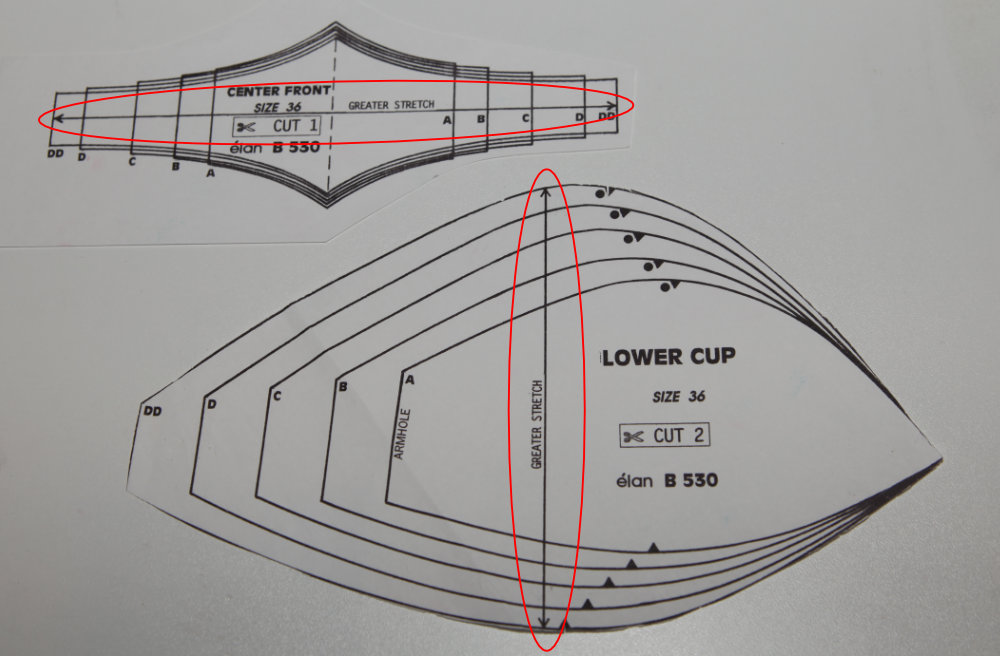
- Grainline (or line of greater stretch)
- Fold Line (If needed)
Fit or Size Adjustment
- Size selection (Coincides with the cut line)
- Lengthen/Shorten line
- Circumference measurements (Bust point, hip line)
Construction Information
- Notches
- Circles, Squares, and Triangles
- Darts
- Sew lines
Cutting and Layout
It's absolutely critical to layout and cut the pattern correctly. If you don't, the garment might not fit, or will hang funny. These marks give you the information on how to layout the pattern on the fabric, and also where to cut.
Cut Line
Almost all patterns have a line to cut on. In fact, I'd go out on a limb and say that most modern patterns do, and it would be a very odd pattern that doesn't. It's typically the edge of the pattern piece. That being said, always check the pattern instructions to make sure Seam Allowance (SA) is included in the pattern. If it is not included it will have to be added on. If SA isn't included, the pattern edge will be the sew line. Vintage patterns and some European patterns may not have Seam Allowance included.

Grainline
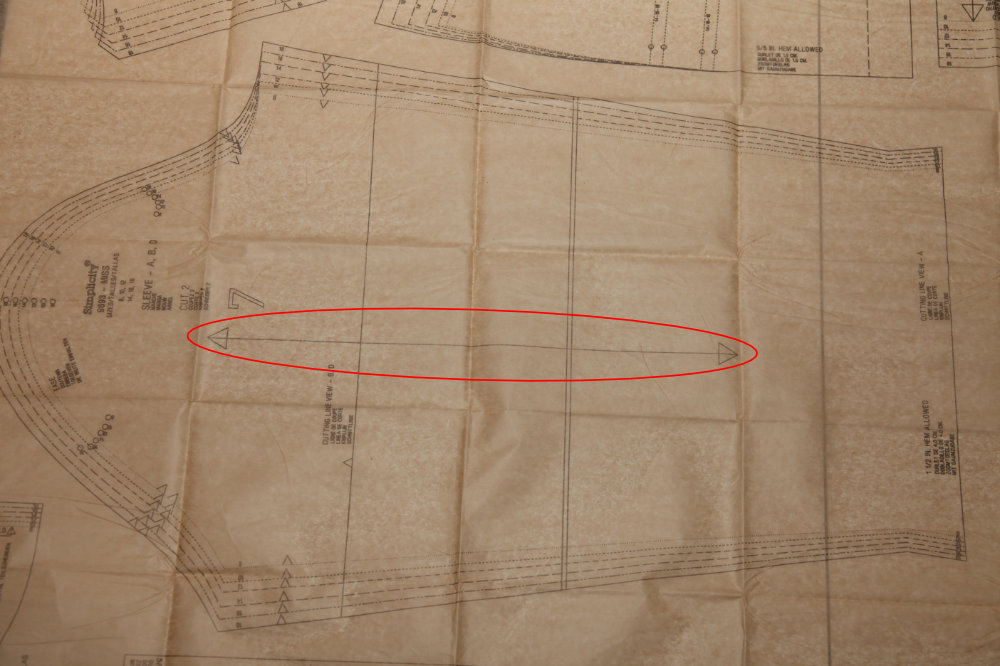
The grainline of your pattern indicated how to line up the piece with the grain of the fabric. Grainlines are usually solid, labeled grainline, and typically will have an arrow on one or both ends. If the line has arrows on both ends (Or doesn't have arrows on either end) that means that you can place the pattern either direction (right side up, or upside down) on the fabric. If the grainline has an arrow on only one side, that means the pattern is directional, and you must place all arrows going the same direction when you layout the pattern. You may have a pattern that has 2 arrows, but you still need to lay out the pattern directionally because of your fabric for example when you are working with a directional print or napped fabric.
Fold Line (If needed)
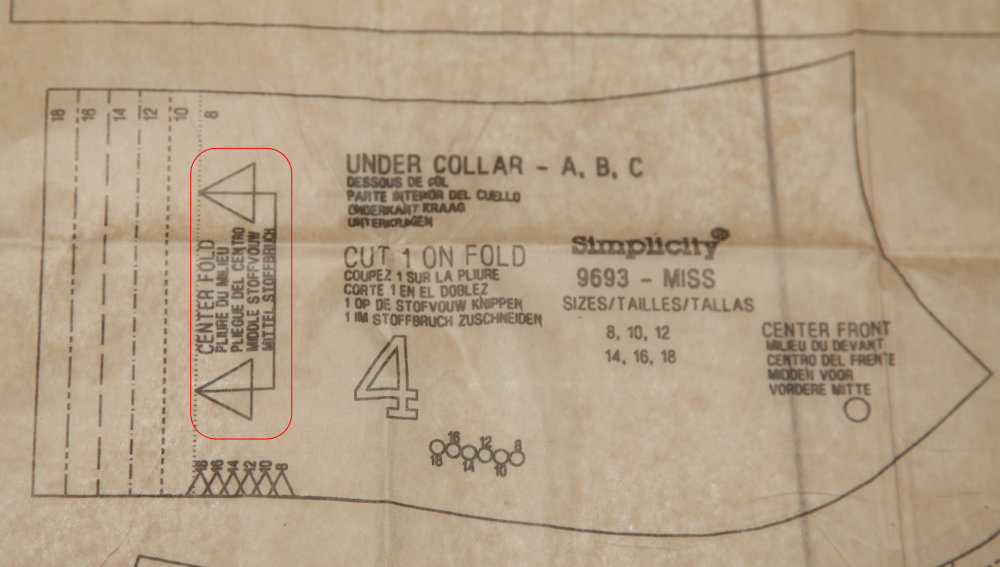
If a piece is to be cut on the fold of the fabric, it will have a fold line indicating which edge goes against the fold. Often, if a piece has a foldline, it won't also have a grainline. In that case, it is assumed that the fold is on the grain. You must fold your fabric on the straight of grain. However, sometimes you may have a piece to be placed on fold, but the grain would be perpendicular to the fold. This could be especially true if you are working with stretch fabrics and the "grainline" really is the "direction of greatest stretch".
Fit or Size Adjustment
When making a garment, it's best to make as many adjustments as you can on the pattern tissue to make the garment fit BEFORE you cut the fabric. Here are some of the markings that are specific for fit or size adjustments.
Size Selection
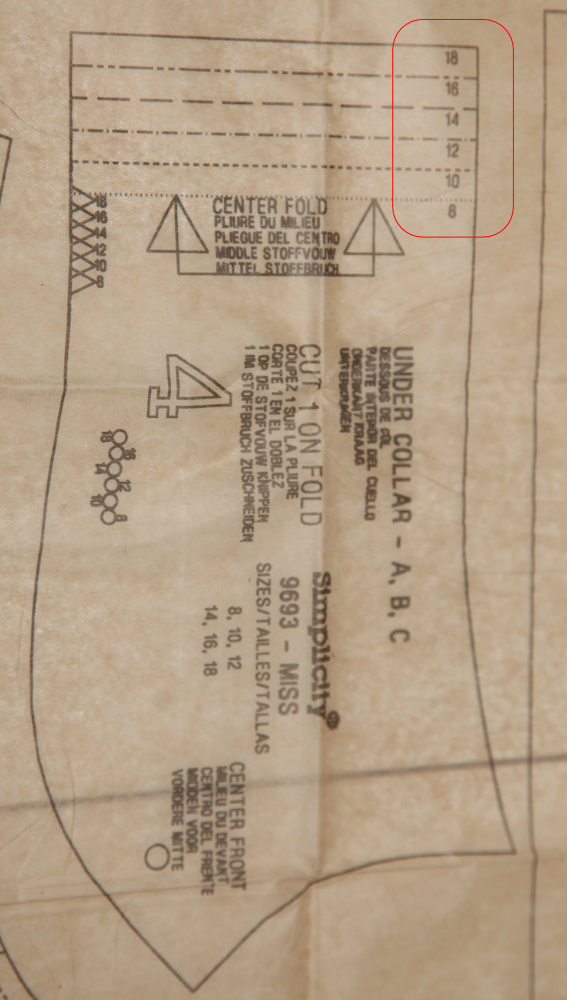
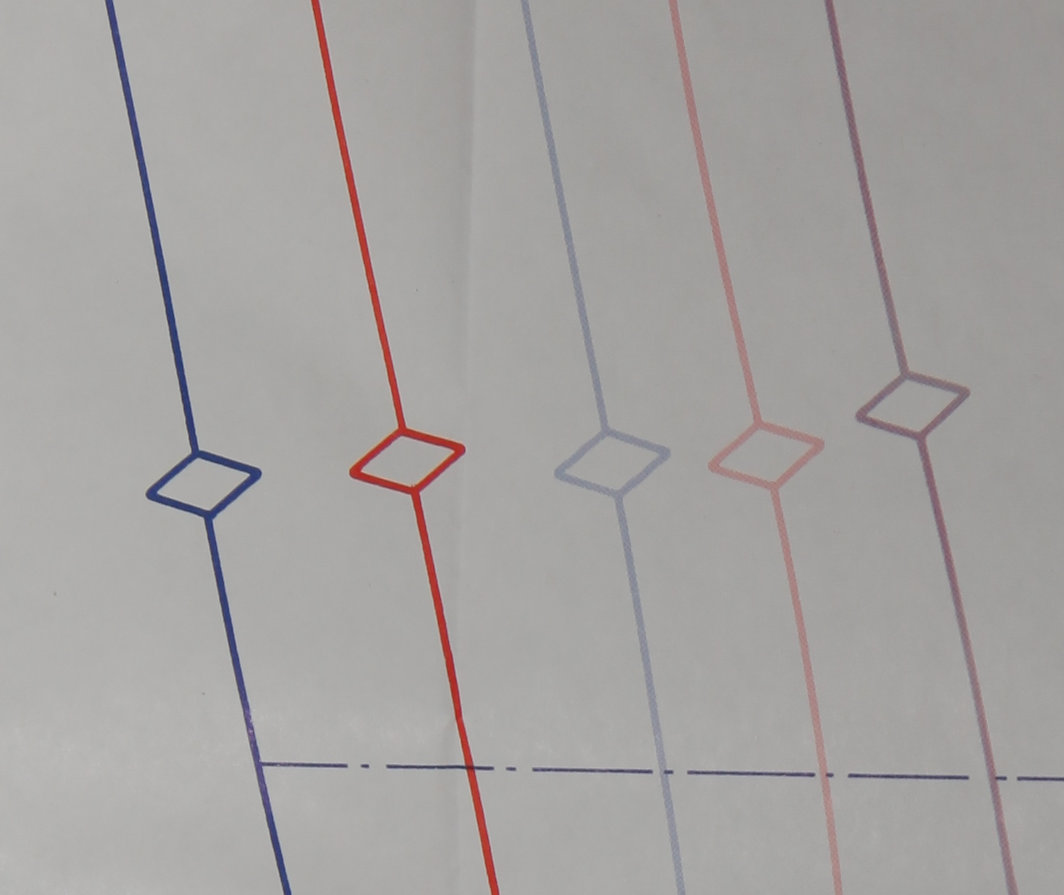
Typically this is indicated on the cut line. If the pattern contains multiple sizes, there will be multiple cut lines. And each cut line will be indicated by a different line type (dot, dash, solid, etc). If you are printing a PDF, the sizes might also be color coded.
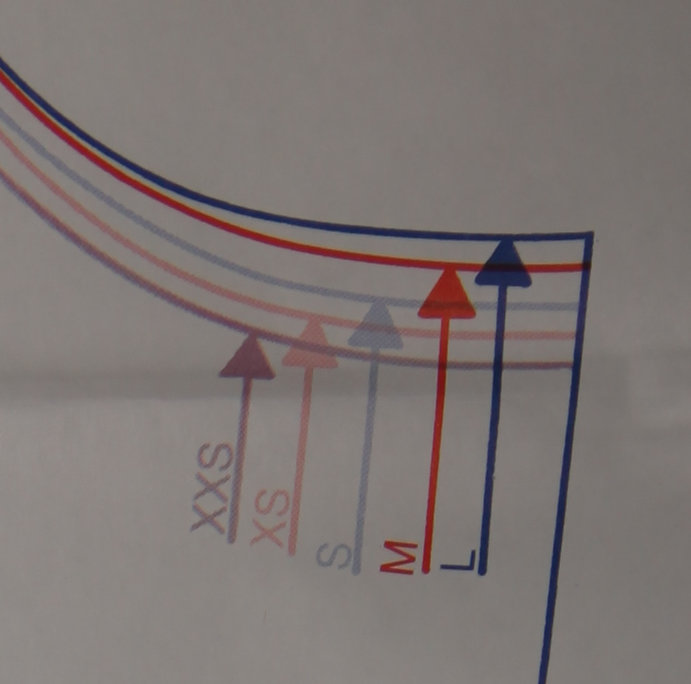
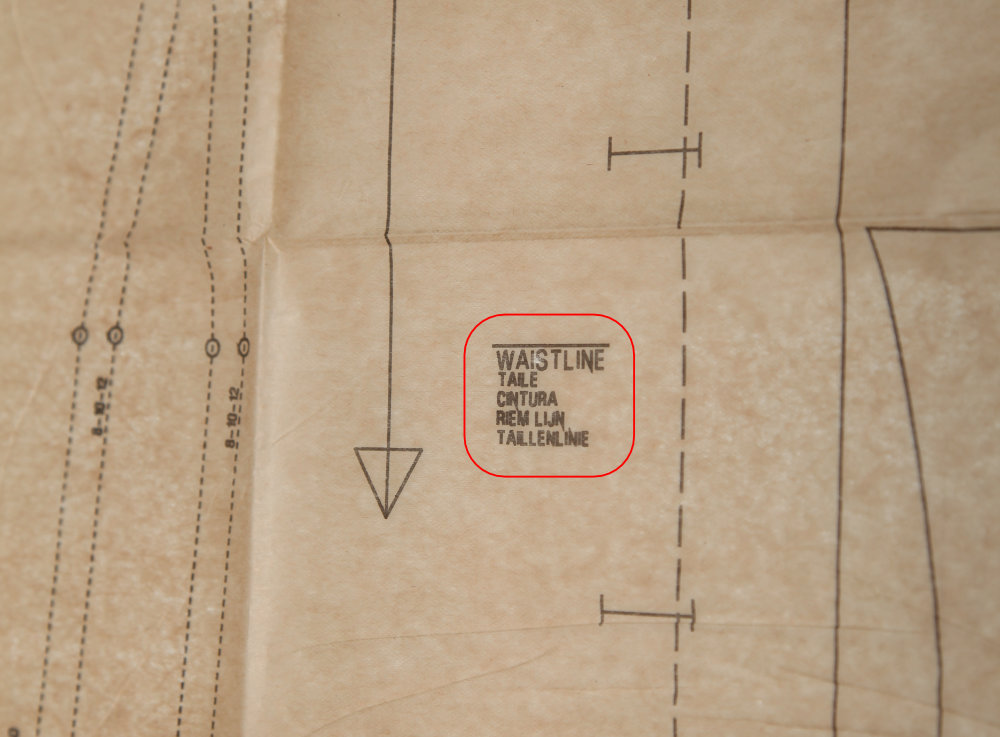
Circumference Measurements
A large (about 3/8") circle with a plus in it (like a reticle) indicates specific placement of a body part on the pattern. This is often used for the buts point, but could be used for waistline, hipline or biceps.
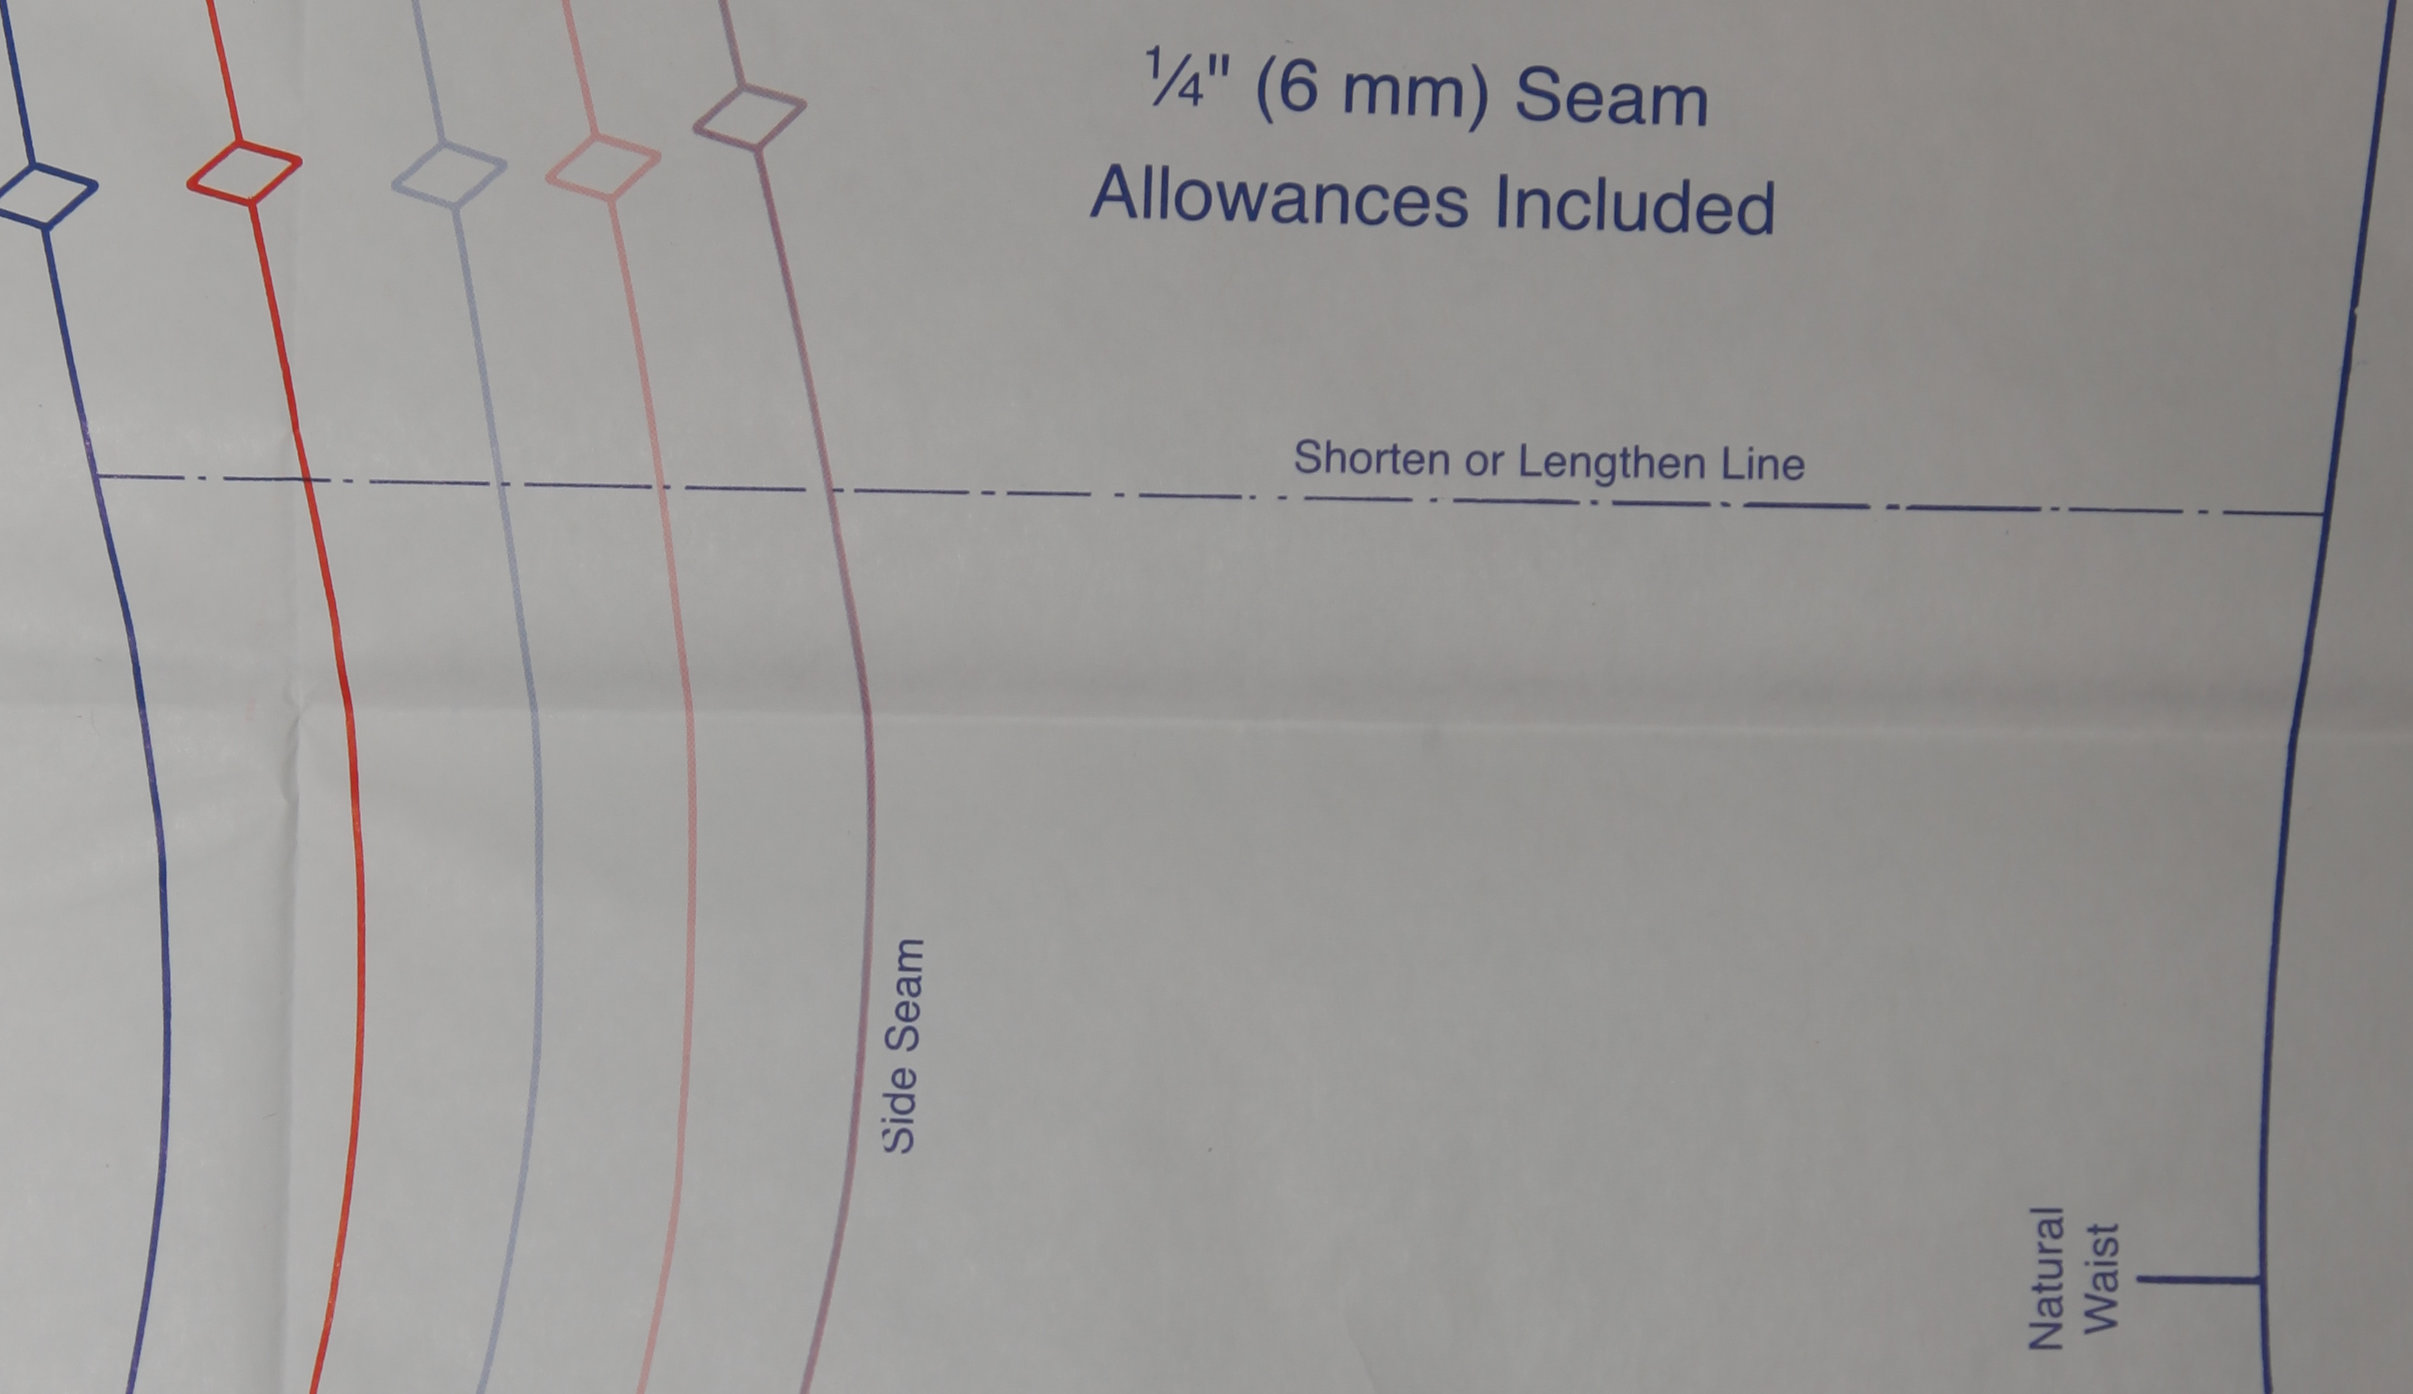
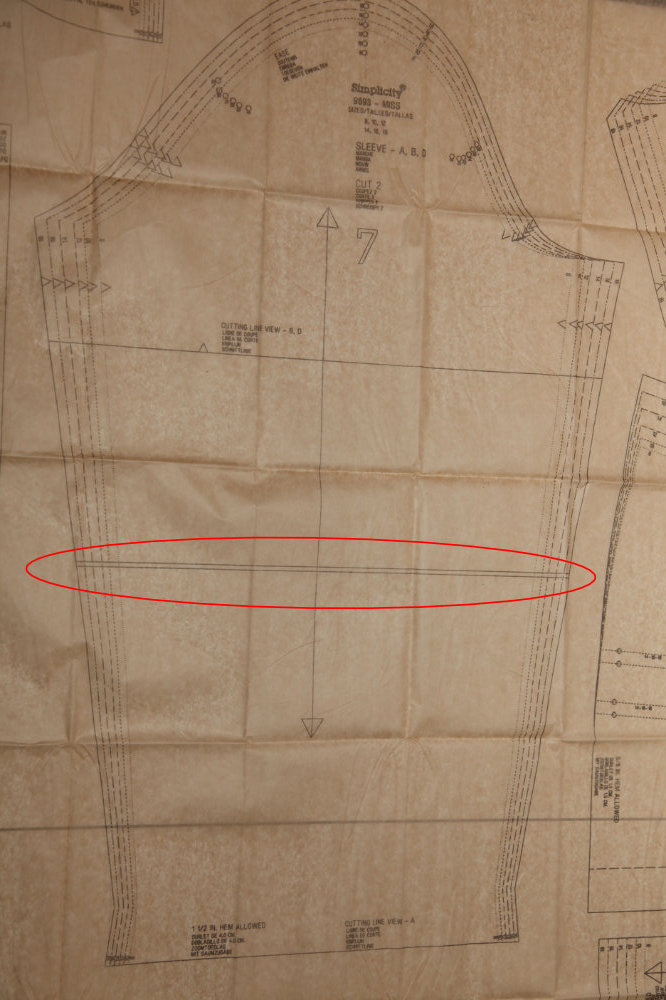
Lengthen/Shorten line
If the pattern has the place(s) to lengthen or shorten a piece, that section will usually be indicated by two parallel lines typically no more than about 1/8" apart. Some patterns will use a different line and label it.
Construction Information
There are many marks on the pattern that indicate how to put the pieces together. From outside seams to placement of pockets or patches, these all must be indicated on the pattern. These are the basics, but you may encounter other design features indicated on your pattern depending on the style.
Notches
Notches are typically triangles (or diamonds) on the outside edge (cut line) of the piece. Back in the day, they would poke out past the cut line. Some pattern manufacturers still do this. You do NOT have to cut around the notches. Just cut the piece flush with the cut line and mark the notches with a single snip (take care to snip less than the distance of the seam allowance) for each triangle. (They will all be triangles if you cut half the diamond off..) On some patterns, the notch might be a single line or a T (capital T) that has the bottom of the T on the cut line.
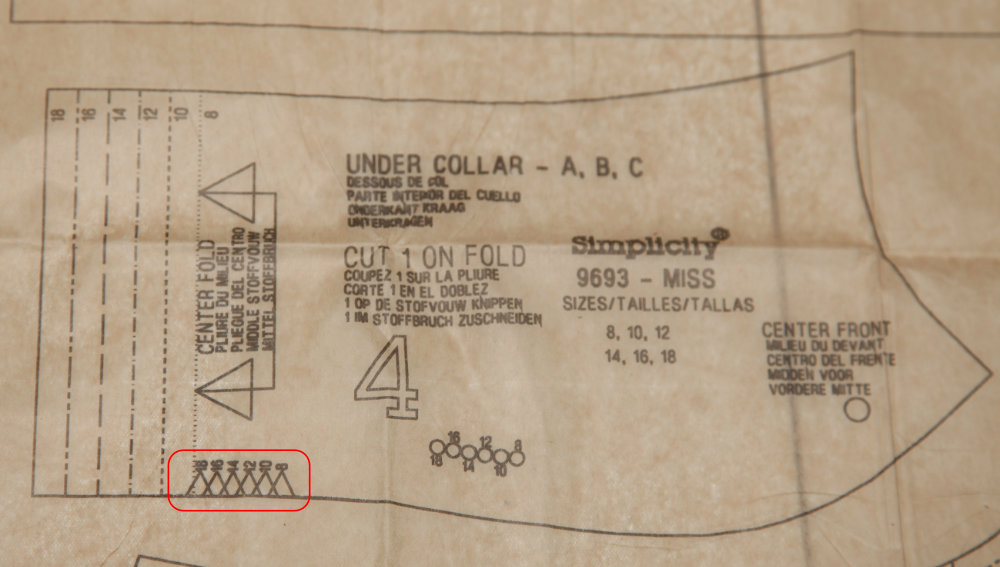
All notches mean the same thing. They are for matching up seams when putting the garment together.
Single notches are used for the front (Or if it's a side seam a single notch is typical). Double notches are typical for the back of the garment. If you have one of those patterns that have a LOT of pieces to put together, you could have triple (or more) notches. I've seen this on very few patterns, but it's usually when you have a triangle that has three different pieces that have to attach to it.
Circles, Squares and Triangles
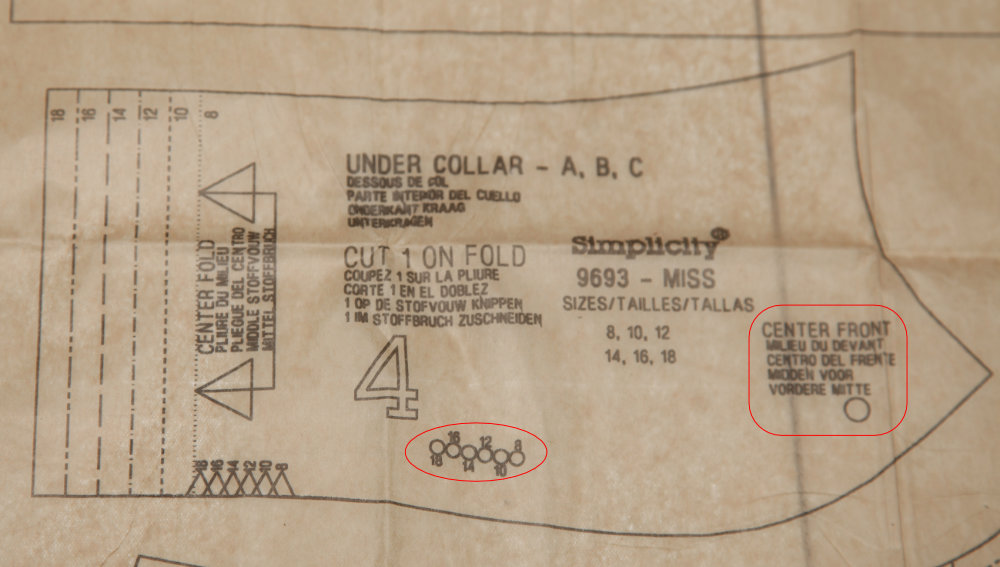
Circles and squares are often used to mark where to match up parts of a pattern. Some examples are placing patch pockets, inside corners, bottom of zippers and decorative stitches. They might also mark start and stop places of stitch lines, or sections that need to be eased together, or where you might need to gather between. You'll also find circles at the point of the dart, as well as on the intersection of the dart lines and the sewing line (usually).
Sew lines
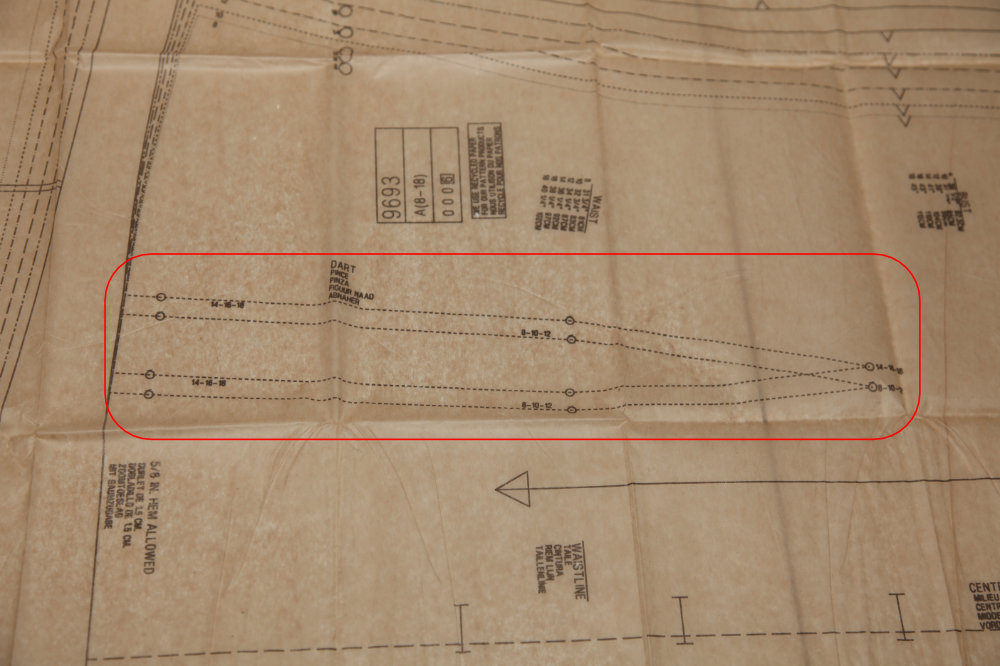
Sew lines for the main body of the garment is typically not indicated. It's assumed to be the seam allowance distance from the cut line. However, there may be other sew lines within the patter, such as for darts or pleats that could be indicated. They will typically be single lines that are the same style as the cut line by size. For example, a dart likely won't be in the exact same place for all sizes on the pattern so each dart placement will be indicated by size. If the line styles don't match, the size will be indicated on the dart sew lines. Other common sew lines would be for pleats or top stitching like in a fly front on pants.
Let me Sum Up
There's a LOT of information on patterns. It can be overwhelming. The best bet is to take it one part at a time, starting with the envelope when you are choosing what to make. Then carefully read through the instructions. The more you sew, the more used to the markings and layout instructions you'll become.
Learn to sew. Go at your own pace. Learn helpful techniques and tips to make sewing more enjoyable.

