Don't make one of these common mistakes beginners make using patterns.
Let me set the stage:
You finally did it. You bought a stylish pants pattern, picked out gorgeous fabric, and made your first pair of pants.
You proudly try on your pants and your heart sinks.
They are too big in the waist and saggy in the ass. They pull across the front of your thighs. One leg is slightly shorter than the other (but who notices that half-inch, right?). The other leg hangs funny and twists a little.
What was supposed to be a proud moment, becomes a spiral of despair and frustration.
What the hell went wrong?
It's not you, it's the pattern
For starters, LOTS of things can be actually blamed on the pattern itself and isn't necessarily anything YOU did wrong. And the good news is for these things, you can totally do something additional or different to make it go right.
Here's some common assumptions you may have made about the pattern which can cause heartache.
1. You Assumed the garment would look on you like it does on the pattern illustration or photo
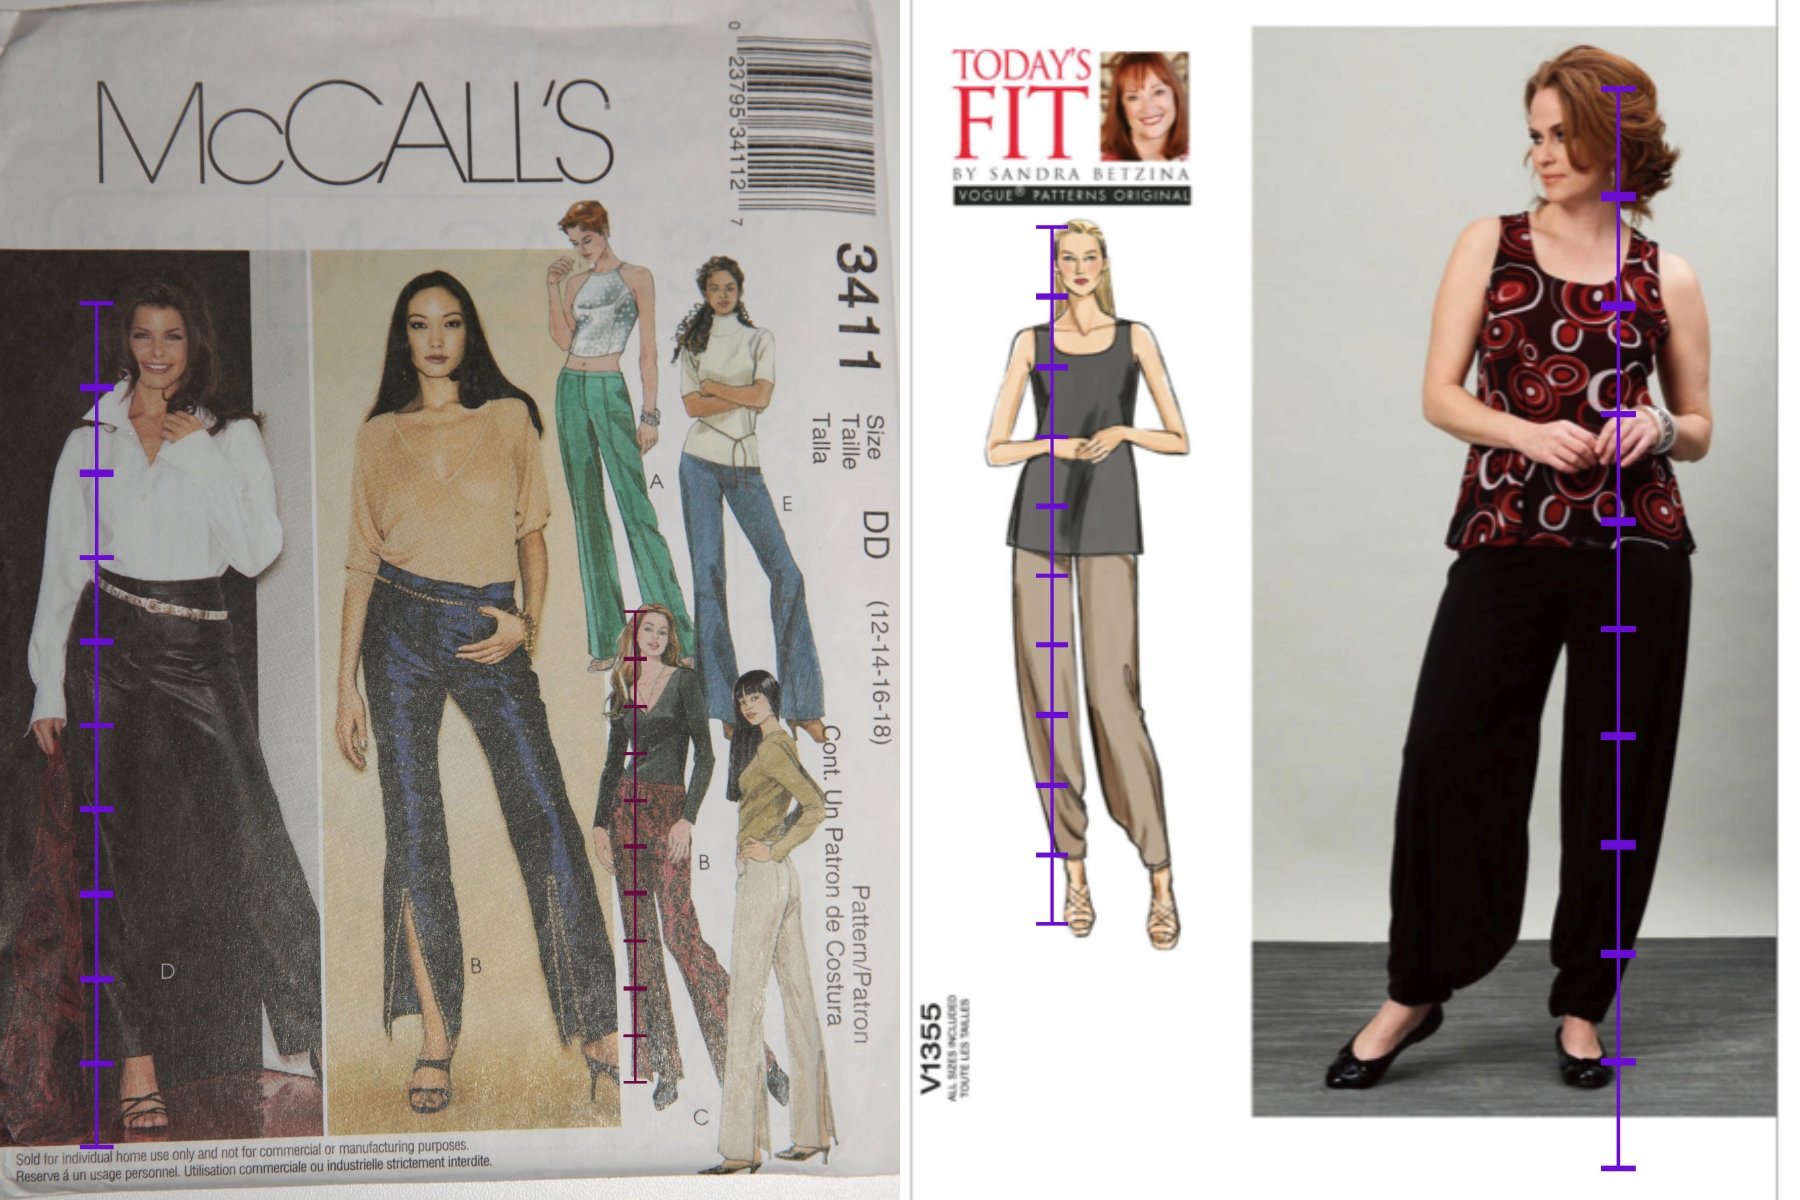
The fashion industry often uses a very specific frame for illustration. This is usually referred to as a croquis. And, much like runway models, the typical croquis used for fashion illustration has proportionally longer legs. It's also rather slender.
A croquis is typically drawn using a "head" as the measurement for the height of the figure. I've seen references online suggesting fashion illustration is somewhere between 8 and 10 heads high.
According to a fashion illustration book I read, a real person is about 7.5 heads high. And a fashion croquis should be 8.5 heads high with the extra length in the leg. 🤨
Fortunately, more and more pattern companies are using more realistic proportions for their illustrations. And a lot even show real people wearing the garments.
It's still not REALLY You
Even with more realistic proportions, and real people as models, you have to remember that it is NOT you on the pattern envelope, so there is always some chance that a particular garment won't look remotely close on you to what it does on the model.
In the photos to the side, you can see that in the McCall's, the illustration is about 10 heads, where the model is "only" 9.5 heads. The more modern Today's Fit illustration is 9.5 heads and the model is only 8.5 heads.
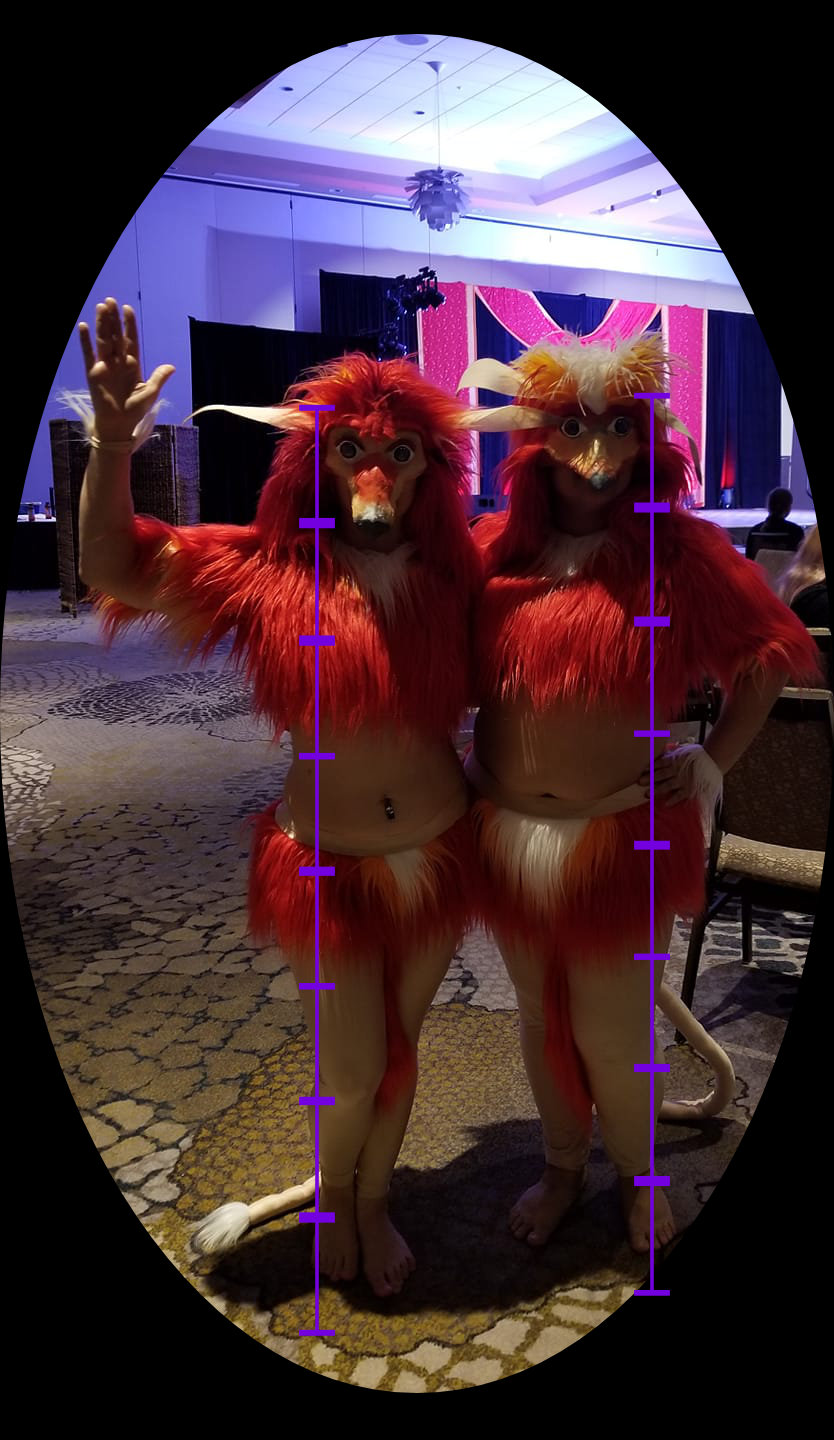
But contrast that with the photo of the real people (in costume). Each is roughly 7-7.5 heads high.... if you can believe where their forehead and chins are. 🤪
It's far too easy to fall into the trap of thinking that you'll look like the model just because you bought the clothes.
And keep in mind that the style may flatter the illustration, but may not flatter you. So, it's always good to have an understanding of how clothes can fit and flatter or do completely opposite and emphasize all the parts you'd rather not draw attention to and in some cases, even make you look bigger and dumpier just because of the fit.
2. You Assumed the Pattern size is the same as ready-to-wear sizes.
I've heard it said that Marilyn Monroe was a size 12. I suspect that she may have been, but that was back when the then size 12 was what today's ready-to-wear size 6 or 8 is.
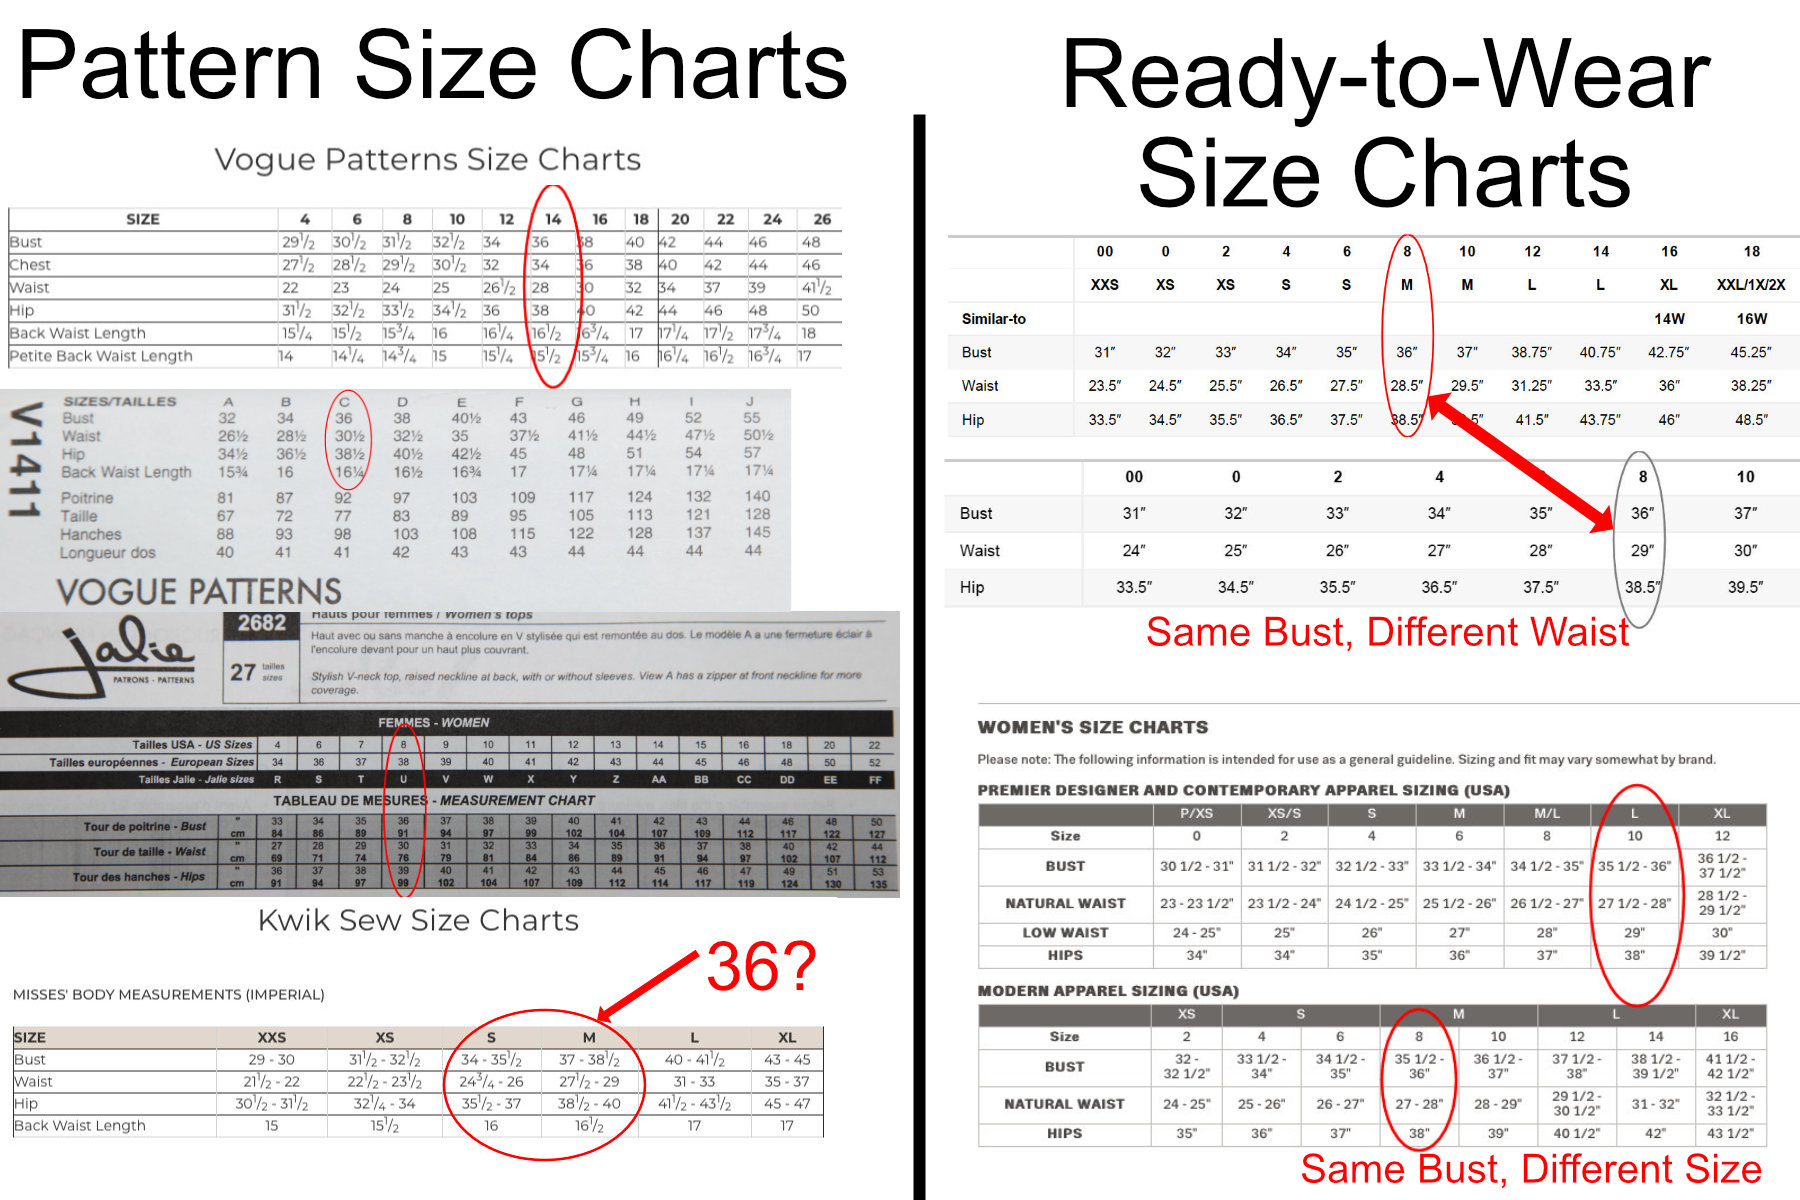
Common commercial patterns use the standard sizing from decades ago and do not match up with ready-to-wear dress sizes. Add on top of that, not all commercial patterns use the same sizing chart.
You can see in the image below that for a 36" bust the recommended "size" is different. But, even when the size and bust measurement are the same, the waist or hip could be different. Even when the pattern manufacturer is the same, the chart could be different due to the designer.
Always know your measurements and buy the pattern according to your own body measurements. And, depending on the sizing of the pattern and the garment you want to make, you may need to buy two different sizes. Fortunately, most patterns come with multiple sizes, but if they only have 3 sizes, you may still need to buy two, if your specific measurements span the two sizes.
Generally speaking, you'd buy shirts according to your bust or chest circumference. And you'd buy pants according to your hip circumference. Though, check the waist size for both of these as well. You may want one size for the waist and another for the hip or chest. And keep in mind, if you're making a garment that fits from neck to past the hip, you'll need to take into account all three. (i.e. dresses, coats, jackets).
3. You Assumed the garment would fit without making any adjustments.
Did you know that women's commercial patterns are drafted for a B-cup? Well, now you do. And, if you aren't a B cup, you'll likely need to adjust the pattern. (Unless it's a super baggy thing ... like a muumuu or a close-fit stretchy garment like a t-shirt.)
Making adjustments to the pattern before you sew it out of your gorgeous fashion fabric is almost always necessary. However, not all adjustments listed here will always need to be done. It will depend on the fit of the garment and your particular body. Additionally, there are other adjustments you may eventually want to make, but they are more subtle and nuanced. And certainly not for a beginner sewist.
Common Top Adjustments:
- Shoulder Slope
- Bust Point and Bust Size
- Sleeve Length
- Boddice Length
Common Bottom Adjustments
- Hip Curve for the Waist-to-Hip ratio
- Crotch Curve for Pants
- Waist Height
- Leg Circumference for Thighs and Calves
- Leg Length
4. You Assumed the pattern didn't have mistakes
Just because the pattern is a commercial pattern doesn't mean that mistakes didn't make it into production. Just like a book that might still have typos, a commercial pattern can have errors too.
Some things to watch out for are mismatched seam lengths.
Now, granted, some seams are SUPPOSED to not completely match in length. And for this, you need to ease one piece to the other.
This is mostly around arms, necks, under arms at the bust or chest level, and in the inseam of pants at the top of the leg just under the crotch.
But other than that, the seam line of all pattern pieces should match.
Instructions should be clear. But they aren't always. And well, it's not you, it's the pattern.
But as a beginner, this can make for some tough sewing ahead. I mean, I have over 30 years of sewing and I have run into patterns where I did a WTF on the instructions. One, I never figured out and just made it up as I went along.
Side Note: I also have a pattern which is written in German. 🤣 For a bra. And I had to totally wing it. Fortunately, the pictures were mostly helpful. And I tried google translate on one and it was mostly helpful, but it translated the legend from schulprand to "School debt". Somehow I doubt that I'm supposed to put school debt on my undergarments. ... I digress.
5. You Assume all design elements are required (or that Additional ones cannot be added)
You need to remember that YOU are in control of the design elements on any garment you make. I mean, that's one of the best reasons to make your own clothes.
So, if a pattern shows a garment with different colors for different parts or an embellishment like an applique, remember, you don't need to do everything exactly the way it's shown.
There are ... restrictions. As a beginner, you probably won't be adding seams. But if a pattern has all the awesome seaming you like you can add embellishments relatively easily at the seams. And you can always add appliques if the fabric will support it. Or take them away if they aren't your thing. Also, you can add color blocking to the pattern within the pieces.
So. Buy the pattern for the seam lines, the fit and the fabric. You can do a lot with a well-structured pattern that you love the shape of.
Ok, It is you. But you can totally fix this
So These common mistakes are simple mistakes that anyone can make, and probably aren't even aware you're making them. Some of them you may have done because you were trying to go fast. Or maybe you just didn't understand why it needs to be done so you chose not to do it.
6. You didn't read the pattern instructions thoroughly
I get it! I really do. When you want to make a garment, and you want to be done with it... sometimes you want to just GO! But this can, and will, bite you in the ass. Here's 3 things you absolutely must do.
- Check the Seam Allowance
- Note how many pieces to cut of each pattern piece (and what needs interfacing or lining cut as well)
- Understand all the steps before sewing (and realize some steps might have assumptions in there).
Checking the Seam Allowance
Seam allowance matters. For a simple shirt, with just two side seams, and you assume the seam allowance is 5/8" and it's really 1/4". you will essentially sew the garment 1.5" narrower in circumference than intended. This could result in a shirt that doesn't even fit, or one you're too afraid to breathe in.
Most patterns do have seam allowance built-in. But check! Some say something like "Seam Allowance 5/8" unless otherwise noted". This means, on some pattern pieces or in the instructions you might encounter a narrower (or wider) seam allowance.
Lots of knit patterns now use 1/4" as a seam allowance. And independent pattern companies might use well, anything. 1/2" is pretty common too.
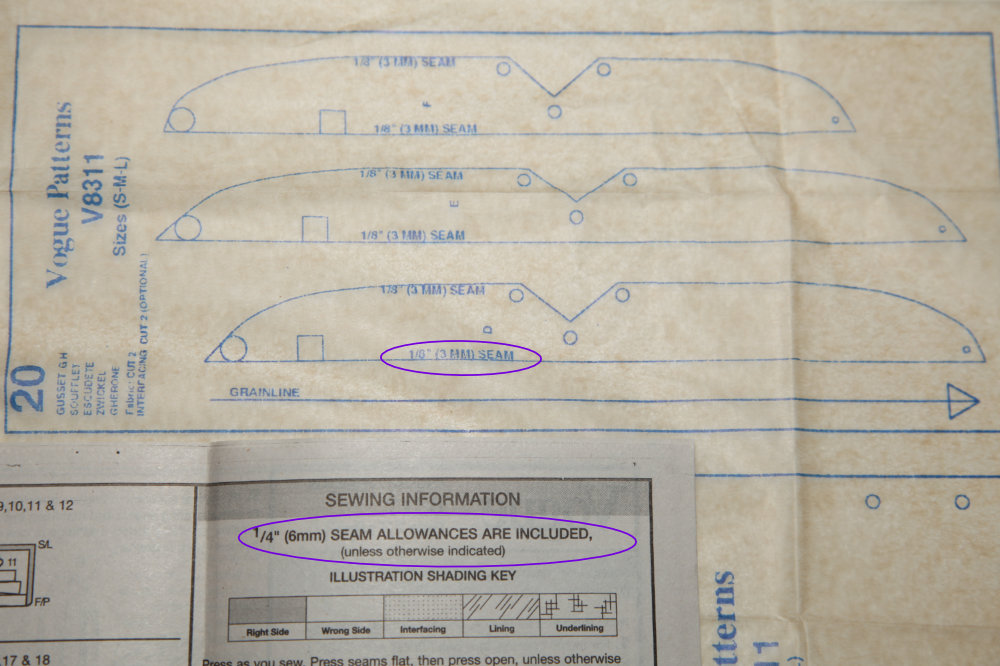
Some European companies don't include seam allowances. And if you managed to inherit an old pattern from decades ago, it may not have included seam allowances either. It pays to check.
Note how many pieces to cut of each pattern piece
It is super frustrating to cut out all your stuff and then during construction, realize you need to cut something out of interfacing or a lining. Or maybe you do what I've done and cut only one sleeve.
Then you have to pull all the cutting stuff back out or clear your cutting table off or whatever. It slows your flow, it's annoying and it's right up there with reasons to stop sewing for the night.
Also, if it says "cut 2 of fabric" and "cut 1 of interfacing", do it. They mean it. This is common for things like collars and cuffs on structured shirts and waistbands in pants.
Side Note: it can be helpful to take note of the recommended layout guide to make sure you are cutting the same number of pieces as the guide recommends.
For example, lots of woven sleeves are not symmetrical, so you will need to cut 2, which is easy to do when cutting on a double layer of fabric.
But, some knit sleeves are symmetrical and can be cut on a fold. You're cutting a double layer of fabric, but you're only cutting one sleeve. So, unless that's the look you're going for, and you have a plan for the non-sleeve side of the shirt.. you'll need to cut a second sleeve.
They typically also have an interfacing layout guide and a lining guide if applicable as well.
Understand the steps before sewing
It's really good to read through the instructions before you start sewing. I will say that sometimes some instructions don't really make sense till you get the half-assembled garment there in front of you. But, it's good to read it anyway and at least figure out what you're supposed to be accomplishing in that step.
Then just be aware, that some instructions might say something like "Sew piece A to piece B, easing between the dots". But others might say "Match dots and sew", and then you're sitting there with one piece longer than the other and you know you cut it out right and WTF? Well, yeah, some places need easing.
Easing, as in gently somehow making a longer piece fit against a shorter piece without wrinkles or tucks. Yes. It can be done. And, it's super common on the top of sleeves at the shoulder, on some collars, and occasionally under armpits and in the crotch. But it's not always called out specifically to do it in the directions.
7. You didn't transfer all the markings from the pattern to the fabric
Not all marks are critical to transfer. For example, in general, you don't have to mark the stitch line or seam allowance for most seams. But in some cases, you may want to, such as for darts or a zipper fly top-stitching.
You do need to make sure you mark the notches and any circles, squares or dots that the pattern has on it. These are often used for lining up pieces, denoting where to start and stop sewing or where to ease or gather between.
Other design elements besides darts may need to be marked as well, like pleats.
Once you have started putting together your garment, it is often very difficult to go back and accurately mark these landmarks on the fabric.
8. You didn't pay attention to the fabric requirements
Every pattern has a recommended fabric for the finished garment. It is important to follow these recommendations and only deviate from them once you understand the characteristics of the recommended fabric and can make decisions based on that.
At the very basic, if it calls for a super stretchy knit, there is no way that pattern will work with a woven. But, the reverse is true as well. A pattern drafted for a stiffer woven fabric won't turn out very good if you make it out of a slinky knit. Patterns are drafted differently for knits vs wovens because of the stretch and stability inherent in different fabrics.
However, just getting "knit vs woven" right isn't always enough. If your garment is a super flowy skirt, dress, shirt, or cape you will want a fabric that can behave the right way, drapey and flowy. Choosing a stiff fabric won't work. The opposite is true as well. More structured garments need less flowy fabric, less drape, and more stability.
And, yes, you can make pants out of quilting cotton, but they might not have the weight or resilience you need in a pair of pants.
9. You didn't make a test garment out of a similar fabric
The last thing you want to do is fall in love with a piece of pricey fabric and make an ill-fitting garment out of it.
If you don't care so much about the final product, or the fabric you're using then you can probably skip a test garment.
But see the note above about having to adjust the pattern for fit? Also, see the part about understanding all of the steps? Well, making a test garment is a great way to 1) test for fit, and 2) make sure you understand the steps.
Now, if you don't really have time or enough fabric to a full-out test garment with all the intricate steps, you can get by with just making a test for fit with just the basic pieces (minus pockets, interfacings, collars, the backside of cuffs, etc... )
Muslin? Or not Muslin?
It's important to use a similar fabric. You might have heard about muslin and how it's used for making ... muslins of a garment.
So, "Making a muslin" really just refers to making a garment out of fabric to test for fit. I personally prefer to use a similar fabric if I really am testing fit (unless your final garment has the weight and drape of muslin, then, by all means, use muslin. It's inexpensive).
Did you Know: A garment made out of a thick fabric will be bigger than the exact same pattern made out of a thinner fabric?
Yup. That's why, especially if you are going for something super fitted, you should test with a similar fabric.
And, if fabric performance is important, you will want to test for that too. For example, if you are making a dance skirt that needs to swish around your legs as you move, you will want to test it with a fabric that can swish. Muslin doesn't really swish.
10. You cut the pieces out of the pattern tissue and cut off extra sizes (Ok, this one won't ruin your current garment, probably but it's worth noting as a mistake)
This won't ruin your garment. But it can ruin your ability to make that pattern again in a different size. OR, if you find you need to combine two sizes, you won't be able to do that if you've cut the lines off of the other sizes.
I highly recommend tracing the pattern pieces from the pattern tissue or taped together PDF onto an inexpensive tracing paper before sewing. You can see how I do that here: Using Commercial Patterns
Then, any adjustments needed can be made on the copy that you made, rather than the original thereby preserving the original. Think of your pattern as an investment. Preserve it.
11. You didn't prepare the pattern tissue properly
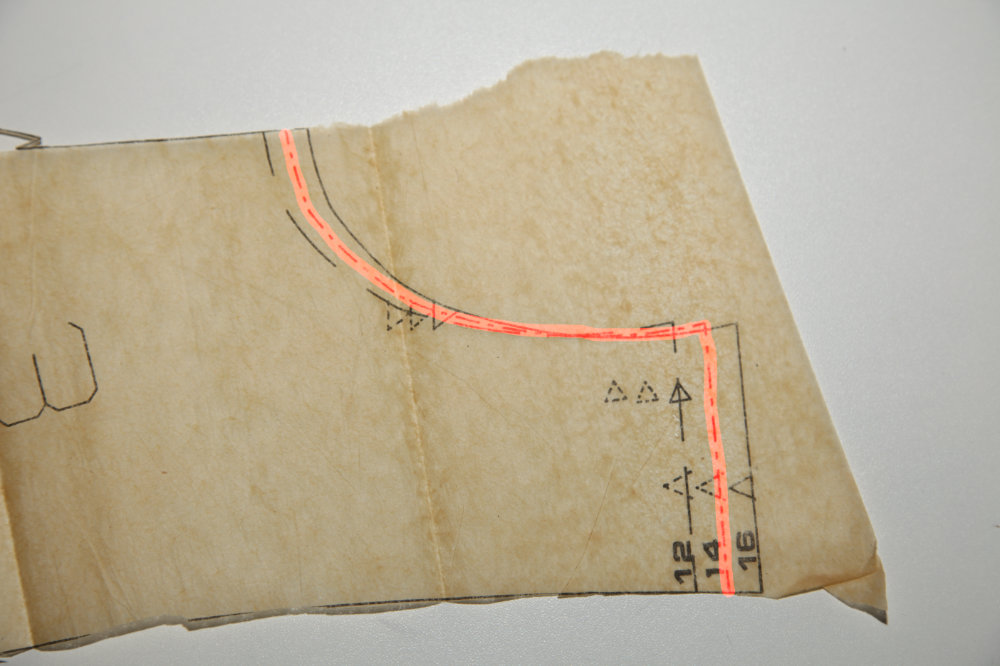
Whether you choose to trace the pattern to tracing paper or not, you do need to make sure that the pattern tissue you are using is properly prepared. Namely, it is not wrinkled or folded.
You can iron your tissue with an iron on medium heat without steam. You can always test a corner of the tissue before ironing to make sure.
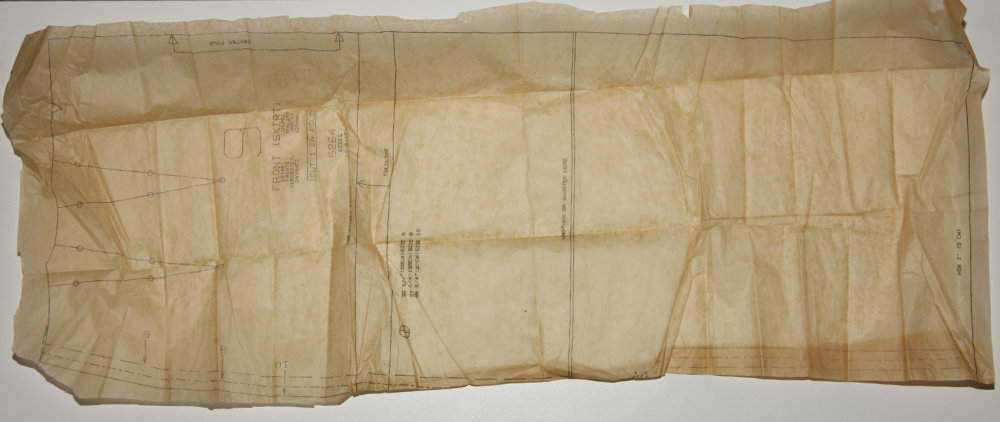
Also, I used to cut through the paper while I was cutting my fabric years ago. But I have since noticed that, especially with a rotary cutter, the paper can shift and distort the shape of the pattern you are cutting. So, to avoid that, cut the pattern out as close to the cut line as possible. You can avoid cutting close to the fold line if you are like me and you like having that little bit extra to hang off the fold. I like leaving that whole line intact so I have it to line up the fabric on.
12. You didn't buy all the notions you'd need to complete the garment (as listed on the envelope)
On the back of the pattern envelope, the fabric and notions for each view are listed. It's important to make sure you get all of these before you sew so that you have everything you need to complete your project. Now, it won't ruin your project, but it is frustrating to have to stop in the middle and go buy (or worse, order and wait for) something you need like buttons, interfacing, elastic, or a zipper.
Also, make sure you have enough thread to get you through the project in the color you need.
13. You didn't follow the layout directions or guidance when cutting the pieces
You can totally screw your garment up if you don't layout the pieces on the fabric correctly and then cut them out wrong.
Grainline
Every pattern has a guide for laying out the pieces. Every Piece has a line on it indicating the grainline of the piece.
When you don't line the grainline of the piece up with the grainline of the fabric (Read here for more information on pattern markings and Read here for more information on fabric grain) the piece won't hang right on your body. The results can be many different things from a leg or sleeve feeling twisted to a skirt draping weirdly, to a piece not sitting right on your body.
Likewise, when you place a piece on a fold, it's assumed that the fold is on the grain of the fabric. So you must make sure two things: 1) The fold is on grain. and 2) The fold line of the piece is exactly on the fold, along the entire line of the pattern. If you don't do number 1, the same results can happen as mentioned above for not being on grain. But if you don't do number 2, you will alter the size of that pattern piece and the garment may not fit the way you want it. (and have issues with number 1).
Two of the same piece - single layer fabric
Your body has a left and right side. Your garment will have a left and a right side. And sometimes pieces that wrap from front to back (Like sleeves, and pants with no side seam) aren't symmetrical. In fact, often they aren't. So, if your fabric isn't wide enough for you to cut those pieces with a double layer of fabric (fabric folded either right sides together or wrong sides together), then you will have to cut each piece in a single layer. (See the next bit on directional fabric if you're tempted to fold the fabric on the cross-grain to get it double layer.)
When cutting pieces out of a single layer of fabric, you need to remember to cut a right and left side of the piece. This means, you will cut one piece with the print on the pattern piece facing UP, and one with it facing down. (This is also a really good reason that I prefer using a transparent paper to copy my patterns to, rather than using printer paper - you can see the markings through on the backside in the event you have to cut the piece print side down.)
What happens if you don't? Well, you could end up with two right sleeves. So when putting the garment together, the left sleeve will be inside out. This would be REALLY obvious if your fabric has a really obvious "correct" side (or right side). Like, velvet, the fuzzy side would be against your skin. Oops.
Directional Fabric
The other thing you need to be aware of is nap or directional fabric. Always check if your fabric is directional.
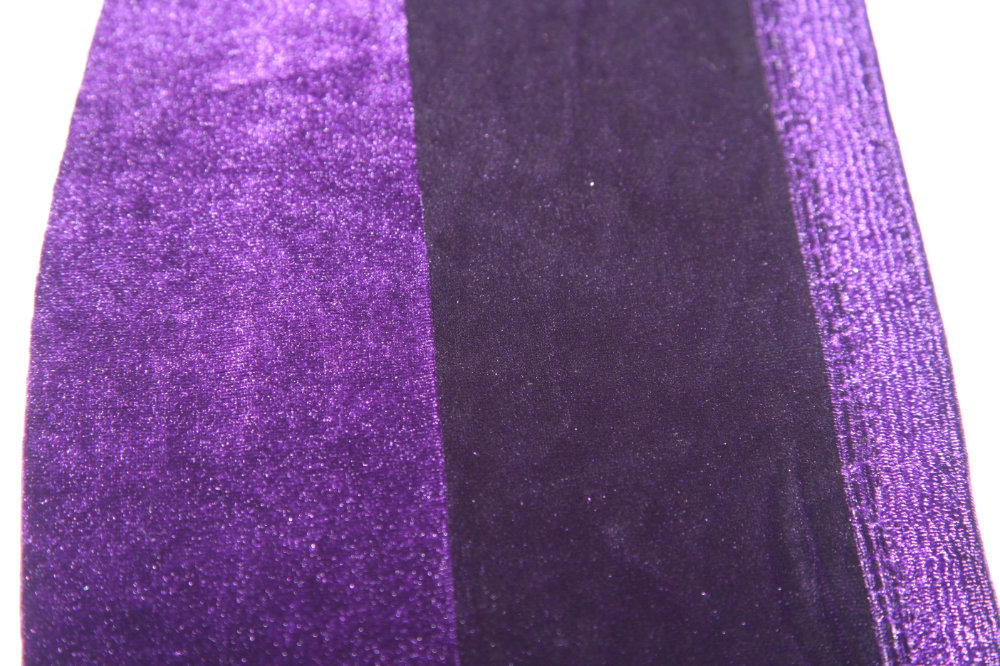
That could mean a pattern or print that would be obvious if you put one piece upside down next to the other. But it could also be more subtle like in the case of velvet, where if you look at the fabric with it hanging one way, and then look at it the other way, you can obviously see that it has a different look. It could be super subtle like the amount of shine, or the color of that shine, or it could be a little more obvious like slight color differences.
(Read here for my laying out and cutting fabric guide).
Pattern Matching
Pattern matching is probably a slightly more advanced technique. I mean if you are just starting out sewing, I wouldn't recommend you start with something where you feel compelled to match plaids, stripes, or prints. BUT. I will say, even as a beginner you should pay attention to this. If you have a print or pattern on your fabric that you know would bother you if they don't match, you'll want to take care to do your best to line it up.
I do a very basic version of stripe matching in the video associated with this post: Laying Out, Marking and Cutting a Garment, and if you just want to go to video, it's here: How to Layout and Cut Fabric from a Pattern. (about 22 min in)
Another thing with fabric patterns to consider is the placement of the pattern. If you fold your fabric, and you have a ... let's say shirt, with a center front on the fold, you may want to make sure that the pattern, if symmetrical, is folded in half on the front. So, if it's a thick wide stripe, you may want to fold one of those stripes in half and place your front piece on that fold so that you can have a big stripe center front. But, if it's a complicated brocade or something too, you would want to consider where the design falls.
And, there may be some pattern placements you want to consider avoiding. ... OR... you may want to do it on purpose... 😈
For example, two giant sunflowers right over your boobs. Or, I dunno, a Fleur De Lis right at your crotch? You need to be aware and only do these things deliberately. I mean, if that's what you're going for, by all means, have at it. But, if that might make you a bit self-conscious to wear the garment, or draw attention to something you don't want attention drawn to, then do your best to avoid it.
Conclusion
We all make mistakes. Having sewn for over 30 years hasn't changed that for me. I still make them.
But, knowing what mistakes to lookout for in the beginning will set you on a better path to sewing badassery.
I still wish I had legs as long as the illustration and think I can look that leggy in patterns I have. And it wasn't until the last few years that I really got into making fit adjustments to really suit my body. (And just the other day, I made underwear with two right sides. thank goodness it's underwear!).
If you haven't clicked to some of the linked content, here's the in-depth articles to check out:
How to Read Commercial Sewing Patterns
