I lost my job in late 2019 and decided to give handmade gifts to my family for Christmas and other gift-giving occasions.
I mean, I had a LOT of time, not a lot of money. And to be quite honest. I have spare fabric.
A LOT of spare fabric.
Dad’s Birthday Shirt (and 2019 Christmas Shirt)
The shirt giving started with my Dad in Christmas of 2019. I was making wallets and such for my mom and sister, but my dad didn’t need or want a wallet.
But, he did want t-shirts with a pocket for his phone.
So, I made a few shirts. You can see my original creations here.

I’ve made the men’s raglan shirt multiple times. It’s really simple construction.
The seams aren’t quite straight, but they’re pretty darn close.
The Jalie pattern has a few sleeve length options. Long, elbow, and short. I have made the long and short.
The long sleeves are too long for my dad. I shortened them for the second long sleeve shirt I made for him. But it’s hard to get a good fit for someone you can’t measure yourself. (Heck sometimes it’s hard to get a good fit for someone you can measure. … like yourself.)
The pockets were added by me. My first two shirts for Dad had a decent pocket, but he requested the future shirts have slightly deeper pockets to fit the phone better.
The biggest challenge with adding a pocket to a raglan sleeve shirt is pocket placement.
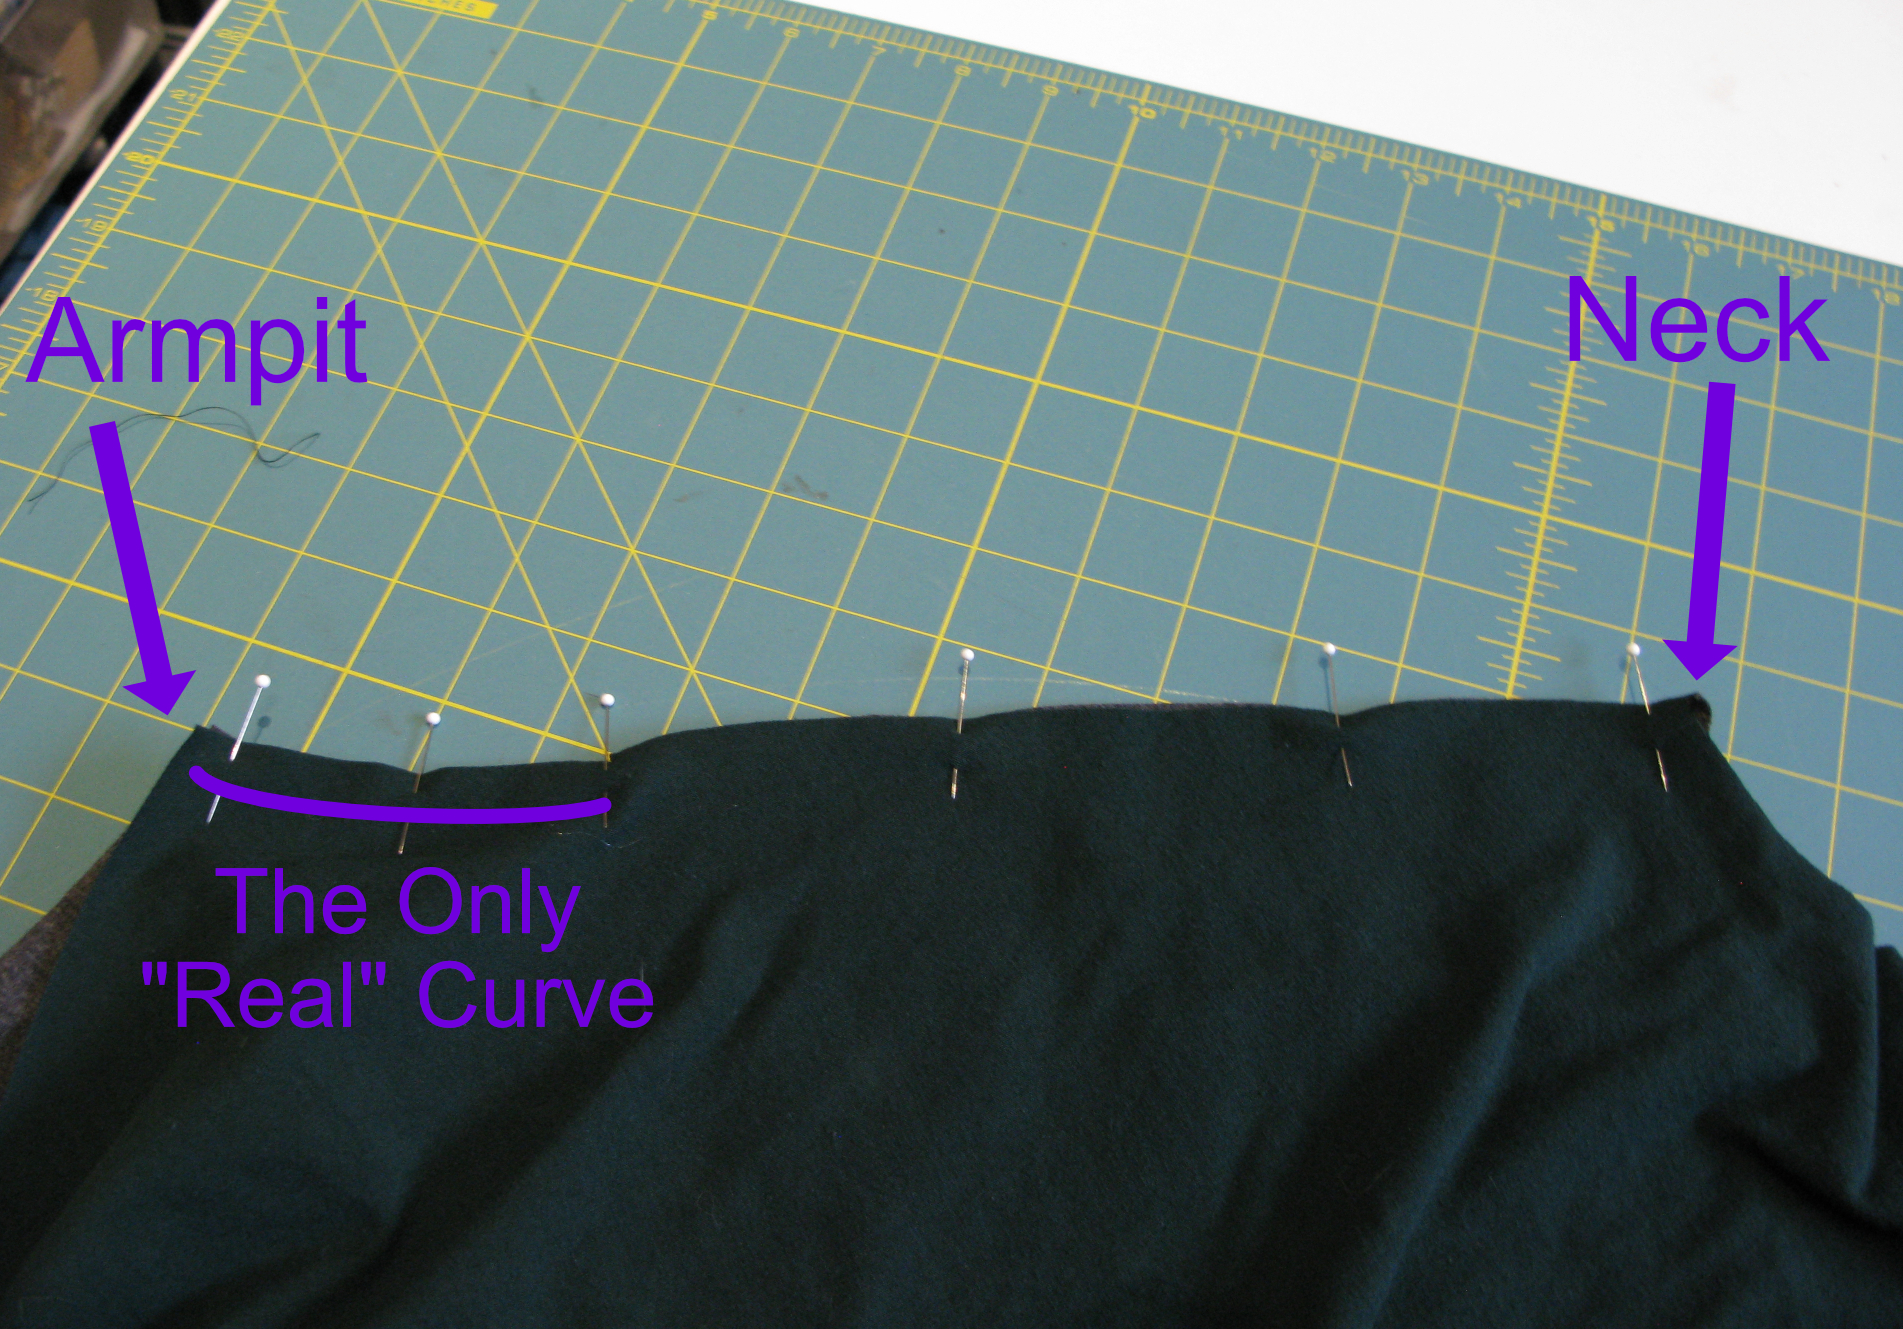
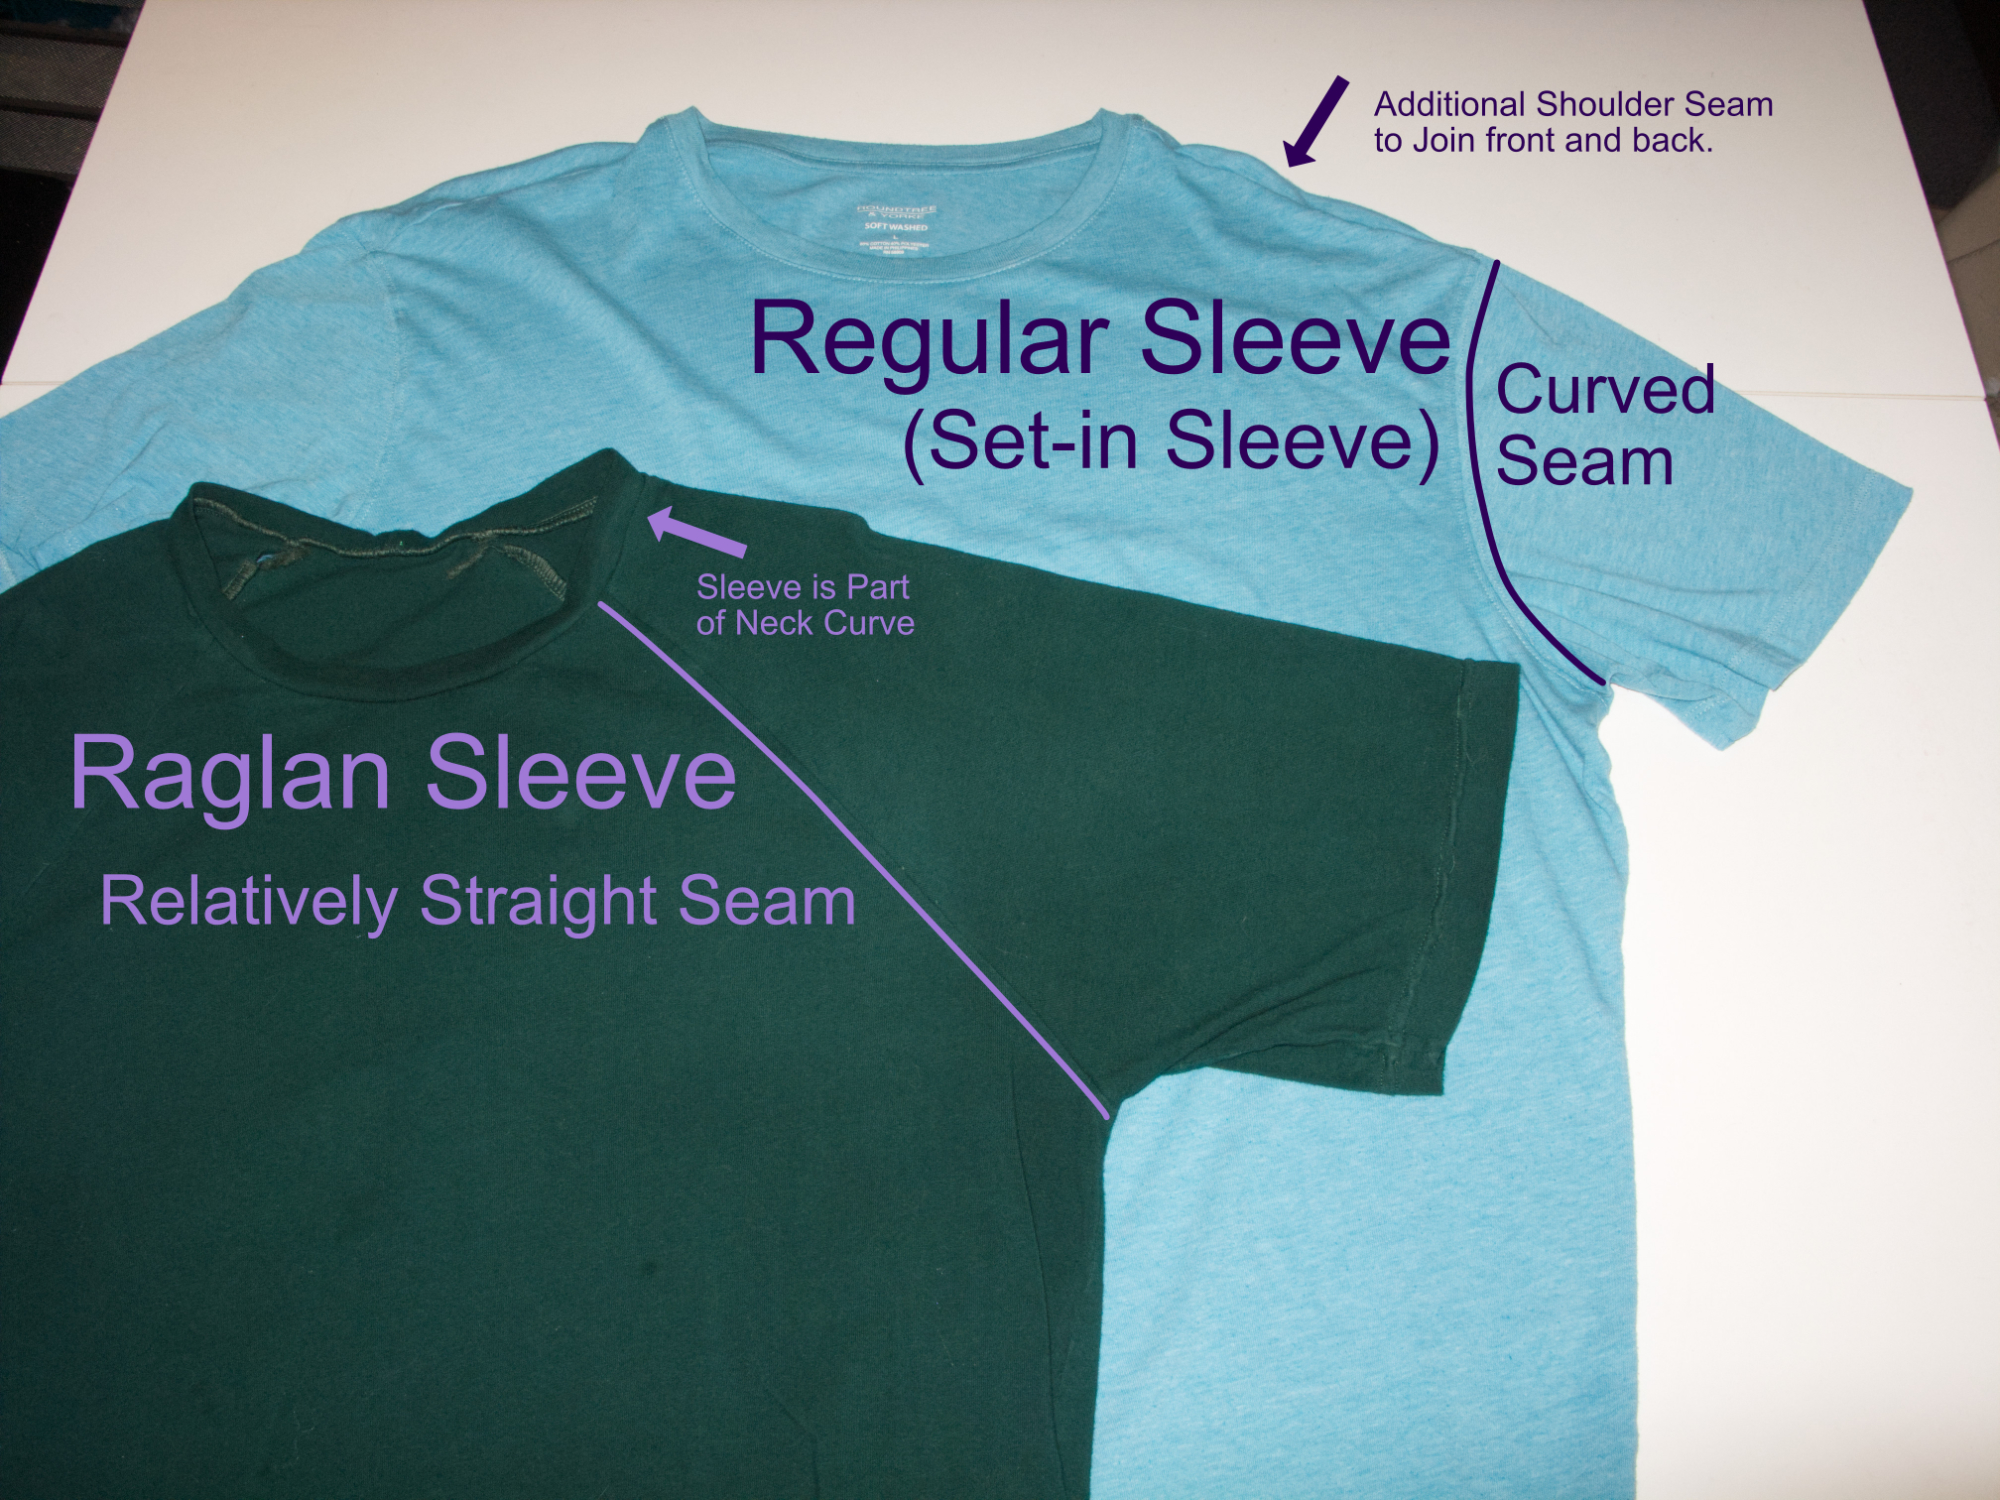
In a normal shirt, the seam that attaches the sleeve to the shirt body is vertical. It goes straight up the body from the armpit crease. In a raglan sleeve, the seam is diagonal from the armpit crease to the neck.
This reduces the amount of space you have to play with when placing the pocket. Obviously, you don’t want it too close to the center of the body because that would look weird.
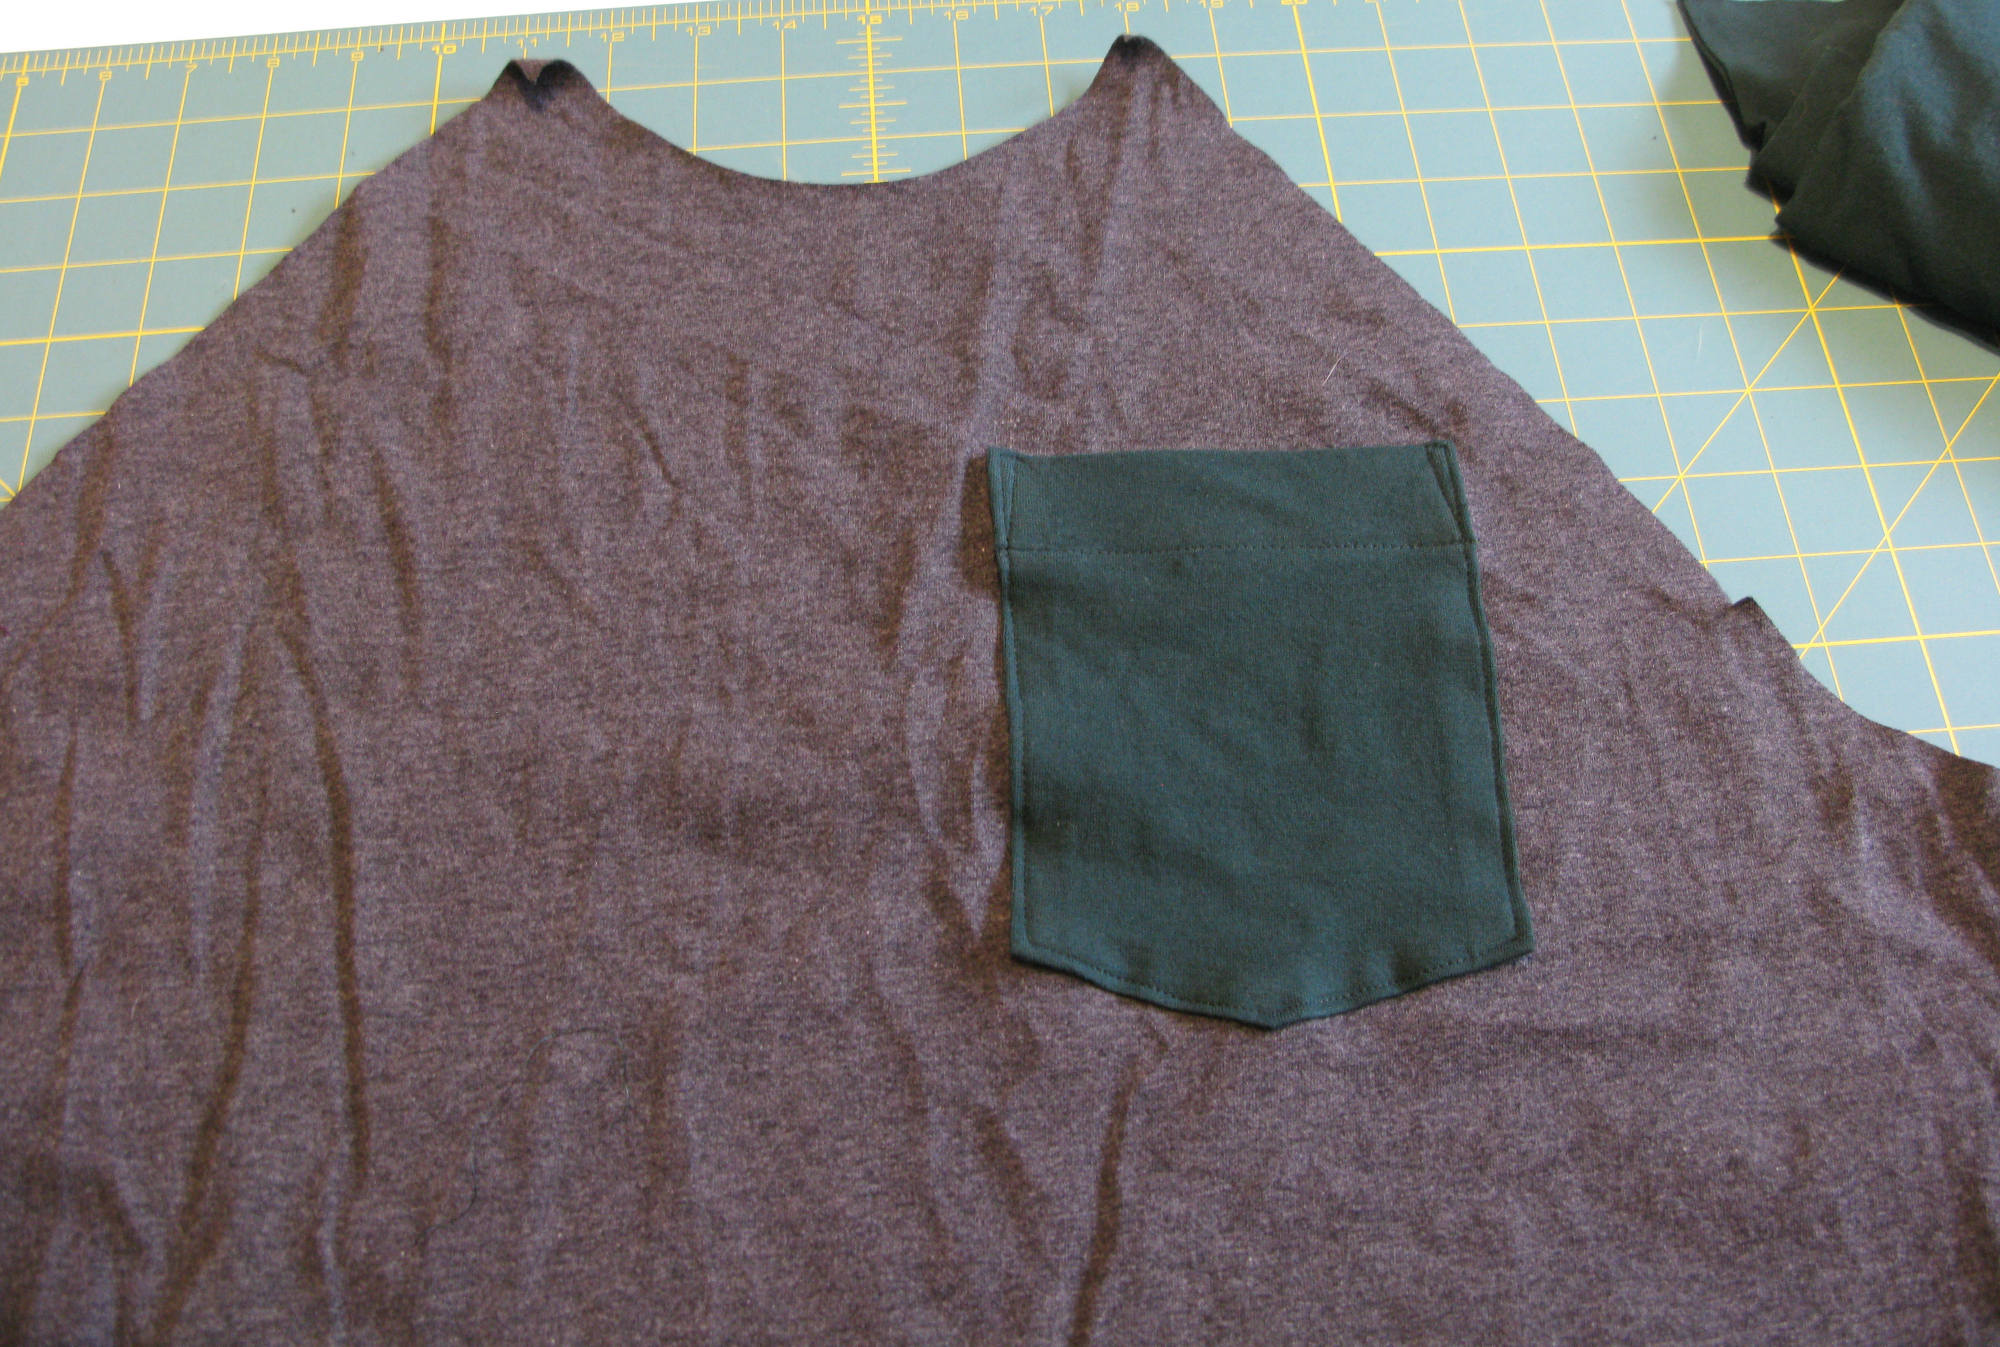
And, you don’t want to place the sleeve too low, or it’ll look weird.
Serger Struggles
Now is a good time to mention that I used my serger for the majority of the seams on these shirts.
I’ll be the first to admit that you can totally sew stretch fabrics on a sewing machine. In fact, I have some really good examples of things I’ve made on the sewing machine that are close fit stretch garments.
However, there are some stitches that you can do on a serger that there isn’t a good replication on a sewing machine.
One of them is a coverstitch. While you can sort of replicate it on a sewing machine with a twin needle, the bobbin side doesn’t look quite as nice as the underside of a coverstitch. The looper threads of the coverstitch really encase the raw edge of the hem. (if you are using it to hem something. It doesn’t have to be used as a hem.
Side note: not all sergers make a coverstitch. If you are looking for a serger that can form a coverstitch, make sure it explicitly says “Coverstitch” as one of its options. Some sergers offer 5-thread stitches and still no coverstitch. You also have the option of buying a coverstitch machine which is used for making a coverstitch and might not do overlock stitches.
For YEARS I fought with my serger to get it to reliably form a coverstitch. The first few shirts I made for my Dad (and one I show that I made for my Mom later in this article) used a coverstitch for hemming both the sleeves and the bottom of the shirt. But it was a fight.
Coverstitches can be picky. They like super even thickness, so when you have to sew over the seams like side seams or sleeve seams, the stitch can mess up.
One way to mitigate the risk of the bulk around overlapping seams is to snip into the seam allowance at the crease of the hem and fold half the bottom half of the seam allowance in the opposite direction as the top half. This is assuming you’ve used an overlock stitch for the seams and the seam allowances are kept together rather than pressed open.
And then, one day when I was sewing something (not shirts, I just don’t remember what), my coverstitch didn’t work at all. I spent HOURS futzing with it with no success.
Dad’s Father’s Day Shirt
Then, it came time for me to make another gift shirt for my dad. Must have been for Father’s day.
I wasn’t going to fight with the machine to make a coverstitch.
And I had this idea to use the flatlock stitch for the seams.
So, a regular overlock stitch is meant to be a seam with the seam allowances stuck together. It is sewn with right sides together. When you open the garment, you can press the seam allowance to one side or the other. They are on the “wrong side” and the right side appears like any normal stitch.
A flatlock stitch is … different. It is meant to be opened up. On one side, it looks similar to the backside of a coverstitch. The other side looks like a ladder stitch.
There are a LOT of fun things you can do with a flatlock. But it’s one way to make it so that the seams look a little like ready-to-wear.
I made Dad a dark heather gray shirt with blue thread.
And since the coverstitch wasn’t working on my machine, I used the flatlock.
I had to try a LOT of different settings to get the right look for the hem. It’s always a good idea to keep scrap fabric (of the same kind you are sewing) near your serger when using it. You pretty much need to test every stitch you make. Every setting you change, everything.
But I LOVE this shirt. I love the way the exposed stitches look.
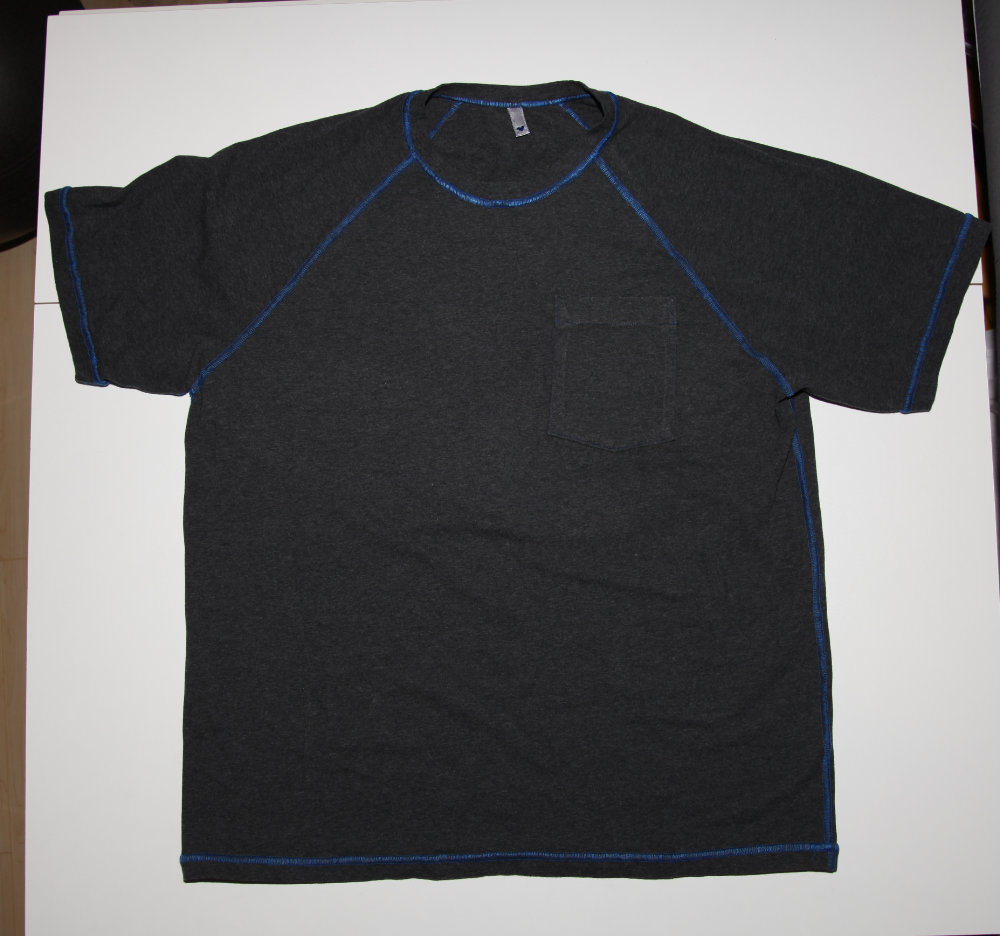
One thing that both the boyfriend and dad have told me about shirts I’ve made for them from this pattern is that they LOVE the length of the shirt. Not the sleeve length, but the body length.
Dad’s Christmas Shirt
I had already planned on making face masks as gifts for my folks for Christmas 2020. But I thought it would be nice to see if there was anything else they would like. And one day, when on the phone with my dad, he said something to the effect (Yeah, I don’t know the exact quote.)
Dad: The other day I was pulling out one of your shirts and I thought it’d be kind of neat if one had a tie on it … you know, just a t-shirt, with a tie.
So, for any of you who KNOW me, would know that this is not the kind of challenge I can just let go unanswered. And I immediately thought “OMG How fun!”.
So, I got a book … and learned how to make a tie. (Cause that’s how I roll.)
Now, I wasn’t going to make a whole tie. Cause it’s a t-shirt, and there’s no collar that you can tuck a tie in and stuff. So, I was thinking I’d just make a tie that hangs down from the collar of the shirt. Right? Let’s start there.
The book shows how to make a tie. BUT, it leaves out some details on the actual sewing instruction of the lining and whatnot. (This is where I’d insert a WTF gif if I was into that.)
I made many tie-tips trying to refine my mitered corner inside a mitered corner lining thing. I mean, I could have taken the easy way out and made the tie and the lining the way you would make … say a collar, with the backside and the front side the same exact size and the edge of the tie a fold.
This is how the internet says to sew a tie.
And yes, that would work… if 1) you can press your lining behind your facing precisely so that the lining NEVER shows to the front side (I’m not that perfect). and 2) You will never need to wash it. Normally, when you make something in this fashion, you edge stitch the perimeter (see my bag tutorial – Yes, you need to sign up but it’s free). Edge stitching traps the seam allowance and keeps the seam from rolling in or out when washed. But who would edge stitch a tie?
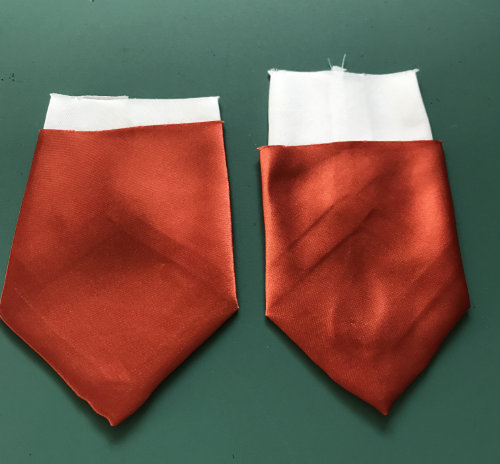
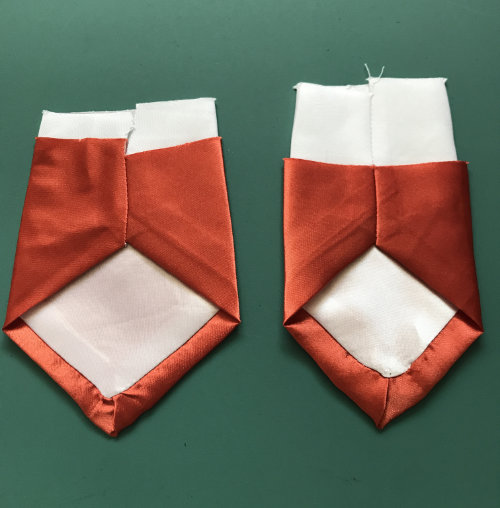
Ok, maybe I would. … if I wanted to make an edge-stitched tie. But I’m going to be honest, I love the clean look of the edge of a tie.
I also didn’t want to do this because. I’ll be honest. I wanted to make a tie that looks like a REAL tie on a t-shirt. Because I LOVE the idea of the ridiculousness of a t-shirt with a tie.
I giggled the entire time I was making this shirt with the tie.
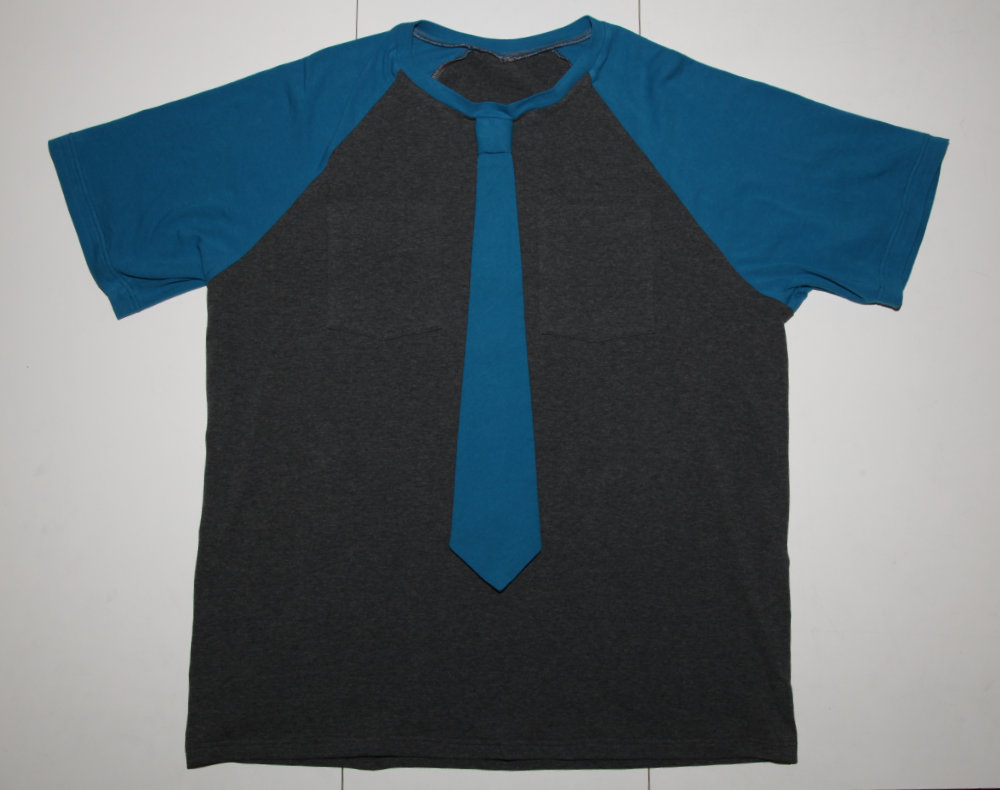
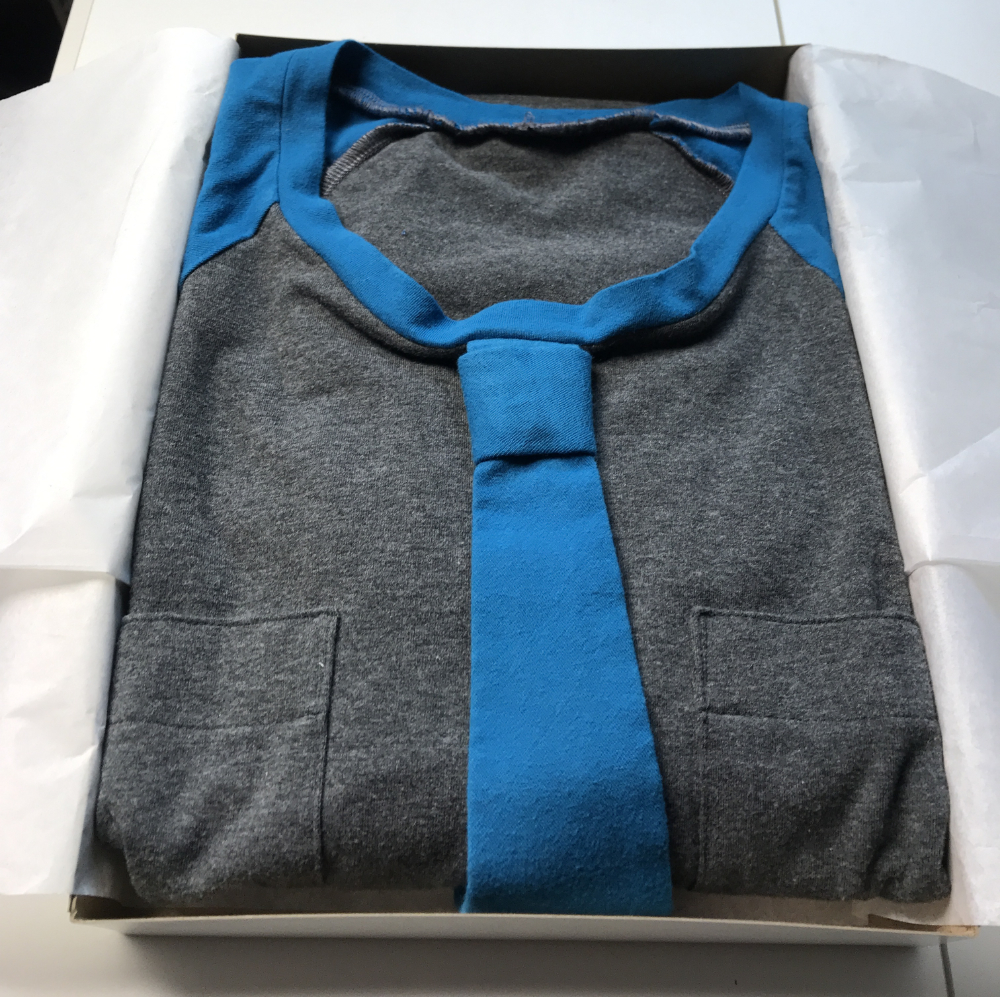
My Dad sent me this photo. He told me he wasn’t expecting the tie to be loose. He was thinking more applique or inset type embellishment.
It looks like I even got the length right.
If I make another t-shirt with a tie, I will have to figure out a better way to stabilize the neckband. The tie is pretty heavy and pulls it down a little. I did use some elastic to firm up the front. But that adds bulk as well. 🤔
But now… I know how to make ties. Mwahahahaha. And boy, do I have ideas.

Mom’s Gift Shirt
I have this … it’s not a habit, per se… quirk? Procedure? I dunno. I’ll explain it and you can leave me a comment if you have the words for this.
When I am making something for the first time, and I’m going to make it for someone else, I usually make myself one first. Then, all my lessons learned, I apply to the thing I’m going to make for someone else. When I make bellydance costumes, I usually make mine first, then my troupe-mates. They get things that fit, and I have … 1st editions with flaws.
So, when making my mother a shirt, I wanted to make her this stretch lace shirt. But I wasn’t going to leave it see-through, so I wanted to make it lined with a flesh-tone fabric. So, I created one for me first. Noting where I needed to do things differently, and testing techniques.
Again, this is a Jalie pattern. I’d never made it before. And while I usually recommend making the pattern as written first, then modify it for the second one. I really didn’t have time or desire to make the pattern as-is. So, I tested my under-layer technique on a shirt in my size.
I wanted to use the edge of the lace as a natural hem. But the underlayer fabric (flesh-tone spandex) needed to be hemmed. So, I needed to essentially construct two bodices and 4 sleeves. And then I could stick the underlayer sleeve to the lace sleeve and the underlayer bodice to the lace bodice. Then sew the sleeves into the bodice. That way, the sleeves, and the bodice have the lace overlay separate from the lining fabric at the hem. But the sleeve cap seams wouldn’t shift around much.
I also learned that it is not needed to line the collar band. That just makes it way too bulky.
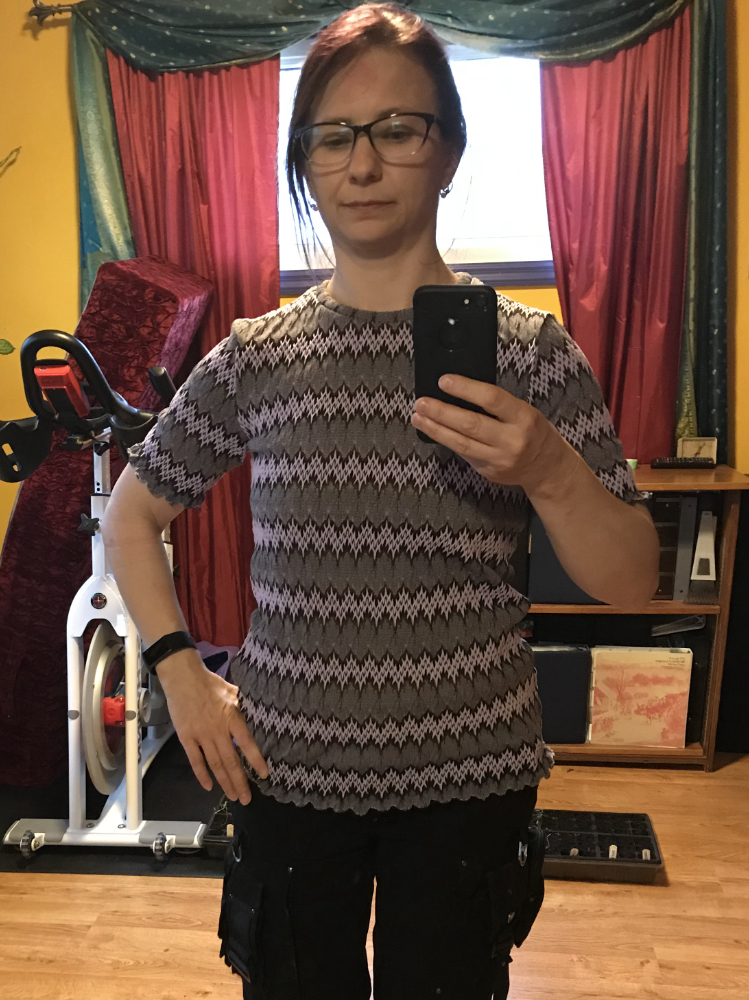
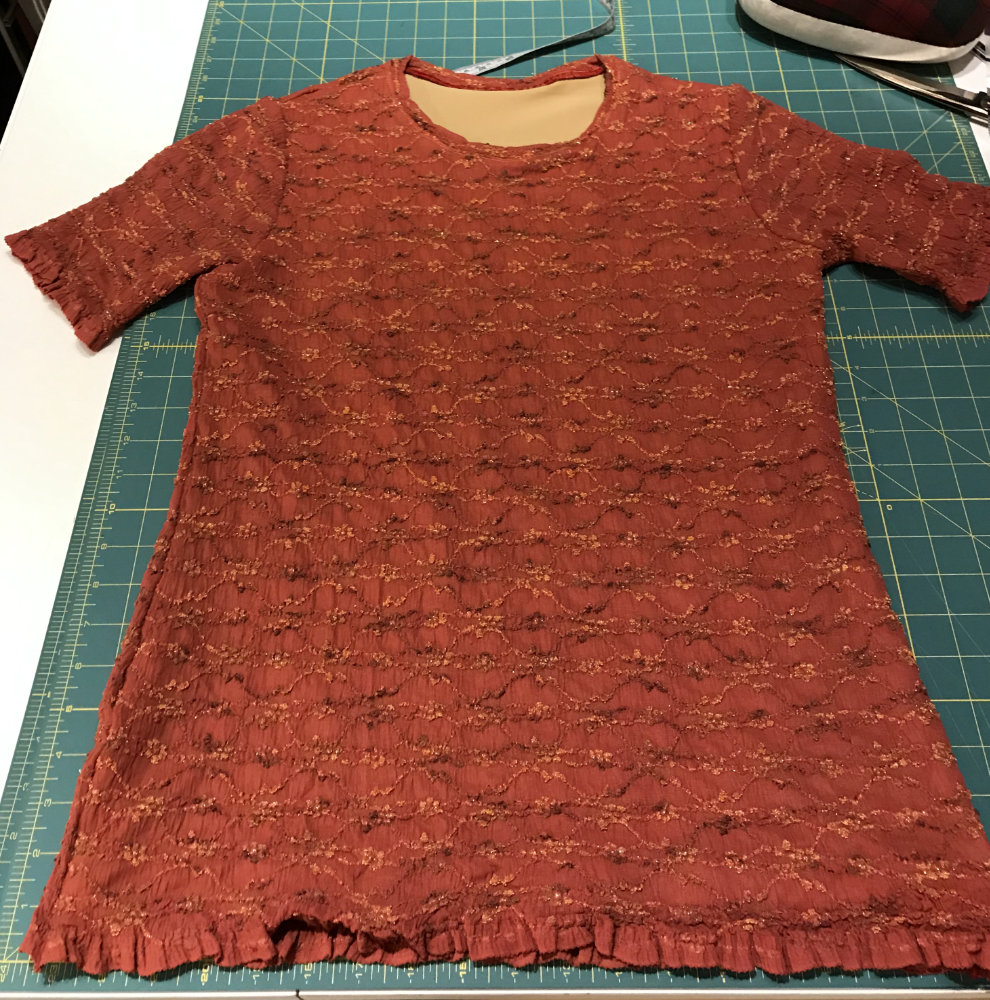
I have mixed feelings about this pattern.
It’s super easy to sew. That’s a plus. And if you are going to do form-fitted short sleeve shirts, it’s fine.
It also is a really good length. It’s long enough to easily cover the waist of your pants. But you could also tuck it in it’s not too long.
What I’m not sure about, is the sleeves. See, this is a set-in sleeve style. And the sleeve pattern is symmetrical. Which when cutting can make things easy. But in reality, the backside of our armhole should be longer than the front. And that means that the sleeve cap in a set-in sleeve should have a different (longer) curve than what in the front.
Now, for super short sleeves in a fitted knit shirt, this might not be a big deal. The repercussions of asymmetrical cap sleeve won’t be as pronounced in a short sleeve knit shirt as they would in a woven or a long sleeve shirt.
But, that got me thinking.
Gift Shirts for the Boyfriend
If the Jalie pattern for a close-fit shirt for women has a symmetrical sleeve. Wouldn’t the one for men have one too? I don’t know I don’t own one of those patterns. If you do, let me know in the comments. I’m curious. I have used MANY Jalie patterns. And I don’t have many issues with them. (Though, the instructions for the polo shirt were a bit confusing. But that could have been user error…)
This isn’t a Jalie pattern review, but I do want to mention that Jalie has been filling a niche for sewing patterns that the big commercial pattern companies had neglected till really recently. And still, if you want gymnastics, figure skating or similar athletic patterns, Jalie is where it’s at. And when you are designing dance costumes, you need stuff that’s made to move with you. The major pattern manufacturers have some options but haven’t really filled the niche. So, hat’s off to you Jalie.
But. I have been learning pattern drafting. I mean I’ve been manipulating patterns for ages. But I have been learning how to start from scratch and make a pattern from nothing but a blank sheet of paper and body measurements.
So, I wanted to make Aaron (the boyfriend) some shirts for his birthday. Technically, his birthday is in Jan, but I was making these in Dec of 2020 so I’m counting it as my 2020 stuff.
I had already made a few shirts for Aaron from the raglan sleeve Jalie pattern.
I had some time, so I wanted to test my skills at pattern drafting.
The first shirt I made for him was the test shirt. It fit Ok. There were some adjustments in the armpit and neck that I wanted to make. Plus, Aaron is pretty lean. This means he’s broader in the shoulders and chest area than he is in the waist.
So, I wanted to modify his pattern sloper to better fit his actual body. Meaning, I wanted to customize a pattern for him to fit him the way he would prefer to be fitted.
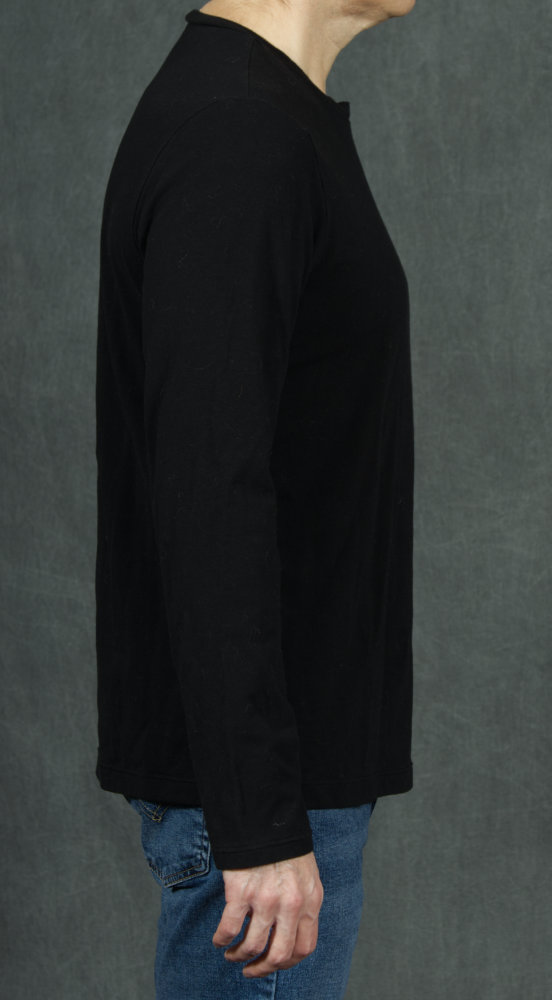
And, he likes green, and I didn’t really have enough fabric to make a long-sleeved green shirt. So, I re-drafted the sloper and then used it to make a pattern that LOOKS like it’s a short sleeve short shirt over the longer shirt with long sleeves.
Also, I modified the standard t-shirt block that I made for him to be longer. He’s longer in the torso. I actually used the Jalie pattern as a reference since he liked the length of that so much.
So, take two was a success. Green shirt over black. Now, these, he got to see before his birthday. Cause I wanted to FIT him.
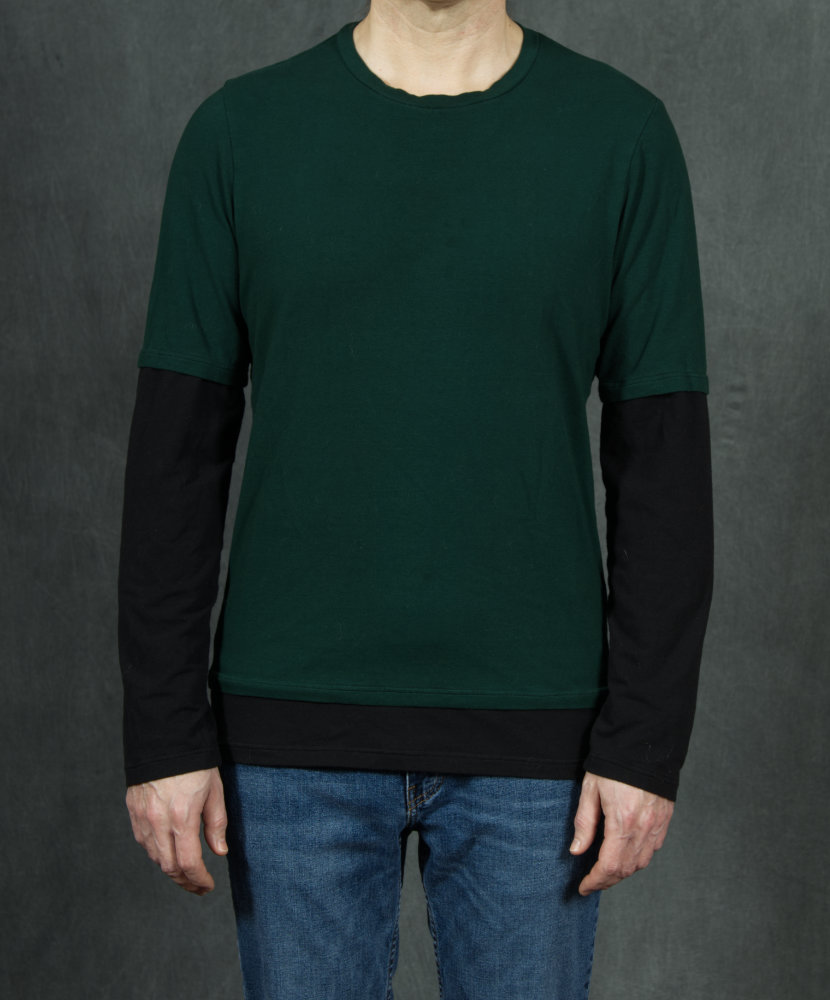
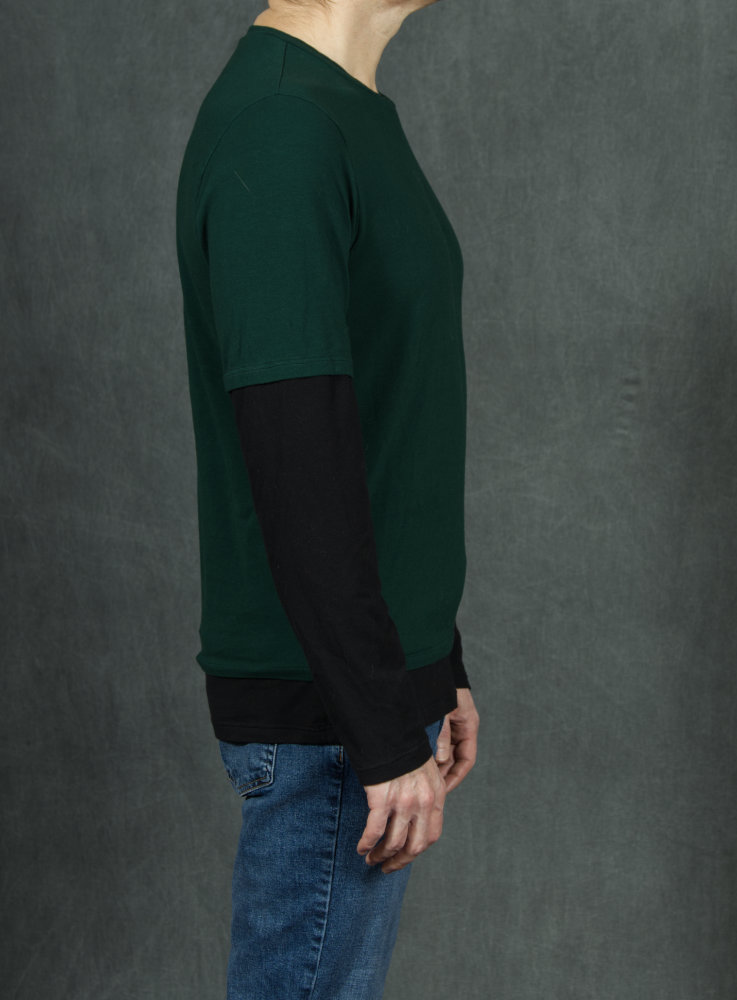
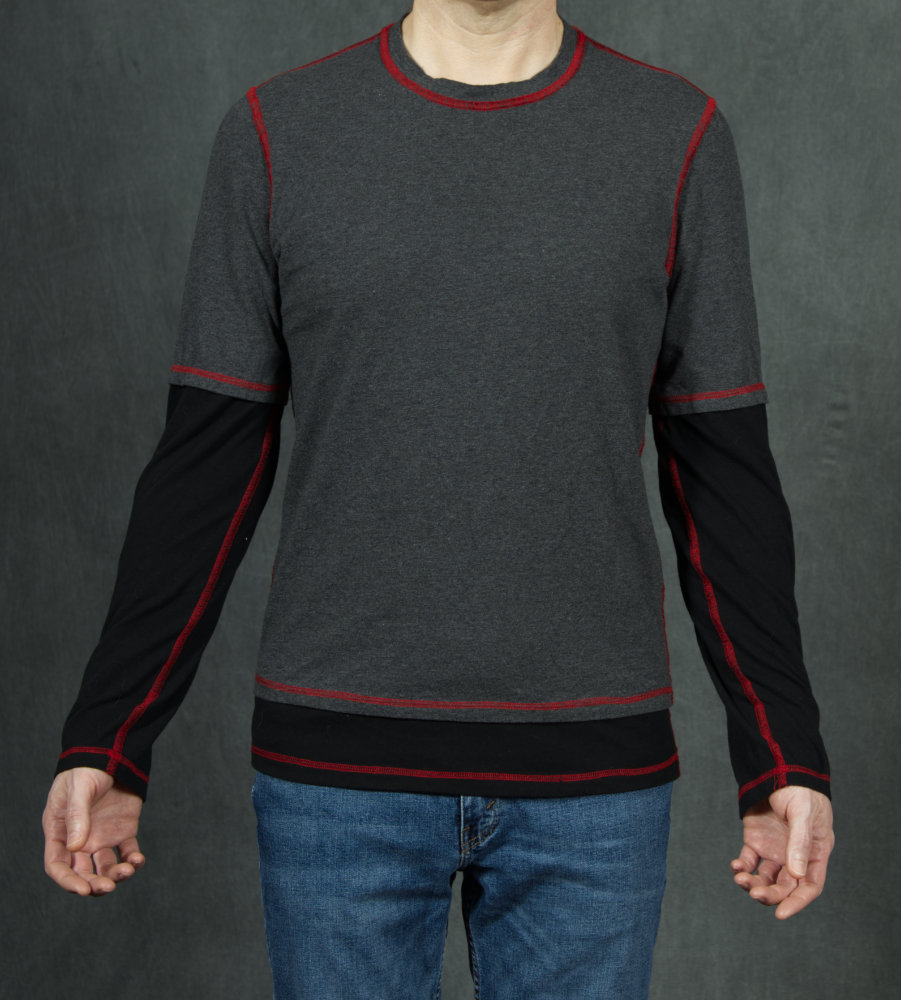
So for his birthday, I made a special shirt.
I used the flatlock stitch for the seams.
Oh, and also, he fixed my serger in early fall. Literally, he spent about an hour working on my serger to get it to properly form a coverstich.
So, for both the tie-shirt for my dad and all three shirts I made for Aaron, I had a working coverstitch.
I’m sure there’s a lesson I learned in there somewhere.
I think that lesson is “don’t let loose looper arms rattle around in your serger when you’re sewing at high speed”. Probably I should expound on that, but that’s a different story. Maybe I’ll even tell it sometime.
Anyway, I love this shirt. I think Aaron does too. (He keeps wearing it anyway.)
Side note: Aaron is a watch collector. He has many watches and watch bands. It’s his thing.
So, he has a watch that is mostly black, with light numbers and a red second hand. He bought a band that is black and gray stripes, with red pinstripes between the black and gray stripes.
It goes perfectly with his gray, black, and red shirt.
I didn’t plan it, but I should pretend I did. 🤣
Do you find yourself needing to take body measurements repeatedly, and then forget where you wrote them down (or how to take them)?
Learn to sew. Go at your own pace. Learn helpful techniques and tips to make sewing more enjoyable.

