In 2018, my bellydance partner and I (in my dance troupe Tonic) had just finished two years of performing some angsty, emotional, dark pieces. And, honestly, we aren’t that dark. I mean. We’re relatively light-hearted and fun… Probably.
And, while we totally take the dance seriously, we don’t always take ourselves seriously.
And what other perfect way to make fun of ourselves than dancing to “Untitled Self Portrait” By Will Arnett from The Lego Movie soundtrack? Well, that and then having two friends help out with finishing the performance to “Everything Is Awesome”.
So, while I refer to these as my “Awesome Costumes”. That has more to do with the song they were made for than the costumes themselves.
Though, they are pretty awesome…
Designing the Costume Pieces
When working on this piece, and therefore the costuming for this piece, I really wanted to contrast the “Darkness” of the first bit with bright vibrant happy colors for the second piece.
I personally like jewel tones, but I know I cannot wear yellow. At least, not close to my face or as a primary color. But I’m not going to tell my dance partners that they can’t wear yellow.
I really like letting them pick their colors. I mean, I can offer opinions and give suggestions based on fabric I have on hand, or swatches, etc. But ultimately, they have to live with wearing the costume and owning it.
So, the guidelines for this costume were along the lines of “Pick bright colors inspired by Lego bricks, but not just primary colors”.
Melinda and I had the added constraint of having to make our costume “go with” the pants that we’d be wearing for the first part of the piece. The “dark” part – which was a costume we brought forward from the previous piece. (More on that later).
I often snag fabrics or swatches from my stash to “brainstorm” color combinations.
I even take photos to show to people. (Combo A or Combo B)
For this costume pretty much all pieces were inspired by fabric options. (Sometimes I start with baubles or other decor.)
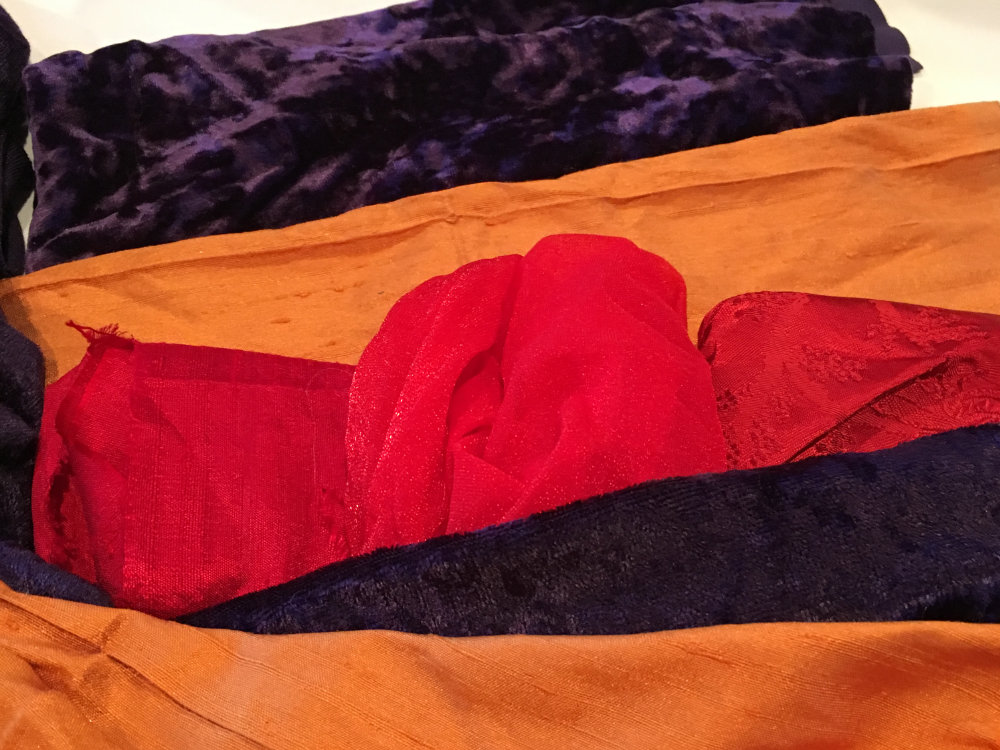
Here’s an example of the evolution of the color combos for the purple costume (which happens to be mine so there are fewer iterations).
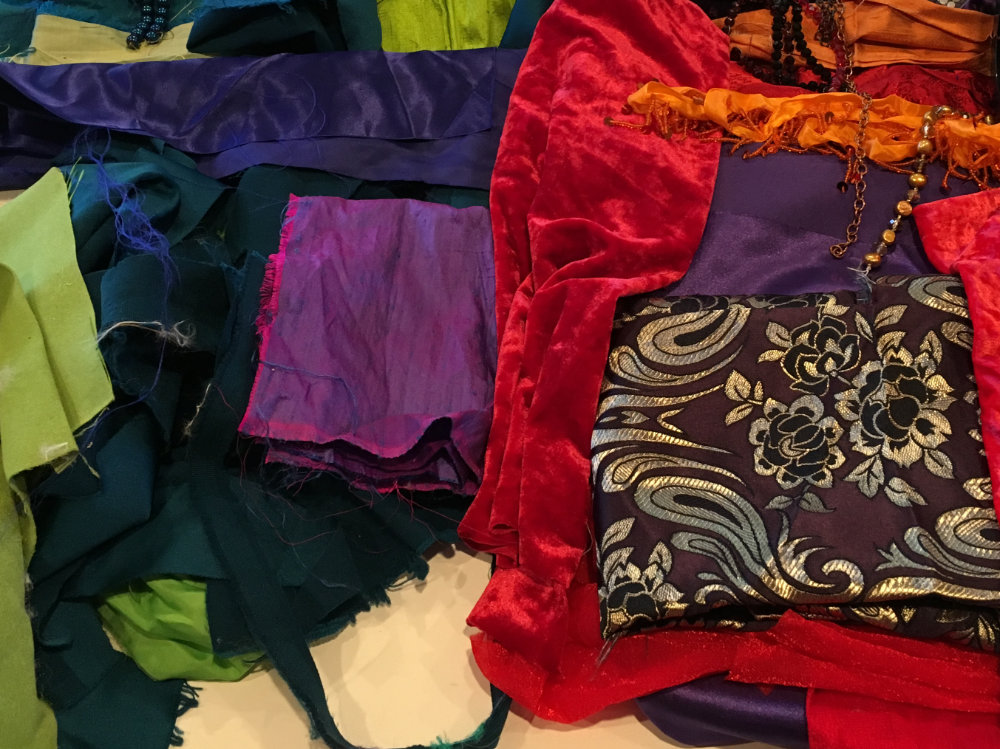
And here’s the evolution of the costume colors for the Lime and Teal costume. The final color combo was decided completely over text.
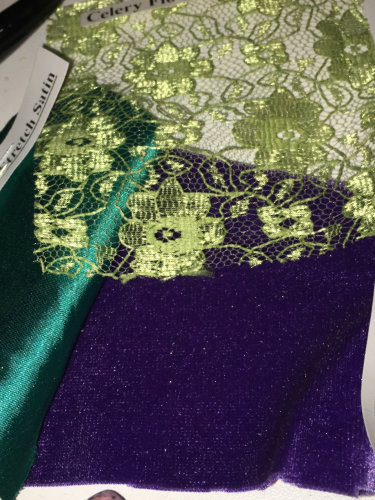
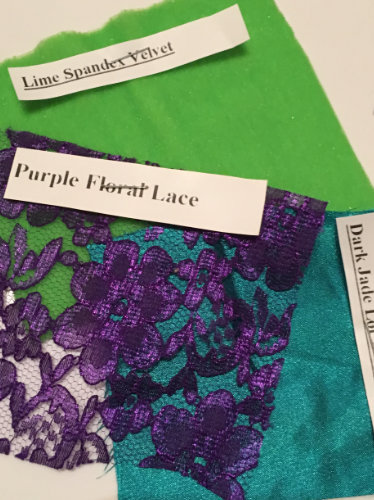
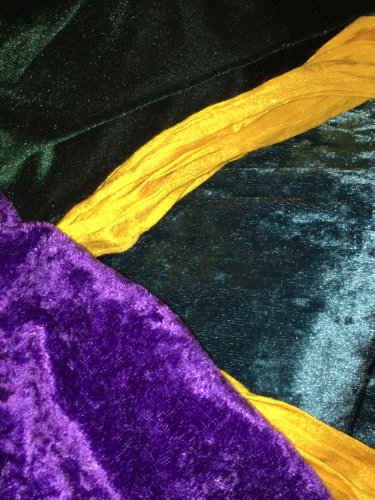
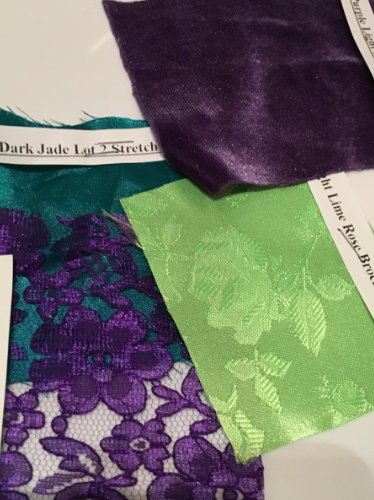
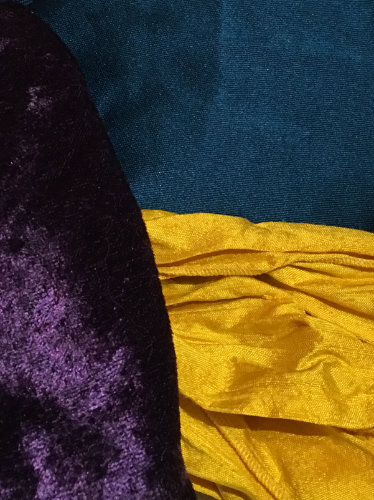
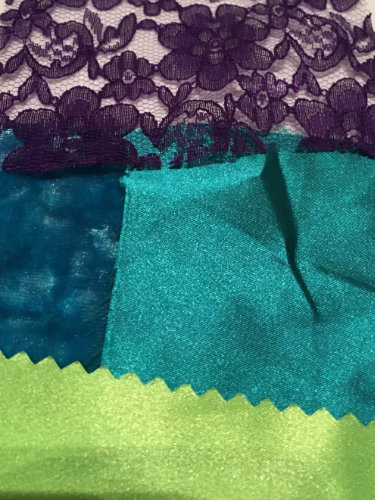
Unfortunately, I have no photos of the blue costume because that was done 100% in-person and not documented. 🙂
As with colors, the shape of the belt was also left up to the wearer of the belt. After all, they have to wear it not me. Plus they have to put it on and take it off.
To some extent, I decided on the closures of the bras. I typically do some sort of ties. But I deviated from my usual types for the blue costume as you’ll see in the details.
The actual layout of the decor on each of the 4 pieces was done during construction and is detailed below. But, I will say, since the piece was reflecting legos, I did choose to use more geometric patterns and layouts. So, lines, rectangles, and triangles, rather than floral, or swirly patterns.
Costume Belts
I made the pattern for each of the belts. And I constructed the belts with the sewn-on applique bits. But I made each dancer glue on their own sparkles and sew on their own chains.
Both the blue and lime belts are 2-piece belts with tie closures.
The purple belt is a 1-piece belt with a snap closure on a symmetrical front overlap.
DIY Bellydance Belt Course
Learn to create your own unique bellydance belt in my 2-part course. You'll learn how to make a pattern that fits your body. And then you'll learn how to alter it to make a wide variety of styles.
Costume Bras
Oh, Bras…
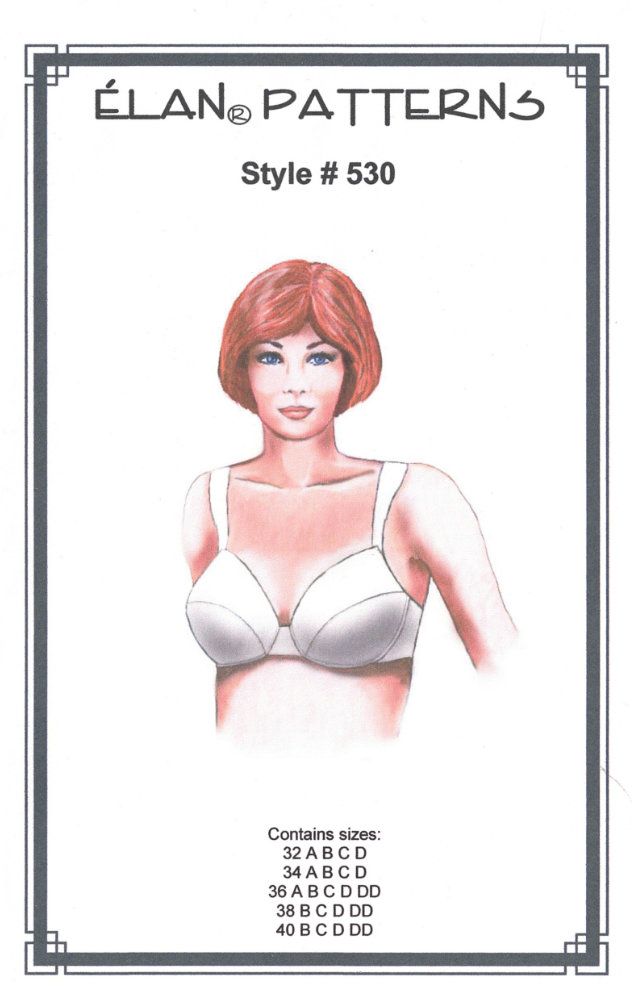
Each of the three bras was made from scratch. For the Blue and Lime costumes, I used a pattern by Elan, which is a 2-piece bra cup with a partial band.
Bra Terminology
A partial band only has a center segment and two side pieces. A partial band attaches the center piece and side pieces directly to the cups.
Whereas a full-band actually has a front piece that goes under both cups and is used to attach both cups together and to the side bands.
I like the Elan pattern. It’s super simple to make. I originally picked it up because it has a nice shape. The style was modeled after an old style of Victoria’s Secret bra (second skin satin).
The catch with a 2-piece cup is that you can only get so much curve in the cup without the shape getting… pointy, especially on larger cup sizes.
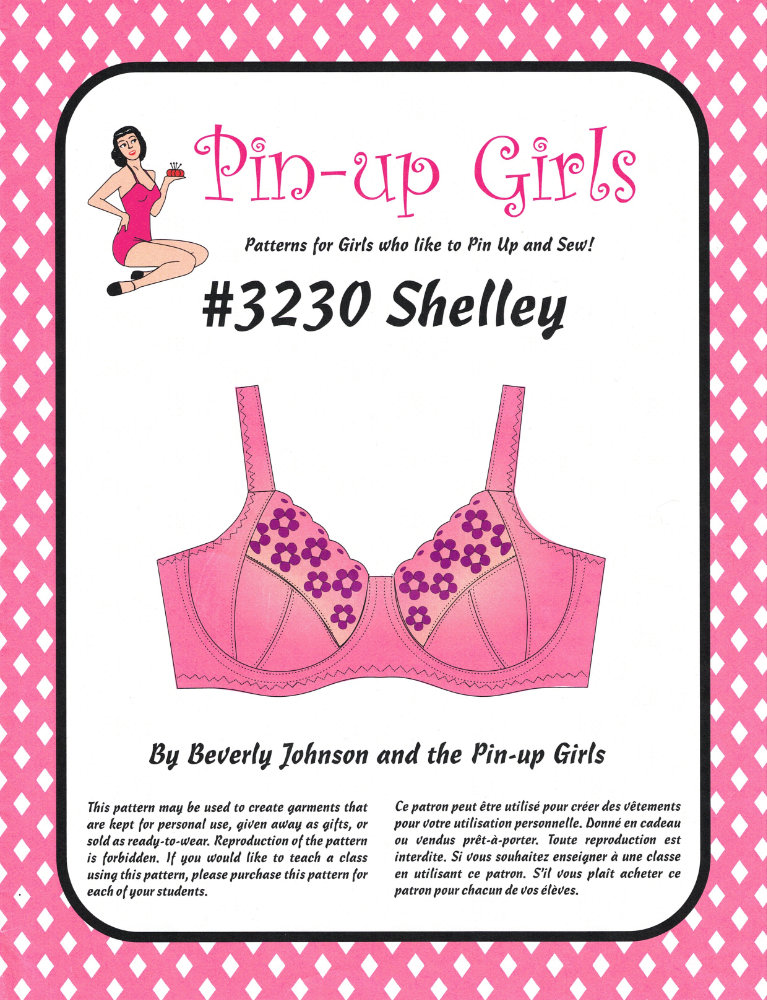
So, for the Purple costume, I chose a 4 piece cup pattern from Pin-up girls.
I frequently make my own bras from scratch now for costumes. I find it actually more liberating than covering a bra. However, it does require knowing your size in the pattern you’re making.
But, since the bras I make for costumes are usually not constructed exactly the same as one would make a bra for wearing as an undergarment, I don’t always follow the pattern instructions exactly.
The biggest difference between a bra for undergarments vs a bra for costuming is finish. Underwear has a certain look to it. Adjustable straps, multiple visible hooks-and-eye closures in the back, picot-edged elastic…
For a costume bra, I want something that doesn’t look like underwear. Straps have to look like the fabric or “go with” the fabric choice for the costume (Not be strap elastic). The closure, while it can be a swimsuit hook (which is made to be “outerwear”), shouldn’t look like underwear, so I avoid hooks and eyes unless they are covered.
Personally, I like my costume bras to be really adjustable, and able to be really tight. So, I typically make straps that tie.
Costume Sets
Let’s look at some of the details of each of the costumes.
Blue Costume
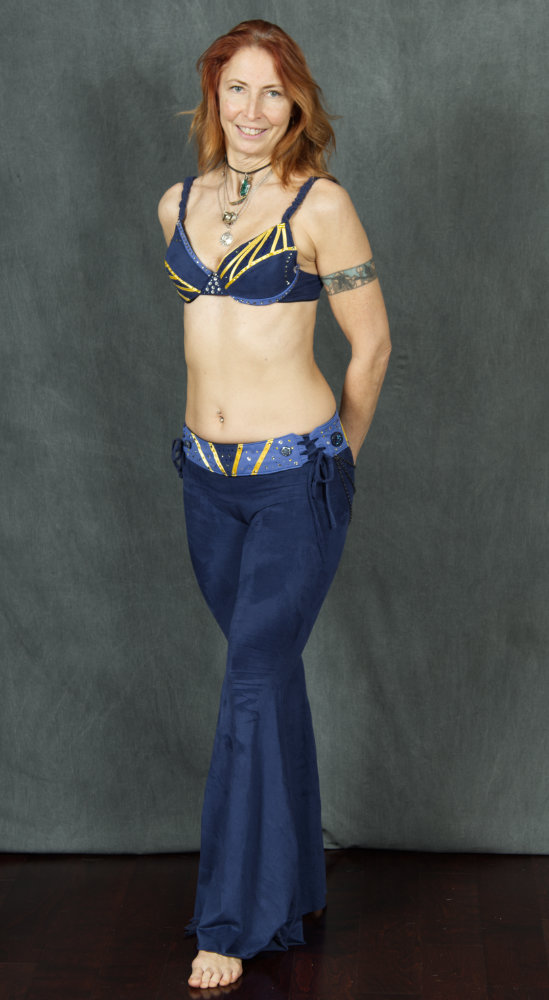
The blue costume has a partial band bra with a 2-piece belt. The colors are navy, yellow, and a slightly darker cornflower blue. (Is it Tuesday?)
When I was making this, I chose to try an asymmetrical bra top, with a symmetrical belt.
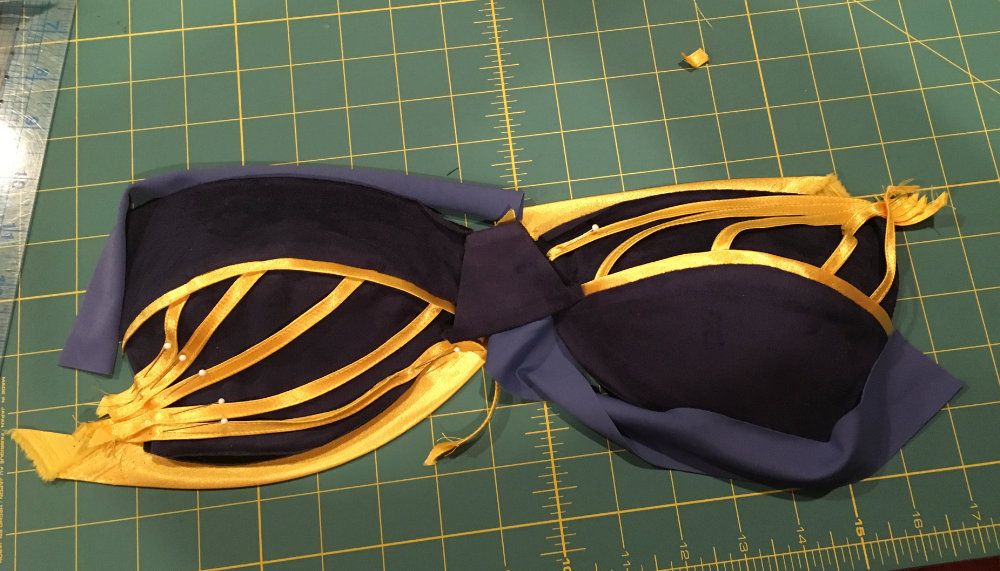
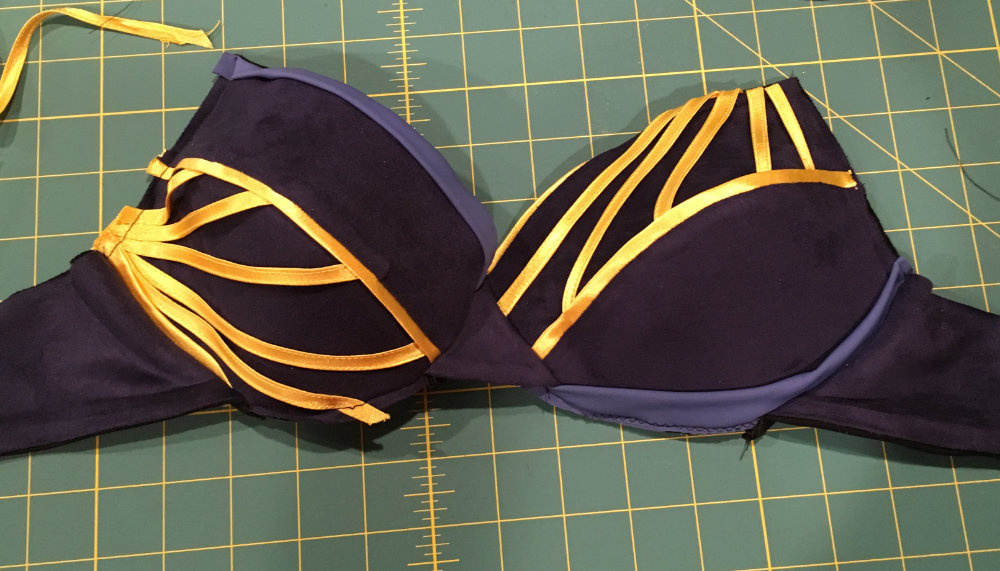
While the top is asymmetrical, it kind of reflects itself on each side. So, it’s more like rotational symmetry.
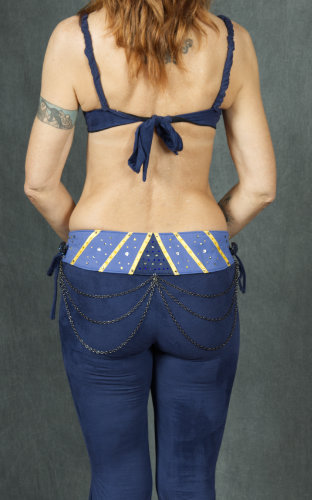
The belt is completely symmetrical. Though, the front and back are inverted.
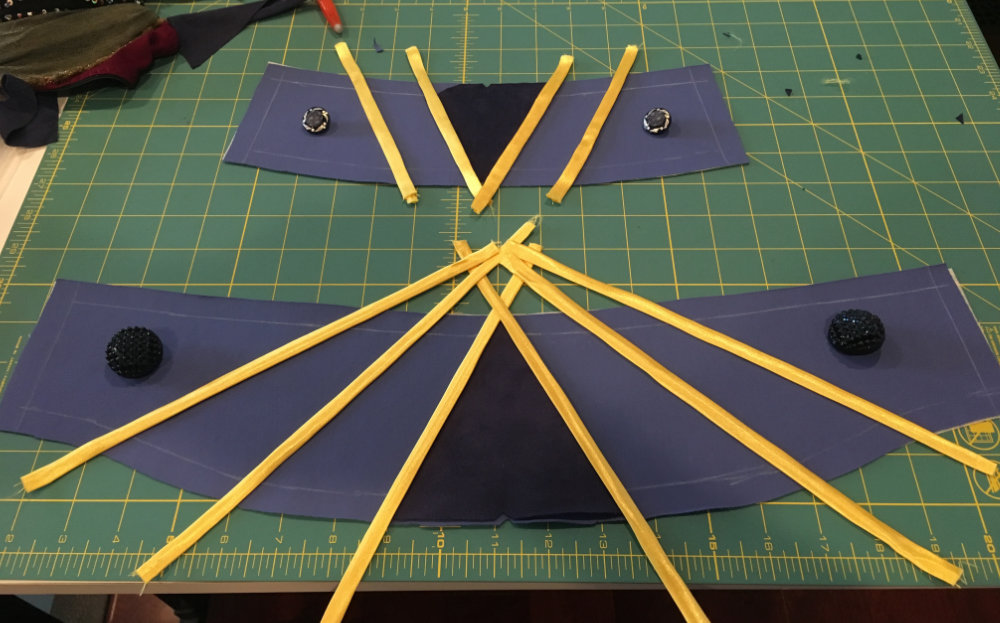
The bra actually has adjustable elastic straps covered with cloth with a tie-back.
The belt has a shaped back, and a modified corset lacing tie. The lacings are actually a tube of fabric in the navy fabric as used on the bra, pants, and belt.
Lime Costume
Not all dancers relish asymmetry. It can bother some people. Me, personally, I love it. (Even if most of my costumes are symmetrical.)
Some people, though, just downright prefer symmetry. And that is the case for the owner of the Lime Costume.
I used the same pattern as the Blue costume for the bra (different size… same pattern).
But In this one, I went with strict symmetry.
When working on the fabric and color patterns for this belt, I sent multiple options to the owner, so that I didn’t have to make the ultimate decision.
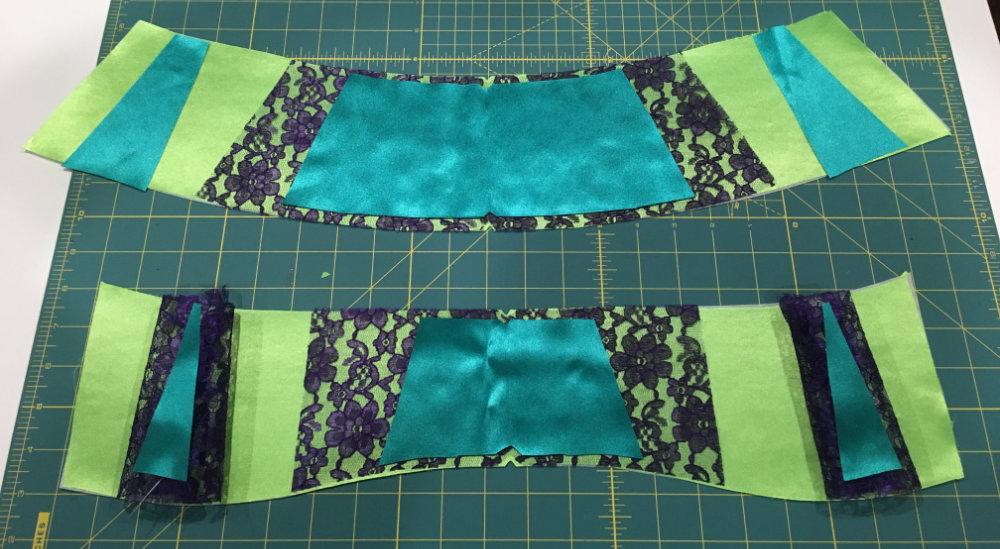
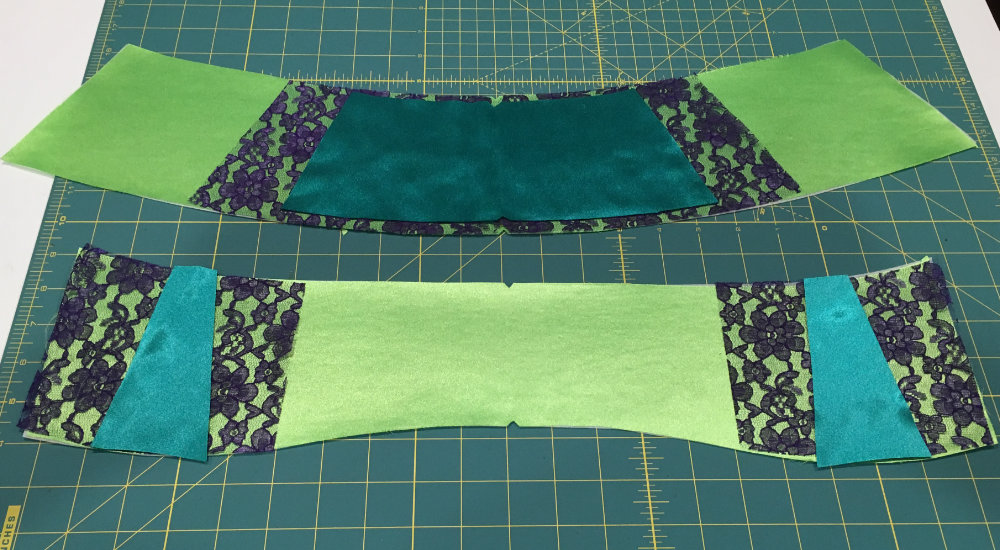
This bra pattern does not call for super stretch fabric, but the lime satin is a stretch satin. To get around weirdness, I cut the pieces on the bias for the “Direction of Greatest Stretch (DOGS)”. And I used a lace overlay on the bottom half of the cup.
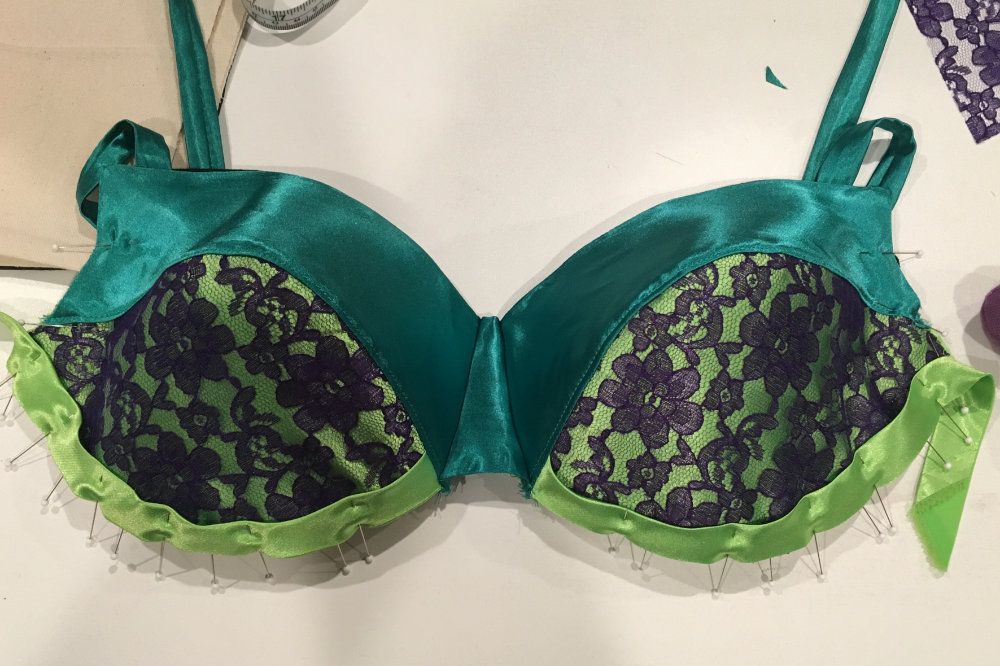
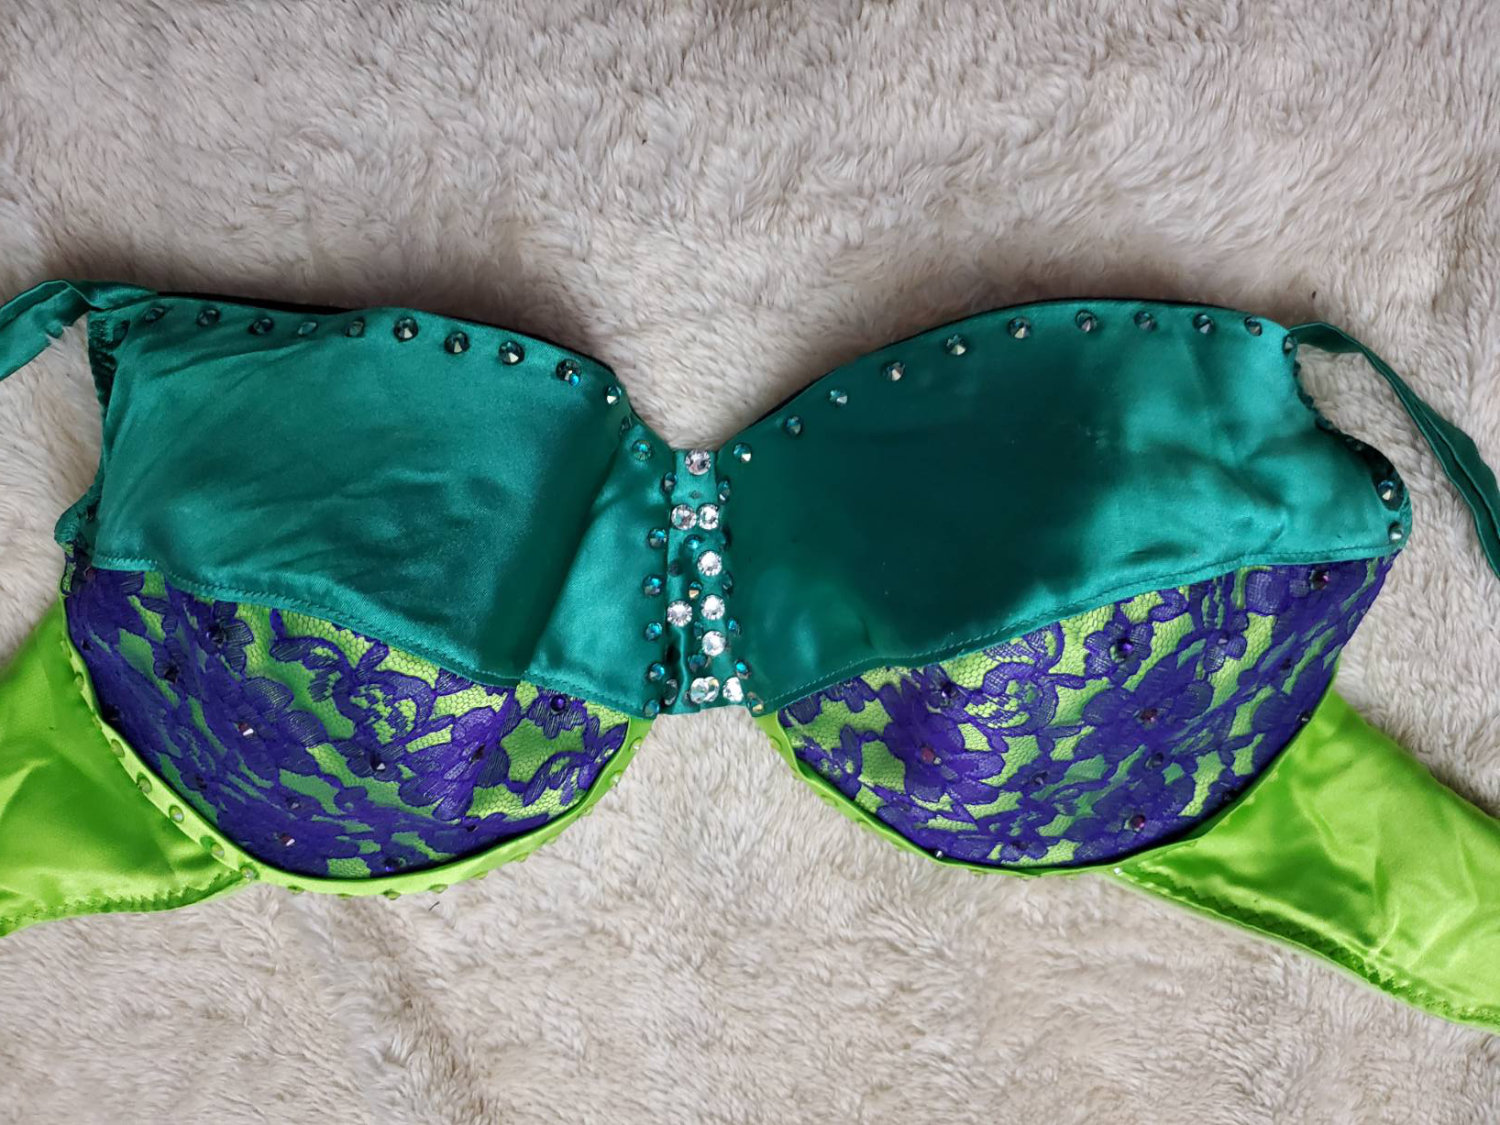
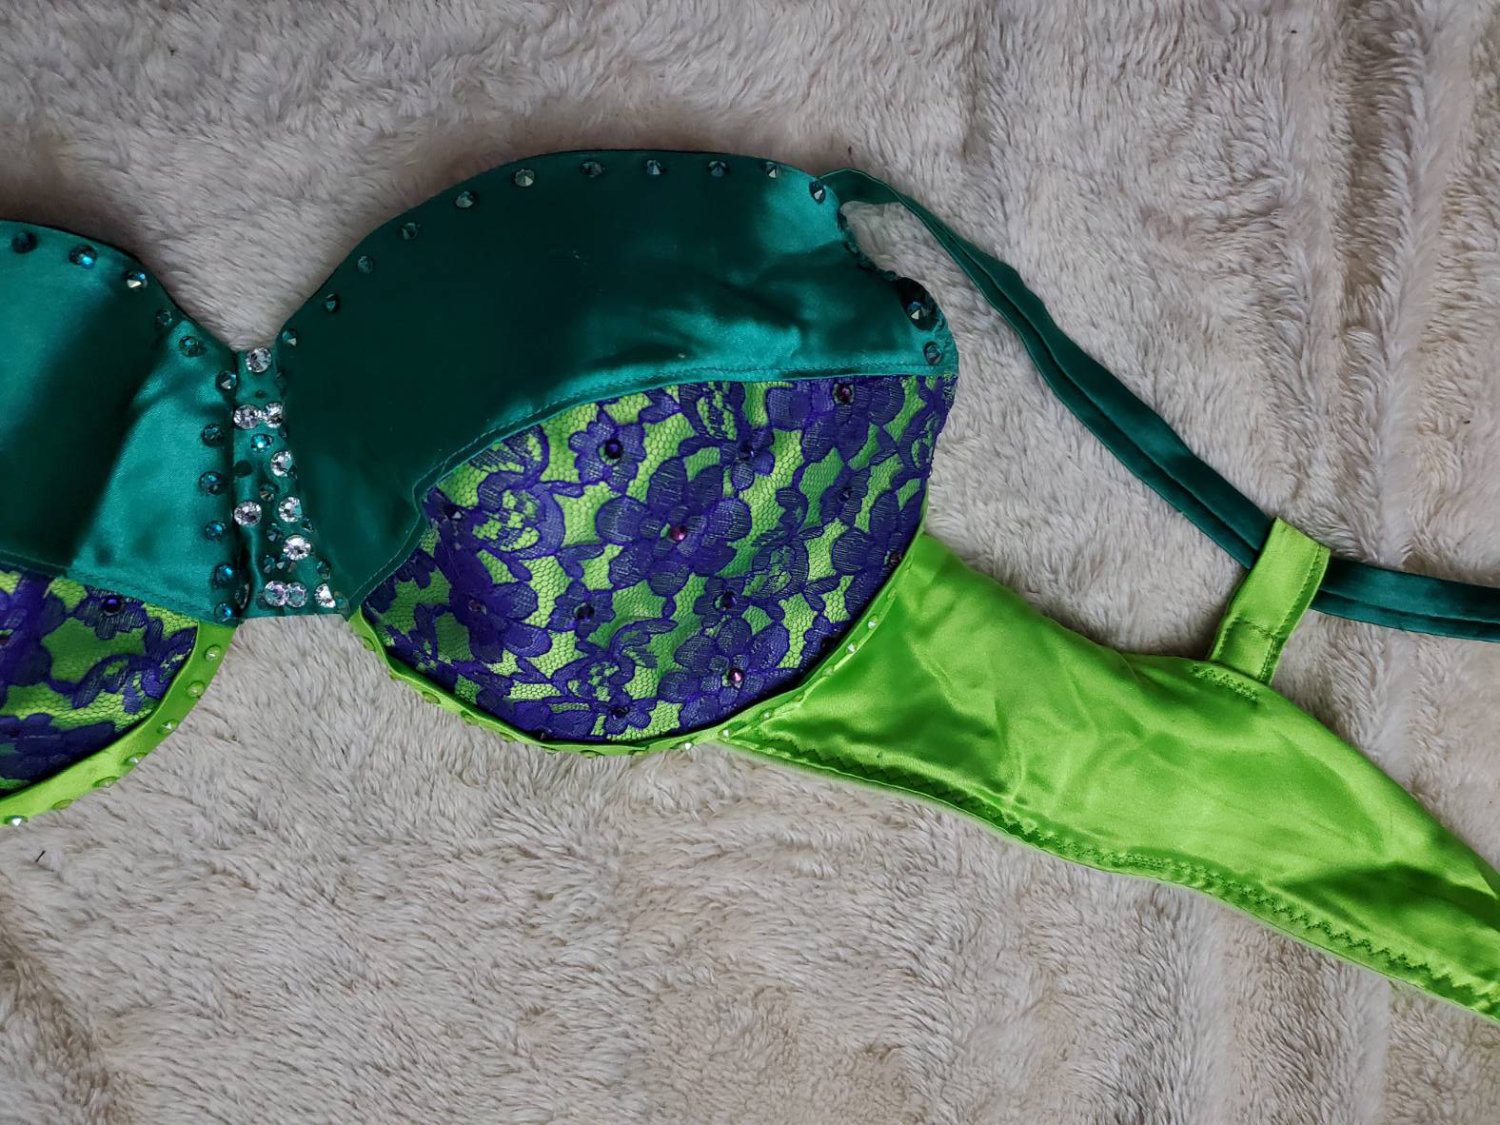
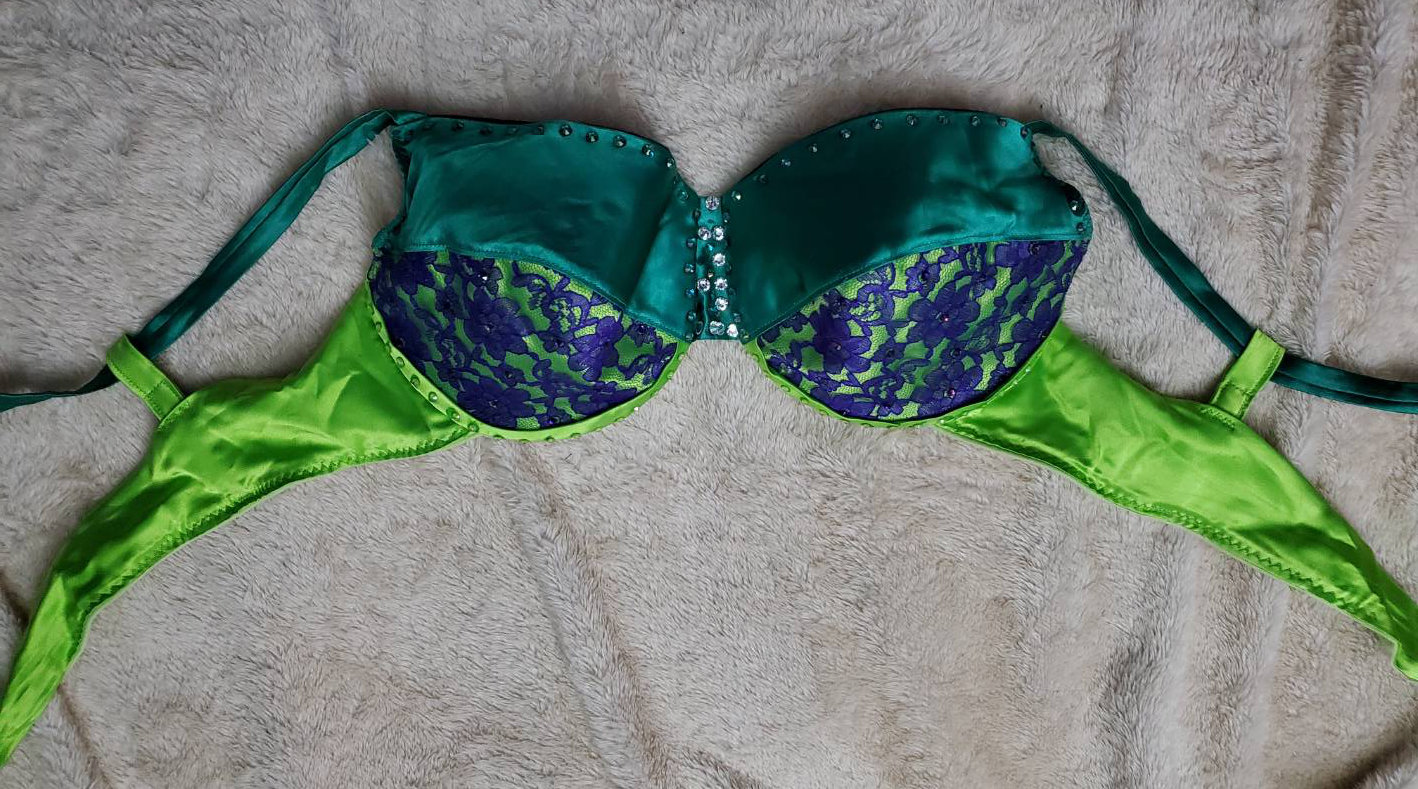
The belt is a 2-piece belt with a tie closure. It’s not strictly a corset lacing. And under the lacing, there is a chunk of fabric that hides the top of the pants so it doesn’t peak out between the lacing.
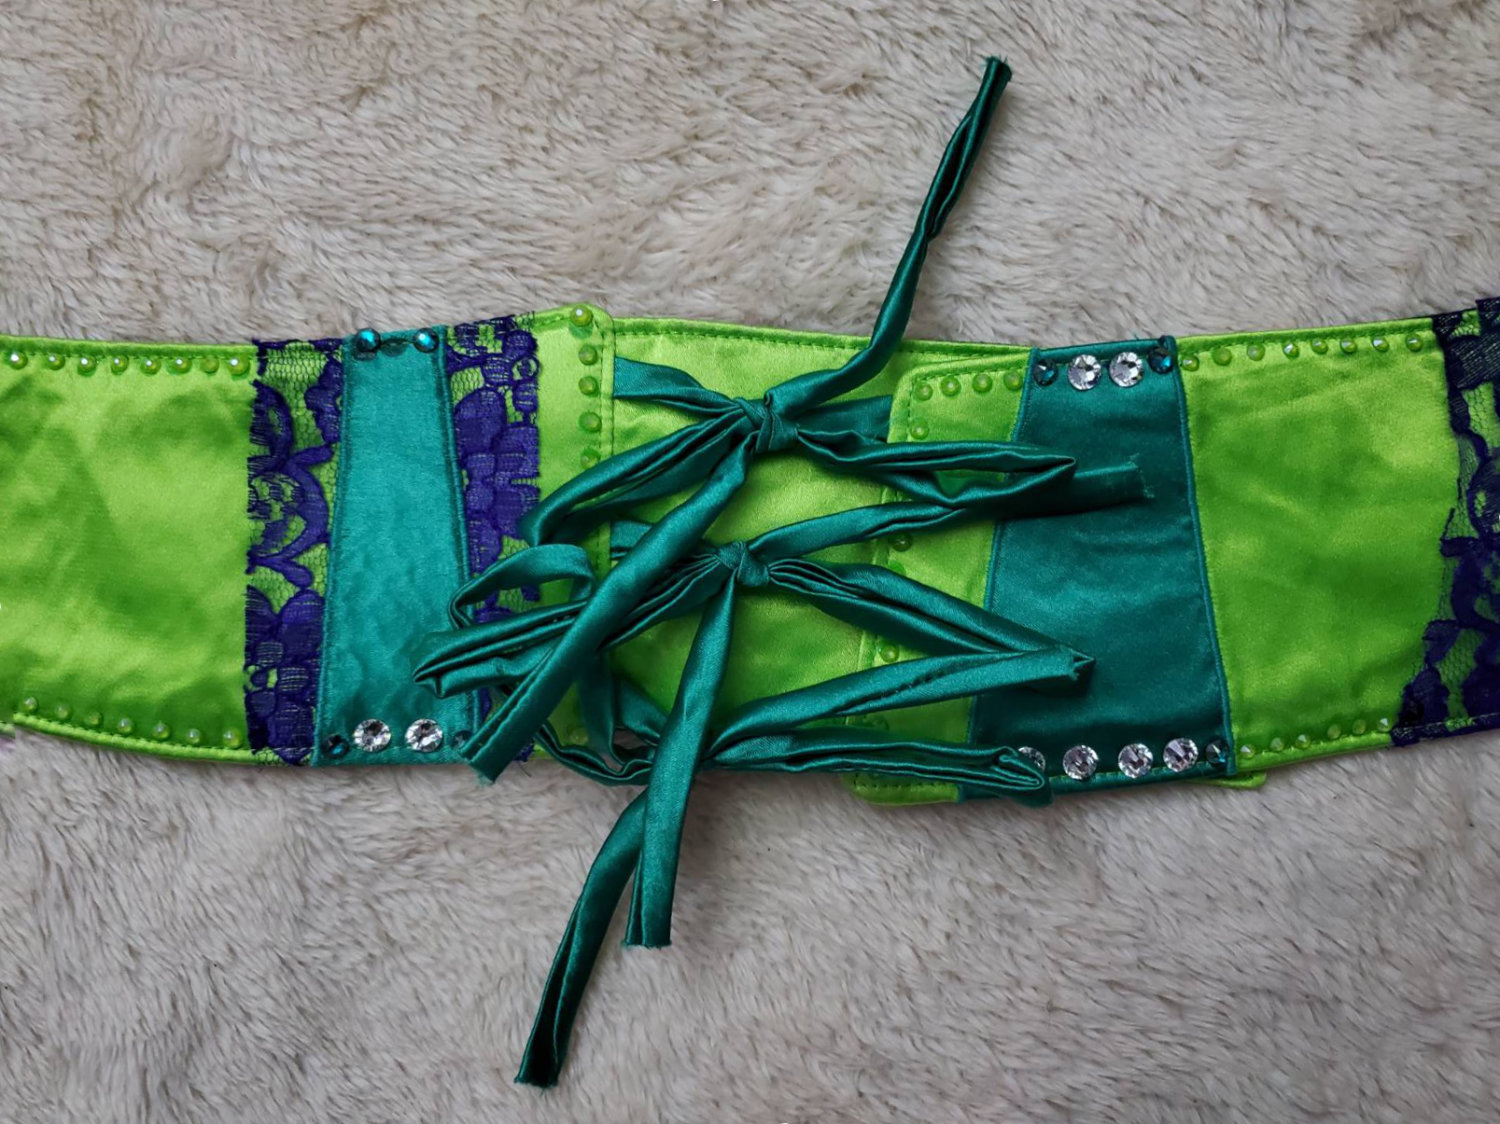

Belt Back

Belt Front
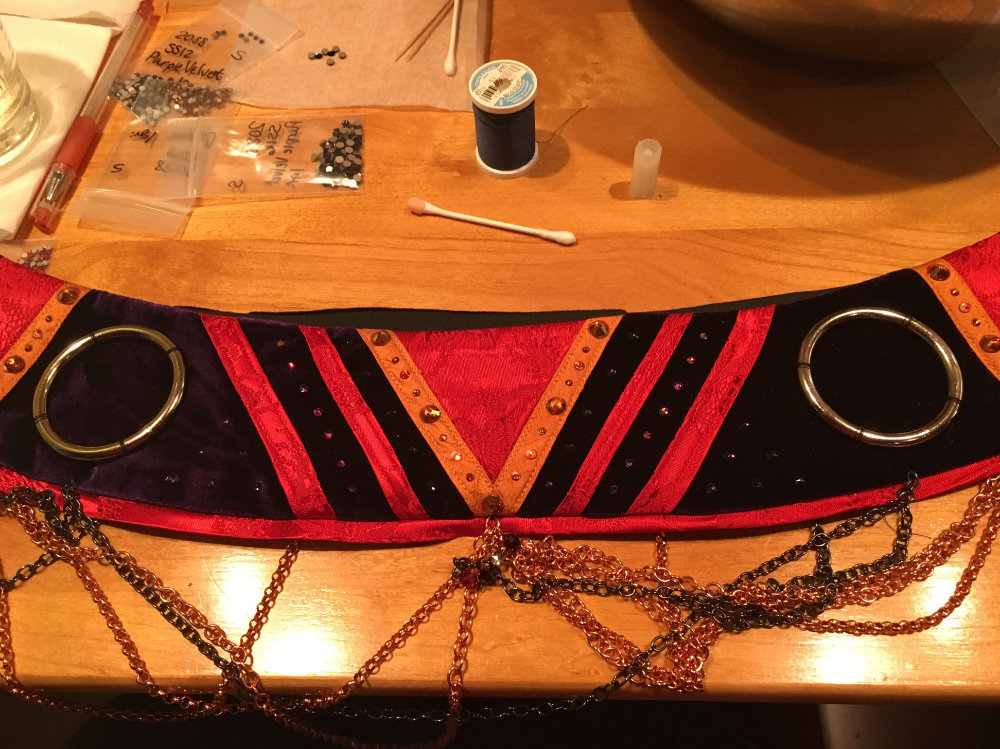
Purple Costume
The purple costume uses the aforementioned 4-piece bra cup. I thought it would give a more rounded shape for a larger cup size. And I really liked the seam locations for the cup.
I used the seam locations for the stripes I added for decor. Some stripes are actually along the seam and embedded, and some float “freely” and are only tacked at the top and bottom. This allows for the cup to stretch as needed.
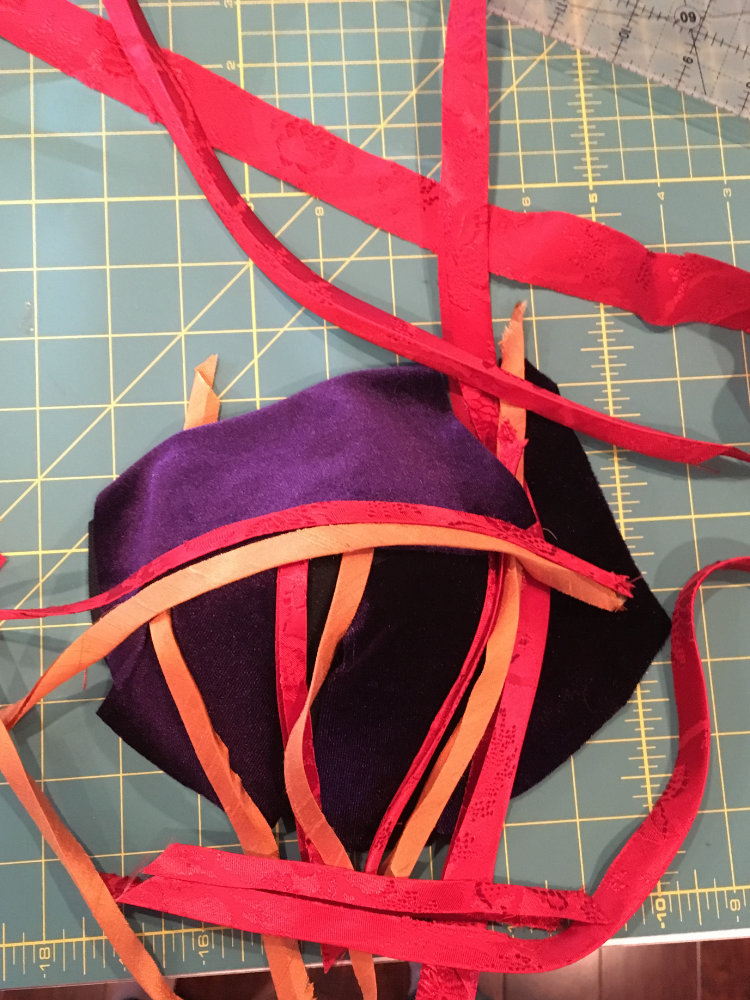
First, I’ll say this. The pattern doesn’t specifically NEED a super stretchy fabric, but I do like a little bit of give in my bra cups. The foam I use to construct the cups actually has some stretch. And I’ve had not-great luck making cups out of non-stretch fabric. Most patterns I’ve used have called for fabrics that stretch, in at least one direction. But not necessarily a LOT of stretch.
Therefore, unless your pattern calls for moderate to high stretch (like a spandex 4-way stretch 50% or more), I’d recommend using a foam cup to keep things firm enough. Then, you can cover it with whatever you want. With caution…
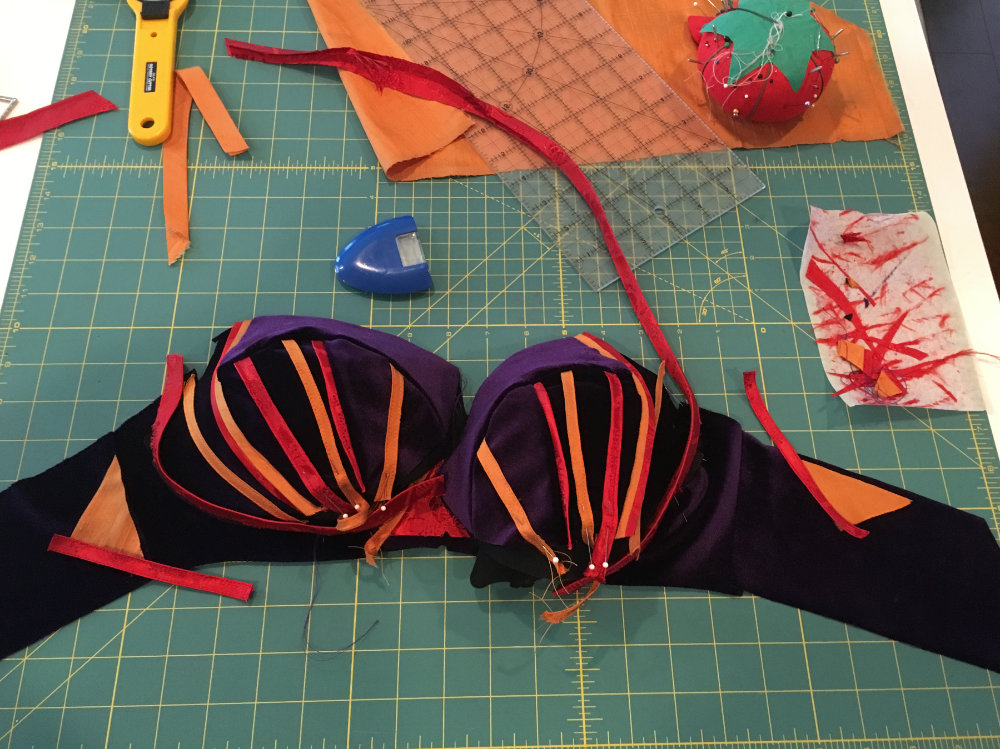
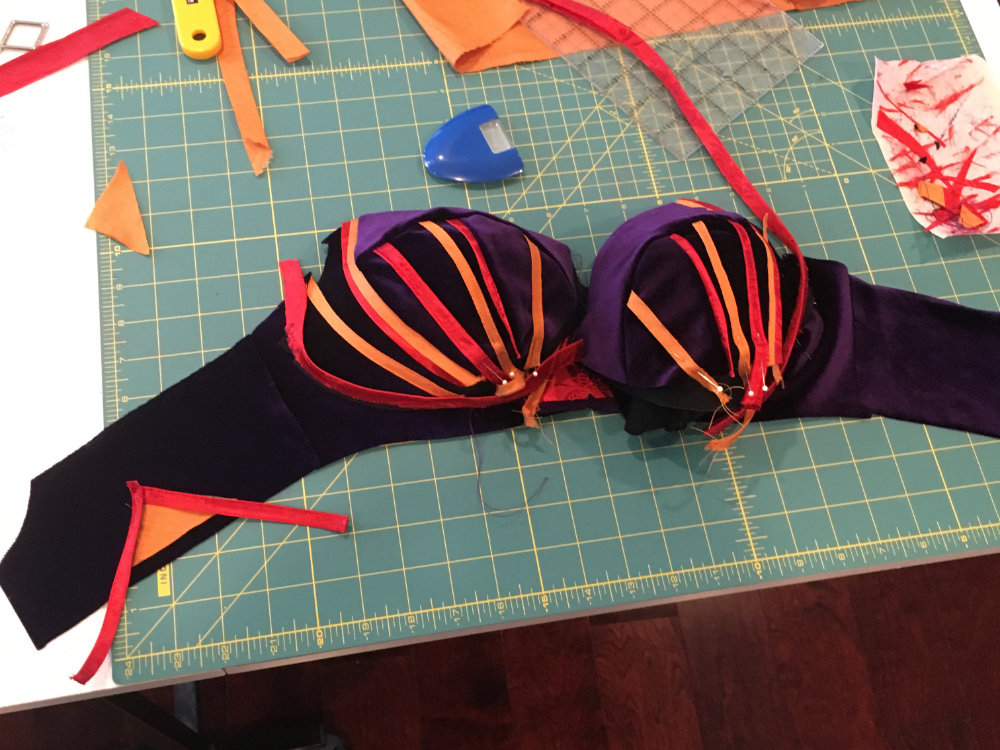
Second, I have got to rant about my decision to use velvet. (Hence the “caution”.)
Sewing bras isn’t particularly difficult. There’s some minor opposing curves you have to put together, but nothing incredibly difficult.
The “difficulty” in sewing bras comes in the precision needed. For most patterns, the seam allowance is 1/8 or 1/4 inch. For comparison, most commercial patterns use a 5/8 inch seam allowance. So, even at the larger quarter inch, it’s significantly smaller than “typical”. (Though, more and more patterns are using 1/4″ and 1/2″ these days, especially for patterns made for the serger.) That smaller seam allowance does not allow for a lot of variation over the course of the seam.
I’m very used to sewing with 1/4″ seam allowances. But with velvet, well, it’s more difficult. See, when velvet is placed face-to-face, the nap of the velvet (fuzzy bit) can force the pieces to slide apart. With a larger seam allowance or a more forgiving garment (precision-wise) like pants, this isn’t really an issue. But it was a fight on the bra. I probably invented some swear words. Well, probably not. I am a Kutherian Gambit series reader (listener) after all…
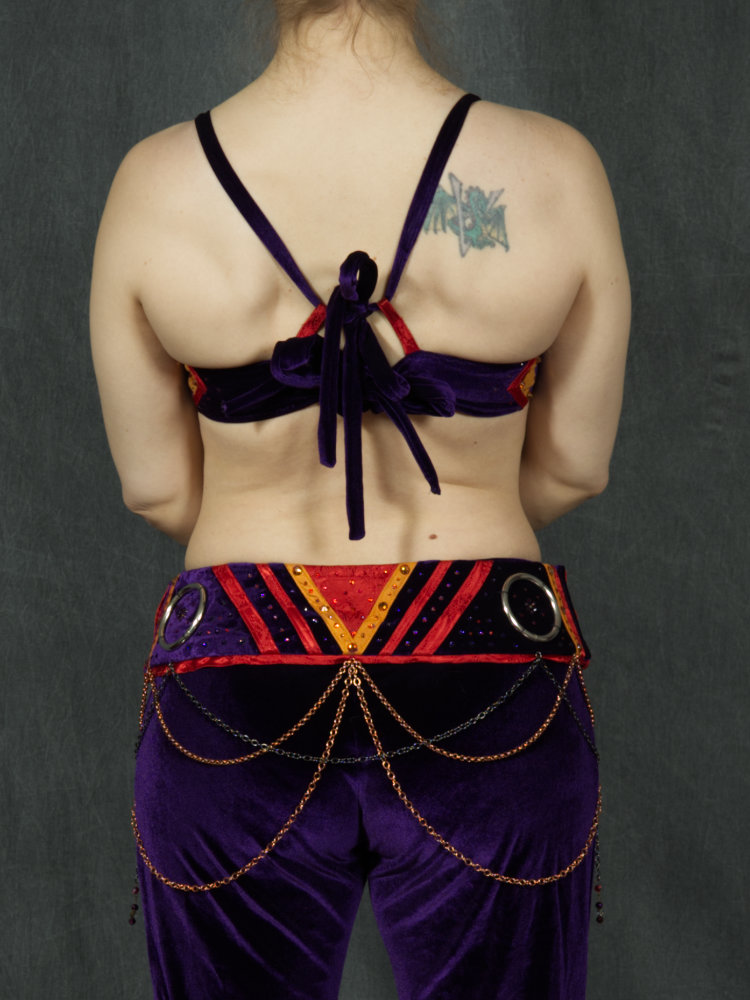
Think about this, if you are sewing a pant leg with a 1/4″ seam allowance and you accidentally sew it at 3/16 in some spots, you have a slightly larger leg hole (1/8″ actually.) and for most pant legs, even fitted leggings, that’s not that critical for fit.
However, on a bra cup, that could mean that the cup will be way to big, or shaped funny (a bulge). Or if you went the other way and made it too small, it could deform it with a concave section, or make the cup too small.
This difficulty is exacerbated with velvet nap because of the directionality of the pieces too. In a pant leg, both the front and back are relatively on the same grain. However, in a bra, most pieces aren’t on the same grain that they are getting sewn to. So, the velvet is way more likely to slide away.
Many dirty words.
All that being said, would I use velvet to make a dance bra again? Yeah. Probably. I’m not really one to back away from the challenge. And if the “Look” I’m going for wants velvet, then velvet it shall get.
The belt, on the other hand, had a different challenge.
I made the belt out of the same fabric as the pants. In order to make the belt stand out more against the pants, I did two things.
The first thing I did, was cut the belt on a different grain (mostly) from the pants. Because of the velvet nap, the color quality and depth are different directionally. (This is why napped fabrics always get a special layout of pattern pieces in commercial sewing patterns.)
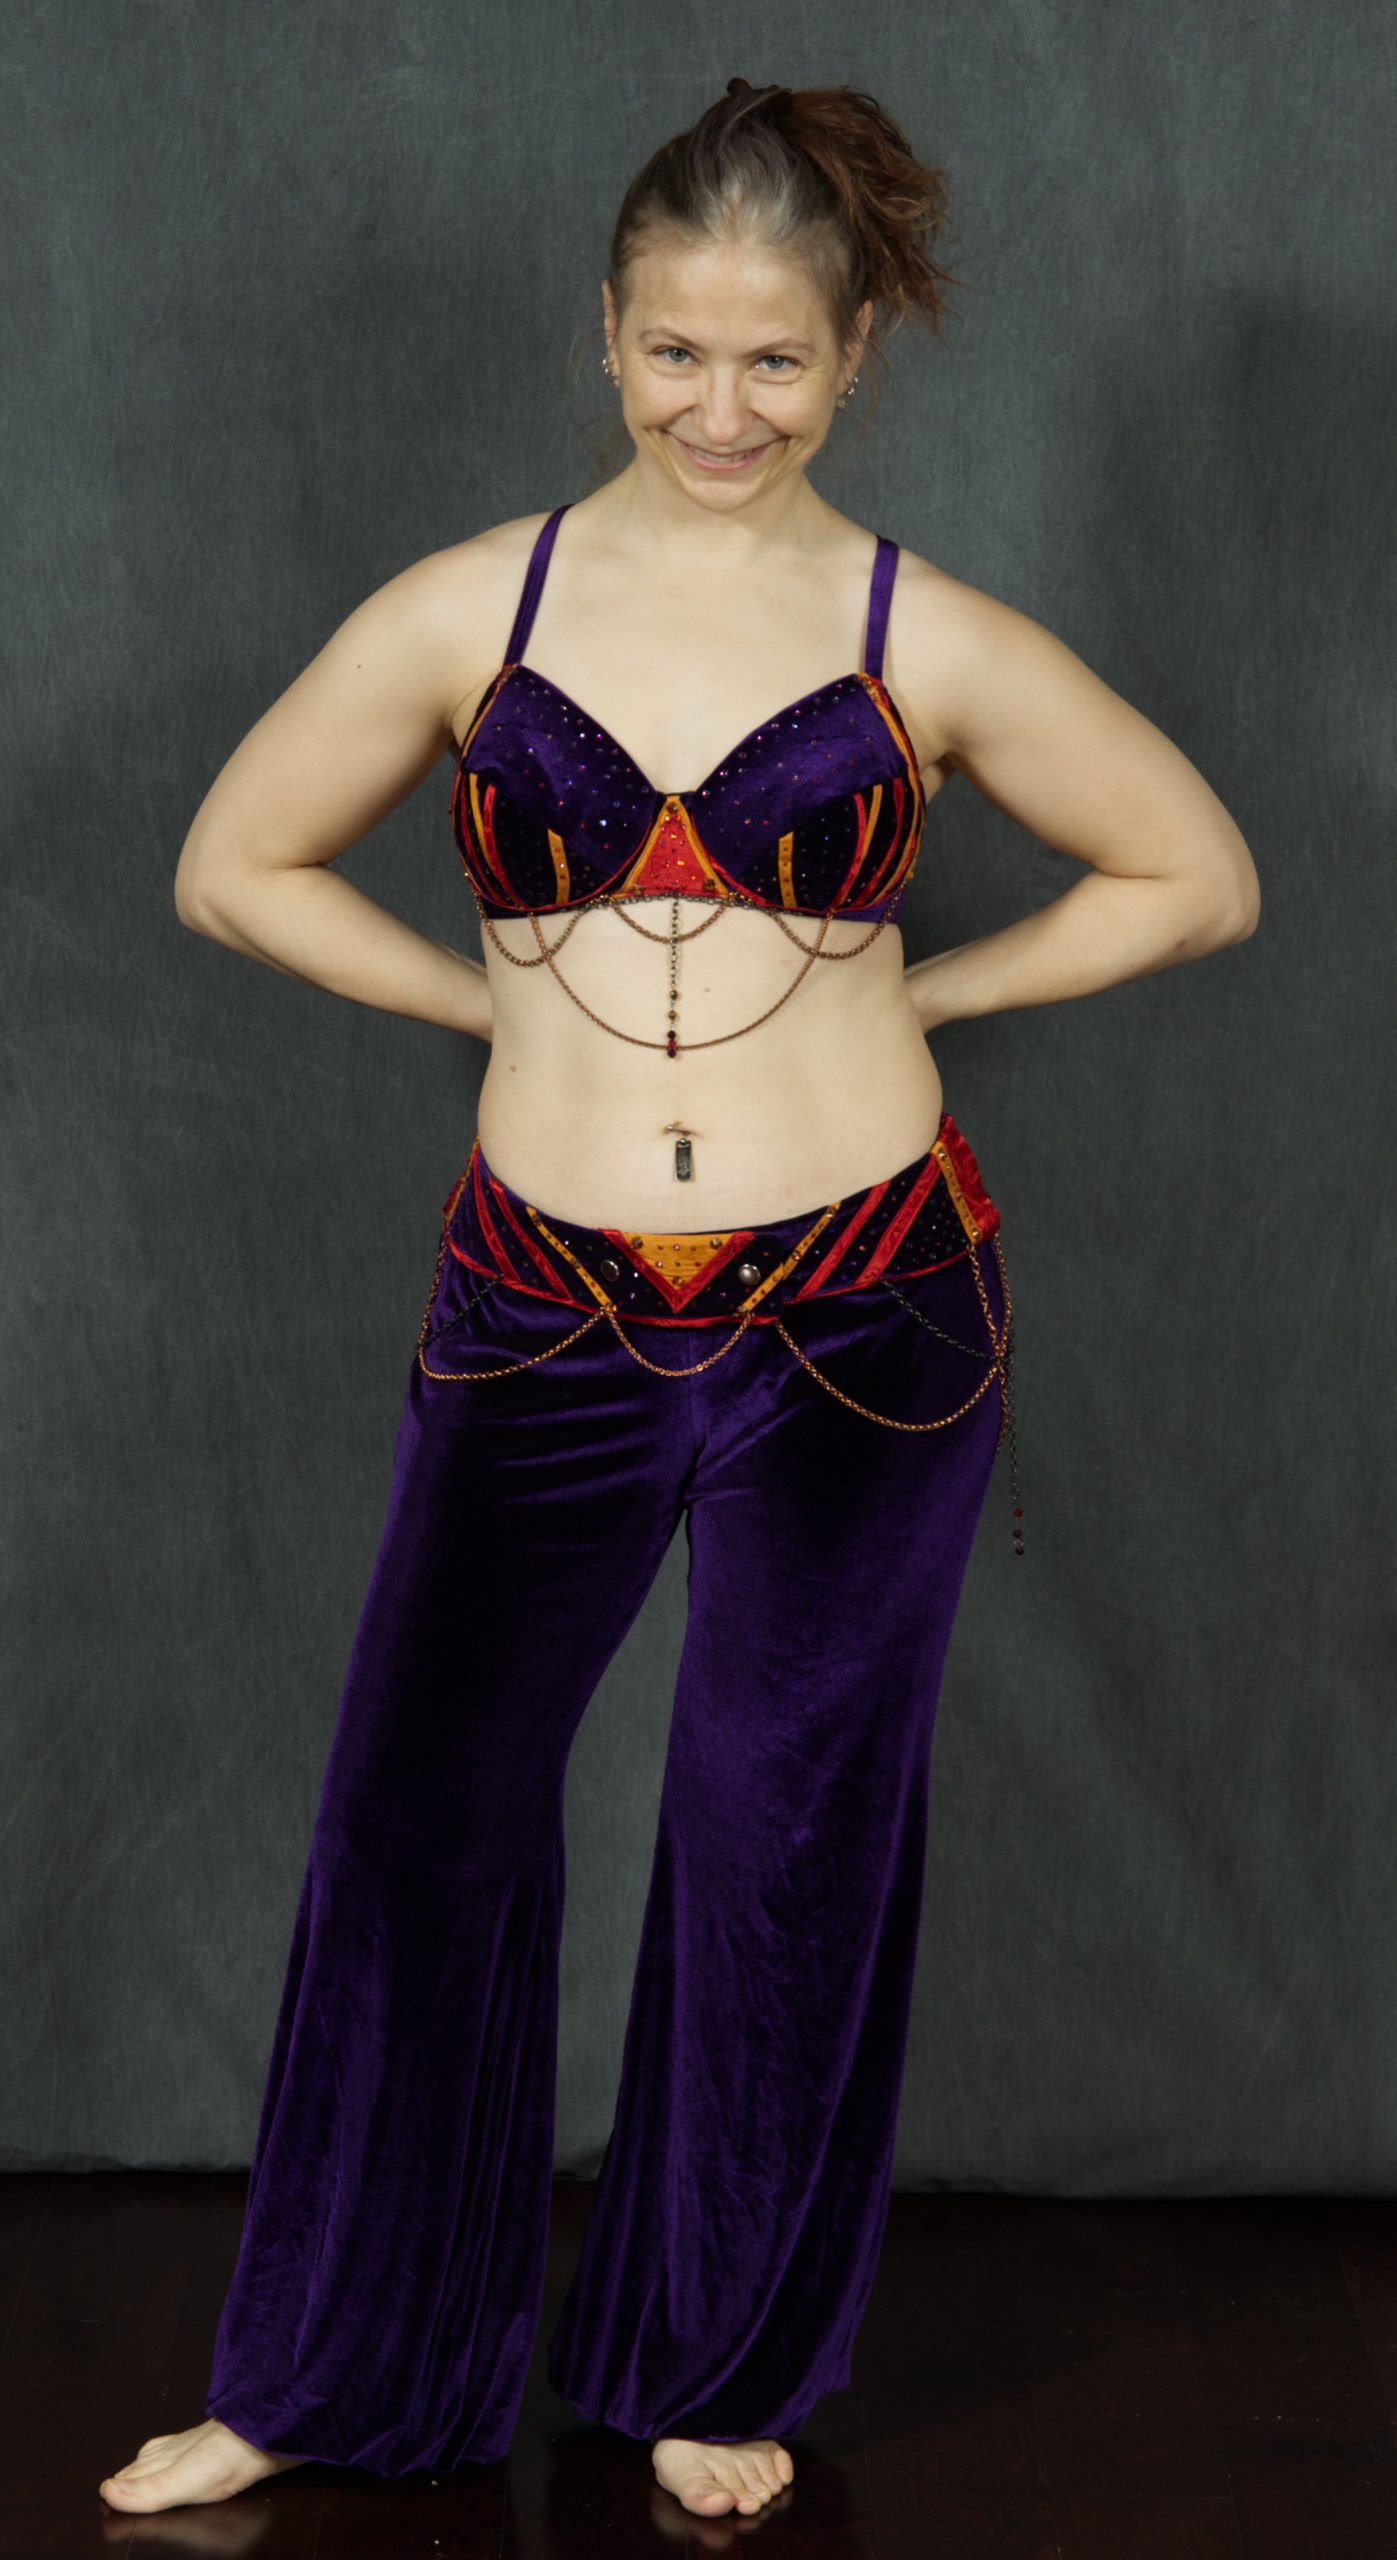
The other thing I did was add a red “piping” band along the bottom of the belt. (It wasn’t exactly piping, there was no, actual piping in it. But it was installed the way piping would be installed, mostly.
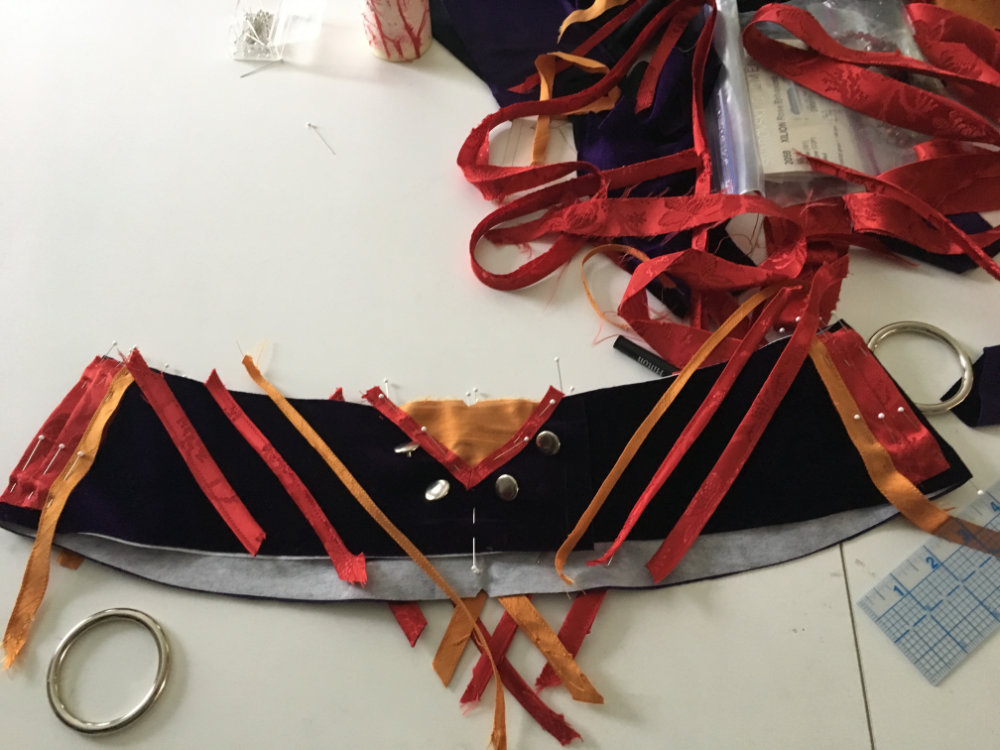
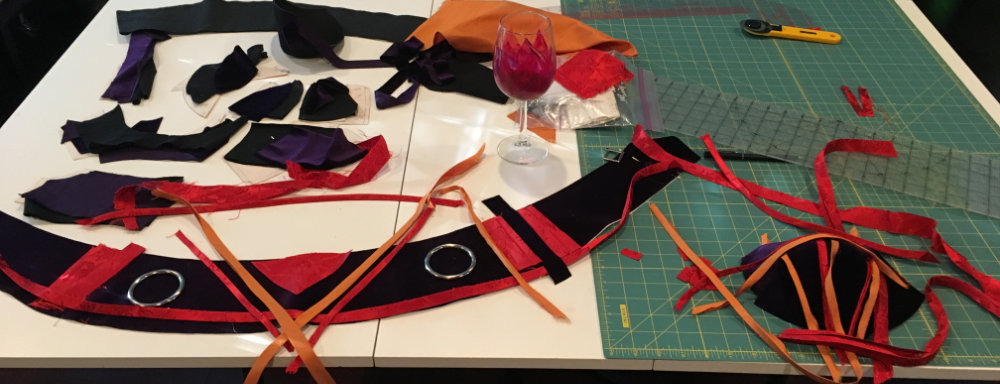
Overall, I think these costumes turned out really well. I did make at least one mistake on my purple belt that I detail in this post though.
Are you interested in learning how to sew your own belt? Check out my course on designing and sewing belts.
DIY Bellydance Belt Course
Learn to create your own unique bellydance belt in my 2-part course. You'll learn how to make a pattern that fits your body. And then you'll learn how to alter it to make a wide variety of styles.


