In my article "Basic Steps and Tools Needed to Start Sewing Clothes (With a Machine)" I listed the bare minimum you need to get started sewing. But I neglected to mention pressing. 🙄
And while technically, you don't need to press to sew, your garments (and all other sewn creations) will look 1000 times better if you do.
Pressing Tools
First, let's go over the difference between pressing and ironing.
Ironing is when someone runs a hot iron over a piece of cloth in order to remove wrinkles. Typically, they lay the fabric out, and glide the iron over it, not really staying in one spot for very long.
Pressing, on the other hand, is when someone places the iron onto a section of fabric or seam and holds it there for some length of time. Long enough to set the crease, or shape the part. But, not so long as to burn, or melt the fabric.
So, this is a list of tools you may want for pressing, but really you only Need an iron. However, a few of the other things will be necessary for certain tasks.
Iron
You will need an iron to press things when sewing. Now, they do make very specific machines to press garments. This is what your tailor or dry cleaner would use if you take a garment to them for pressing.
But, when you are sewing, you need to be able to get into tight spots and do some detail work with your iron.
Types
There are 3 main types of irons: Stand-alone (regular), Gravity Fed, and Mini-boiler (or boiler).
My descriptions above refer to the mechanisms of the steam generation for the iron.
Stand-alone Iron:
A stand-alone iron is your typical run-of-the-mill iron. The water tank is located on the iron, and the steam is generated by heating elements within the iron. You can find these irons in a variety of price ranges with a variety of features. I've seen them as low as $30, and as high as $120, but I'm guessing the range could be even greater.
Here's the thing. You absolutely don't want a cheap iron because it'll be frustrating and could ruin your projects.
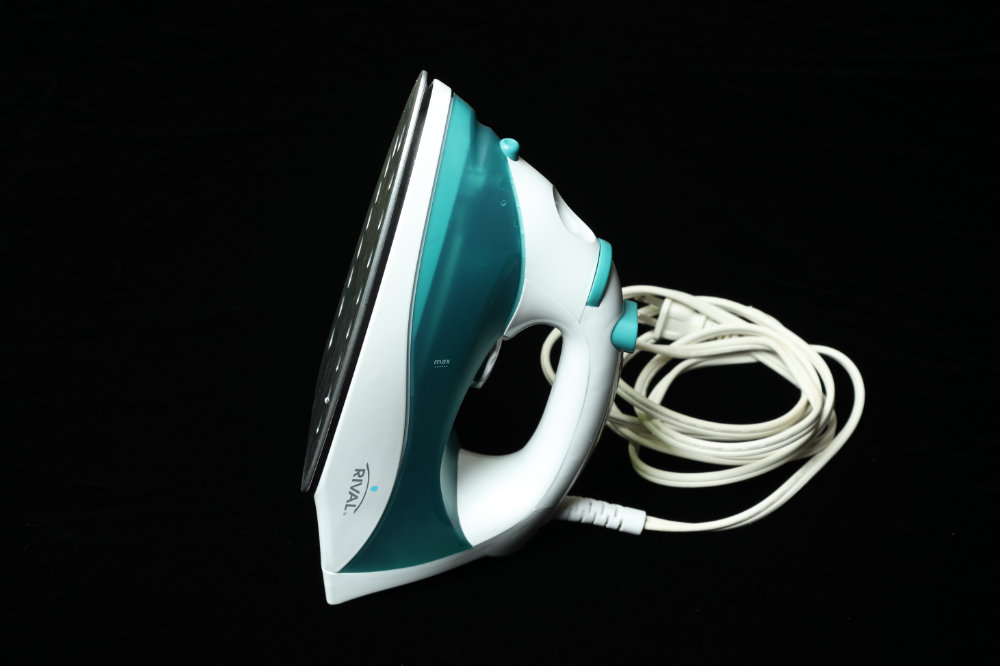
You want good control of the temperature. You don't want the steam system to "leak" onto your fabric when you don't want water on your fabric. Cheaper models will have cheaper controls and cheaper parts.
Gravity Fed Iron:
A gravity-fed iron has a separate jug that has to be hung higher than the iron so that the water can flow (by gravity) to the iron. The iron itself has a solenoid valve that will activate the release of steam. Steam is produced in the iron, but the water is held outside the iron.
These irons are typically heavier than stand-alone irons. And they are made for pressing. But they can be used for ironing too, in case you need it for that as well. (Which I still do).
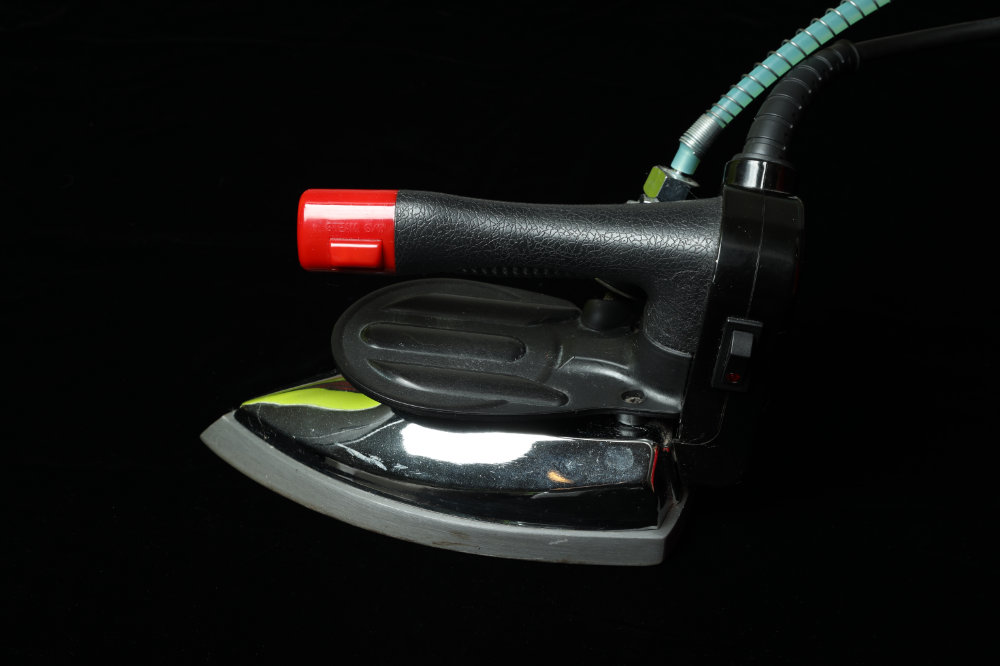
They do have the disadvantage of needing their water tank to be mounted somewhere. Inside the tank is some filter material that keeps the minerals from clogging your iron. So, it's not something that you can easily dump out and pack away.
Unless you sew A LOT and have a dedicated space, this iron is probably not for you. However, it is what I use and I LOVE it.
Mini Boiler Iron:
A boiler iron has a separate boiler that holds the water and generates the steam. It's a pretty complicated unit. And takes up more space than a traditional iron. They are also pretty hefty in price. (Starting close to $300!)
So, probably avoid this unless you're a professional sewer. And if you are, I have no idea why you're reading this...
Features you might want
There's a few things to look for when purchasing an iron. And since the majority of you probably are going to stick with the regular stand-alone kind (and maybe a few upgrade to gravity fed), I'll stick to features you can find on some of these.
Pointy Pointy part
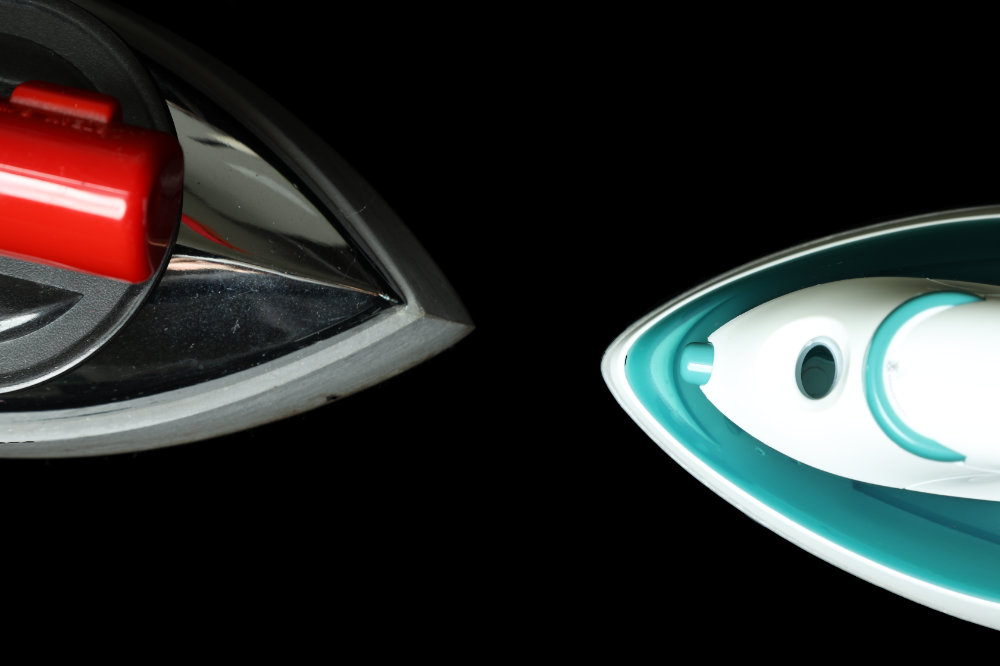
The tip of the iron should be narrow enough to get into tight spaces. Cheaper models are kind of round and wide. The more "professional" you get with your iron, the more pointy the tip gets. Some professional models have an elongated tip.
I have a gravity fed iron that doesn't have an elongated tip, but it is super pointy. This helps when pressing seams open, sometimes I can use the point of the iron to separate the seam allowance. It's really handy for smaller detailed work.
Auto-Shut-Off
This is a feature that some of you need, some of you may want, and some professional irons don't have. My gravity fed one doesn't have an auto-shut-off feature.
If you are prone to forgetfulness, if you routinely leave your stove on, if you don't think you'll be sewing for long stretches at a time, this could be a good feature for you.
It's not a deal-breaker. I just forced myself into a habit of turning my iron off when i turn the machine off. Though, i have forgotten. And the worst that's happened is that it's been hot overnight and I paid for electricity I didn't need to.
It is my understanding that the stand-along models will more-often-than-not have this feature.
You have to weigh the risks of leaving your iron on with the frustration and time wasted waiting for your iron to heat up again cause it shut off on you.
Large Water Reservoir
So, the gravity-fed irons have a LARGE water reservoir. It's probably a good gallon? I don't know, I haven't measured. But, you're lucky to get much in your stand-alone iron.
Irons that have larger water reservoirs will boast of this feature.
If you're going with the stand-alone iron, there are two reasons you'll want the larger reservoir.
- You won't have to fill it as often.
- It'll add weight to the iron.
Iron Weight
So, it might seem like it's a good idea to have a light-weight iron. I'm not so sure. A heavier weight iron means the iron can do more of the work pressing than you. So, the heavier the iron, the flatter it'll smush the thing you're pressing.
Now, moving around a heavier weight iron can get tiresome. So, that's something you need to consider in conjunction with your arm and forearm strength.
If you iron a lot and sew a little, you probably want a lighter iron. If you press a lot and iron only when you absolutely need to, perhaps the heavier iron could be a benefit.
Ironing board
An ironing board is important so that you can have a nice flat, heat-resistant surface to press your garments on. It's not critical, if you have an alternative. However, ironing boards typically have other "features" that you may want that a table with a heat-resistant pad on wouldn't.
Types
There are several types of ironing boards: small ones that are portable - think dorm room or military barracks, wall-mounted ones that fold out from the wall, and stand-alone ones that have their own legs that typically fold up so you can store the board somewhere.
There are "standard" models and more professional or deluxe models.
I mean, you can get away with a standard model. But, if you're going to sew a lot, I'd stay away from the small portable ones. They don't stay as flat and you still need a table to put them on.
Features you might want
Iron stand
Some boards have a place to put the iron that isn't on the ironing surface. This takes more space when it's out, but gives you more space for your work on the actual board.
Convertible End
MOST ironing boards have one end that's "square" and one that is tapered and more rounded. The rounded end is great for getting into sleeves, and slinging pant legs over them when ironing.
Real pressing typically needs more than just the rounded end of an ironing board for shaping things.
Some boards actually have an extender unit that can turn the tapered end to another square end extending the usable space for your ironing. This is super helpful if you are working with large pieces of fabric that need to be ironed. Think duvet covers, draperies, and long capes. Or, even just those several yards of fabric that you just pre-washed and now need to de-wrinkle before you cut it.
Your content goes here. Edit or remove this text inline or in the module Content settings. You can also style every aspect of this content in the module Design settings and even apply custom CSS to this text in the module Advanced settings.
Point Presser
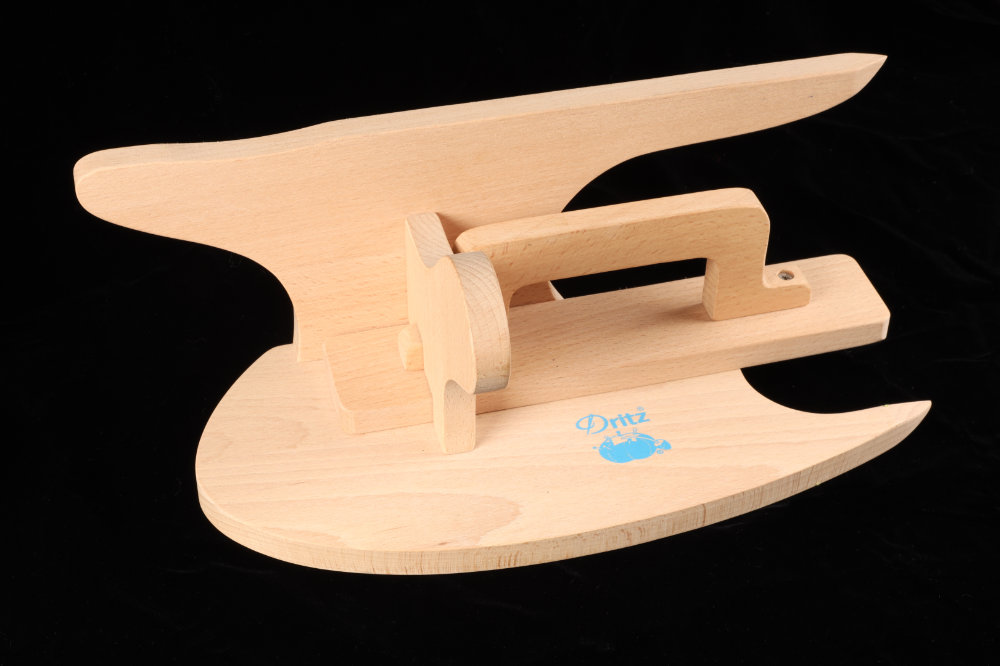
A point presser is a wooden tool that (typically) has several parts on it that one can use to get into really tight corners for pressing. But also come have curves you can use and a long flat space. They really are a great device for pressing a variety of things.
If you plan on sewing sculpted things, shirts with collars, bras or fitted face masks, I highly recommend getting a point presser.
Clapper
A clapper isn't as funny as it sounds like it should be. In fact, I have no idea why it's called a clapper.
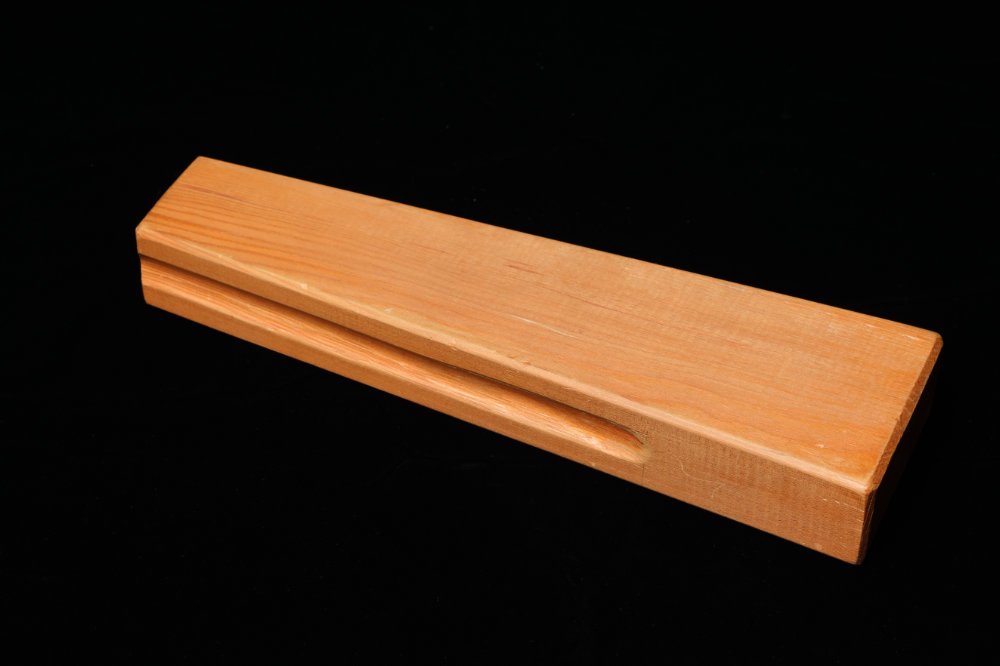
It's basically a block of wood. Yup. Just a block of wood. Here's an option from Amazon.
You use a clapper to suck the heat out of the thing you just pressed so to make whatever crease you just made more snappy. For example, if you are folding a piece of fabric in half, and every time you press it, it wants to unfold, a clapper can help it stay folded.
My clapper was inherited and is about a 1-foot long block of wood (probably pine). It looks like it might have been made from a 2 x 4 piece of lumber.
Some point pressers have small clappers on them.
How to make your own
You can probably make your own from a 2 x 4 piece of lumber.
You'll want about 8-12" long.
Sand the heck out of it to make it as super smooth. You don't want it snagging delicate fabrics or giving you slivers.
If you have the tools, you can put two shallow grooves down each side for gripping. And you can round off both ends, or taper one. And you can miter the corners... kind of up to you.
Pressing Cloth
Pressing cloths are used to protect your fabric from your iron or, to protect your iron from your fabric (as in the case when you iron on fusible interfacing with the fusible part facing the iron ... oops)
Some fabrics absolutely want a pressing cloth in order to preserve their awesomeness. Velvet is one.
Types
Pressing cloths can be found in about 3 different kinds of fabric. You can get a heavier weight canvas or muslin type. You can get a lightweight cotton batiste or broadcloth type. And you can get a silk georgette which is robust to heat, but also see-through.
Depending on the type of fabric you typically use, you may need to invest in all three. Though finding the silk one has proven problematic for me. It may be better to just buy a piece of fabric in the size you want and finish the edges for the cloth.
Pressing Ham
A pressing ham, or Tailor's ham is a roundish ham-shaped stuffed tool that is used to press curves. One side is typically a cotton canvas, and the other is either wool or polyester, (and usually plaid).
They are heavier than they look and are quite sturdy. Online tutorials abound about how to make your own if you so desire. But they are pretty common and easy to find to purchase.
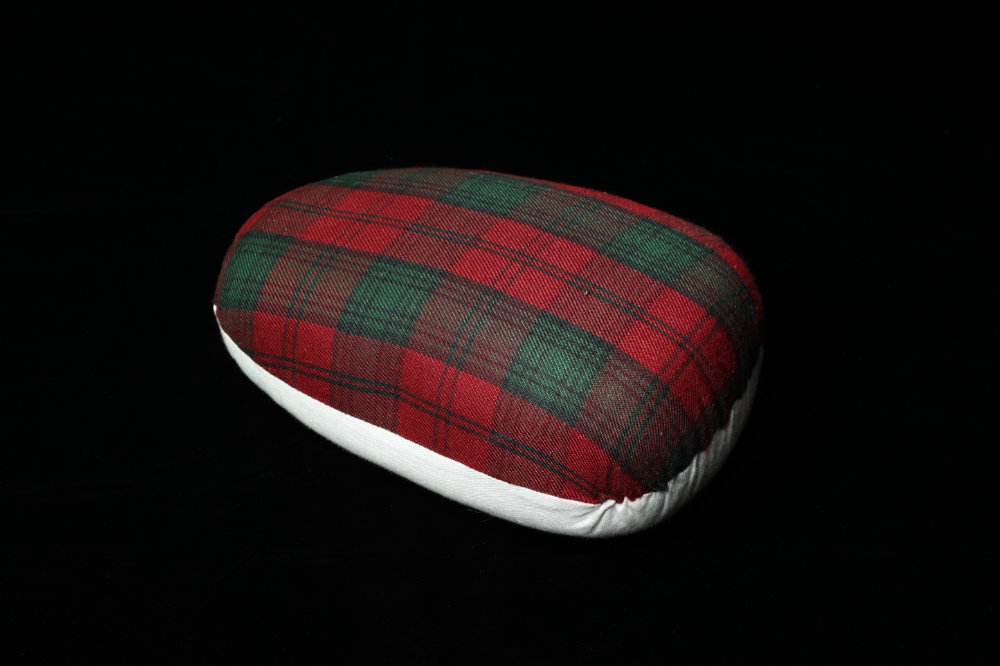
This is a must-have if you are going to sew anything that is curvy. Think sleeves on jackets, shirts, or blouses. Or, bras, fitted face masks, or any other sculpted artifact.
Sleeve Roll
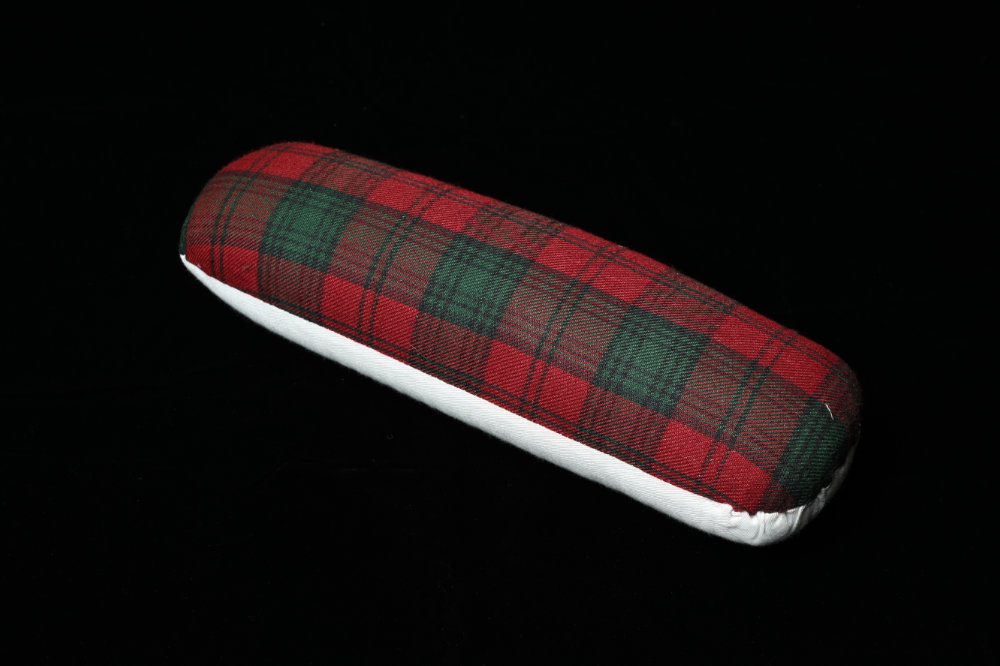
A sleeve roll is like a tailors ham, in that it is a stuffed tool that has cotton on one side and wool or polyester on the other. But it is long and skinny. it's great for pressing sleeves and such as sleeve hems when you are sewing. But can also be used to press flat seams open without letting the seam allowance show on the front side of the garment.
Sleeve Board
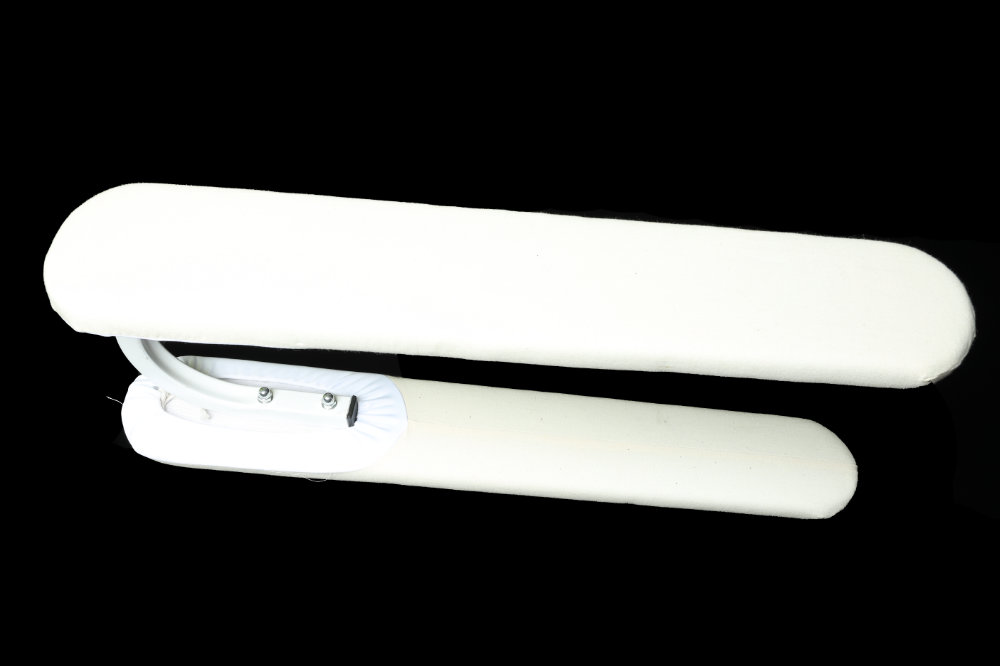
A sleeve board is more for pressing finished seams after they are assembled to the garment. They can also be used for pant legs, but are typically not long enough for an entire leg.
They are narrow enough for a typical shirt or blouse sleeve to slide over it and provide a much better option for pressing sleeves than the tapered end of your ironing board.
What's Next?
You probably don't need all 8 of these tools to start, but you'll eventually really want most, and need some if you keep sewing.
Check out my Basic Steps and Tools Needed to Start Sewing Clothes (With a Machine) Post for everything (other than pressing) you need to start.
Want more cool tool ideas? Check out these 4 posts:
5 Cool Sewing Notions to Make Your Hobby Easier
